Views: 7137 Author: Site Editor Publish Time: 2023-06-20 Origin: Site


● The thickness of steel plates commonly used in stainless steel sinks is between 0.8mm and 1.5mm.
● The sink factory purchases steel plates of different widths according to the needs of the production sink models. The steel plate is sent to the sink workshop in the form of a roll weighing.
● Normally untrimmed steel plates have a maximum width of 1220mm and have almost unlimited length.

● The ductility of steel plates is limited. In order to prevent the steel plate from being broken or damaged during stretching, it is necessary to coat the steel plate at the initial stage of material.
● The film is coated only on one side of the steel sheet, and one side of the film will face the mold in the subsequent stretching process.
● Lamination can be done before or after the cutting.

● Depending on the length of the tank design, the long steel plate needs to be cut into sections to meet the size requirements of the blank.
● In the figure on the right, the worker operates the roller switch so that the protective film and the steel plate pass through the roller compaction zone at the same time, and the lamination is completed with pressure.
● When the coated steel plate passes through the guillotine blade, the worker presses the guillotine switch as required to break the steel plate to obtain a reasonably sized raw material.

Material Angle Cutting
● The cut sheet is now a regular rectangle. In order to roughly conform to the appearance of the sink, it is also necessary to push the sheet into the shears for shearing.
● The finished sheet is generally polygonal and may have arc edges.

First drawing- paint oil
● Apply stretch oil evenly on both sides of the coated and cut sheet.
● Extruded oil can help the plate evenly, reducing the chance of stretch cracking and extending the life of the mold and press.

● Place the steel plate on the press table.
● There are holes on the upper and lower plates of the workbench. The product mold is located within the holes of the lower plate of the table (red shaded area on the right).
● When the motor switch is pressed, the upper plate of the hydraulic stage is lowered and the entire table comes down.
● During the sinking process, the horizontal position of the die remains unchanged, so that the steel plate is forced upwards to complete the form stretching. The first drawing depth must be 80% or more of the total design depth.

Single-bowl mold, 400T
Double-bowl mold, 800T
● Remove the pre-formed bowl and clean the bench that is contaminated by drawing oil.
● The first-drawing sink will be sent to the cleaning site to remove the coating, and the remaining drawing oil will be washed away to prepare for the annealing process.

● Due to the domestic drawing process, if the design depth of the water tank is less than 160 mm, the ideal depth can be achieved by one drawing.
● When the depth of the sink reaches 180mm-250mm, the chance of once drawing causing the stainless steel sheet to crack is greatly increased.
● In order to meet the depth requirements, annealing and secondary drawing are required at this time.

● Annealing can restore the activity of highly stressed stainless steel plates.
● The annealing line itself is a treaty 20 meters long high temperature line, the furnace temperature is about 1150 °C. The two sides are entrances and exits, and the sinks are transported in one direction by a cable car or a conveyor belt. It is possible to streamline about 30 sinks at the same time.
● Annealed companions also include degaussing. This eliminates the magnetic properties of stainless steel due to stretching.

● Many sink plants do not have annealing lines themselves, but instead outsource annealing to third-party annealing plants.
● Sometimes sink plants also use annealing furnaces to achieve alternate functions depending on their needs.

● After annealing, the sink will be drawn by hydraulic press and mold
● The second drawing needs to be fully drawn to the design depth.

● After the product is drawn, no shrinkage occurs on the edge of the steel plate. At this point, the finished product needs to be trimmed.
● It is necessary to reserve the installation position of the upper basin stiffener when trimming.
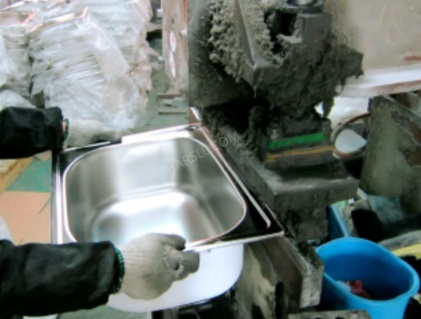
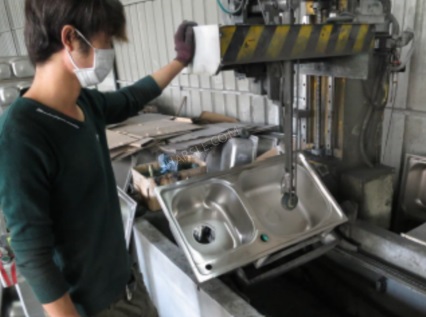
● Drain holes and overflow holes are punched on special molds and punches.
● According to the actual conditions of the plate and punching equipment, it may be necessary to perform burr processing on each section.

This step can be omitted if you will choose double-bowl mold
● If it is a two-slot rolling bowl/bottom-weld basin, it must be welded with the upper plate of the sink after punching.
● Roll welding is usually done by CNC welding, but it can also be hand-welded by workers.
● If it is a butt welding sink, butt welding for both sides of the sink is required.
● Butt welding sink is rare in our product line. The obvious feature is a welding line in the middle of the two basins.

(This step can be omitted if you will choose double-bowl mold)
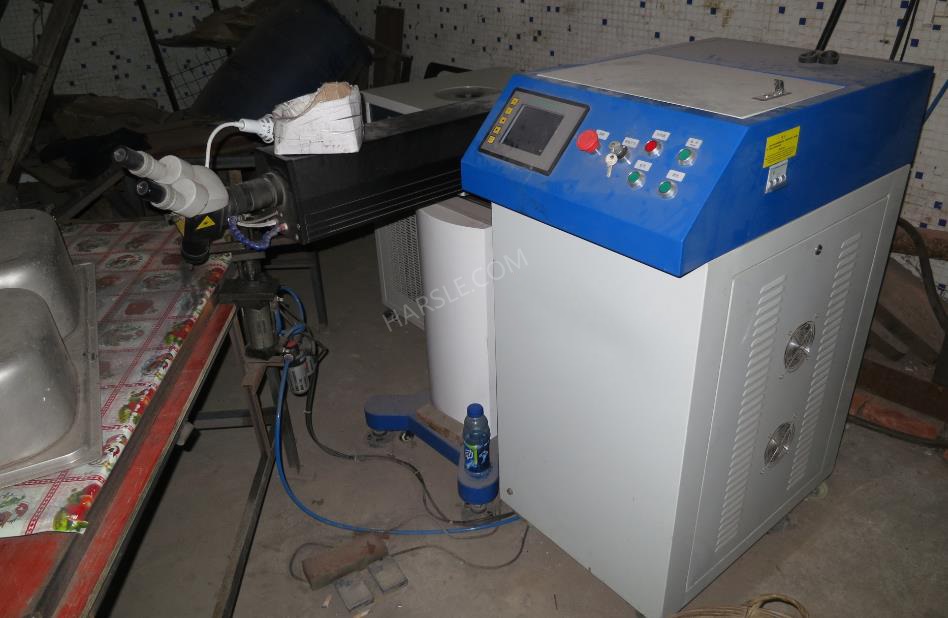
● Use a laser spot welder for rib/hook welds.
● According to the different equipment settings, each spot welding produces about 3 solder joints. Bar stiffeners require spot welding several times in different locations.
● Glue-reinforced ribs/hooks are sometimes used depending on the buyer’s requirements.
● The scrub (brushing) process is specifically described here.
● Grinding is divided into three or four sections based on the differences between the basin and the equipment.
● The first thing to polish is the bottom of the sink.

● Afterwards, the wall of the sink is polished

(This step can be omitted if you will choose double-bowl mold)
● Depending on the degree of automation in the sink plant, this process is sometimes present to reduce the need for worker polishing skills.
● Since the two adjacent faces are polished in different directions, chaotic lines tend to occur at the intersections of the textures.
● Use abrasive wheels to remove chaos between two vertical faces.
● The upper plate is polished at the end of the grinding process to remove the butt welding joints, weld lines and surface flaws visible in the pot body.

● Excavate the tap hole position according to the requirements of the order.
● This process has a high degree of freedom, may be skipped directly according to the order requirements, or it may occur before any welding process.

● The marking of stainless steel sinks mainly includes the following two methods: laser type and stenciled type (see right figure).
● Push the water tank completely into the fixed position to ensure the consistency of the stenciled position.

● In addition to fully automatic laser marking, there are also low-cost manual positioning laser markings (see right).
● Place the semi-permeable film with the brand logo firmly in the designated position of the marking and use a hand-held laser transmitter to illuminate it at zero distance.
● The laser passes through the light transmissive part of the semi-permeable film and burns on the stainless steel surface.

● The minor damages that occur in all production processes are important for commercial value. They are sent to the repair site before the spraying process and are manually repaired by workers.

● Perform a bottom spray treatment.
● The purpose of spraying is threefold: 1. To make light and thin sinks gain weight; 2. To cover the burn marks caused by annealing and other reasons; 3. To prevent the condensation phenomenon in the kitchen environment.
●The current domestic spraying is generally just paint. In fact does not have the anti-condensation function.
● In addition to spraying, pickling also removes burn spots caused by annealing.

● The content of the cleaning work includes the removal of stretch oil residue, removal of dirt and the front of the spray, removal of grinding wheel and stainless steel debris, removal of fingerprints and other dust.
● According to order requirements, sinks can be packaged into brackets, large boxes, or even retail packages.

● Finally, put the product into the warehouse and wait for it to be sent to the place specified by the order requester.


 English
 Pусский