


Discover the robust capabilities of the P40T Controller shearing machine. Enhance your metalworking precision and efficiency with our comprehensive guide to operating this versatile tool, ensuring accurate and dependable results in every task.
In the realm of precision metalworking, success hinges not only on the artisan’s skill but also on the machinery employed. Shearing machines are indispensable tools in metal fabrication, enabling rapid cutting and trimming of metal sheets to meet diverse industrial needs. Among the myriad of options, the P40T controller shearing machine distinguishes itself with its robust design and versatile cutting capabilities, making it an ideal choice for workshops and factories alike.
The P40T controller shearing machine is more than just a piece of equipment; it is a crucial component in enhancing production efficiency and ensuring product quality. With its intelligent control system and precise operational features, the P40T allows operators to execute even the most complex cutting tasks with confidence. This guide aims to equip you with a comprehensive understanding of the P40T’s capabilities, ensuring you can effectively operate this machine to achieve optimal cutting accuracy and results.
Total Brief Introduction: Getting Started with the P40T
Étape 1 : Turn on the Power
Kickstart your session by powering on the machine, ensuring all indicators confirm a stable connection.

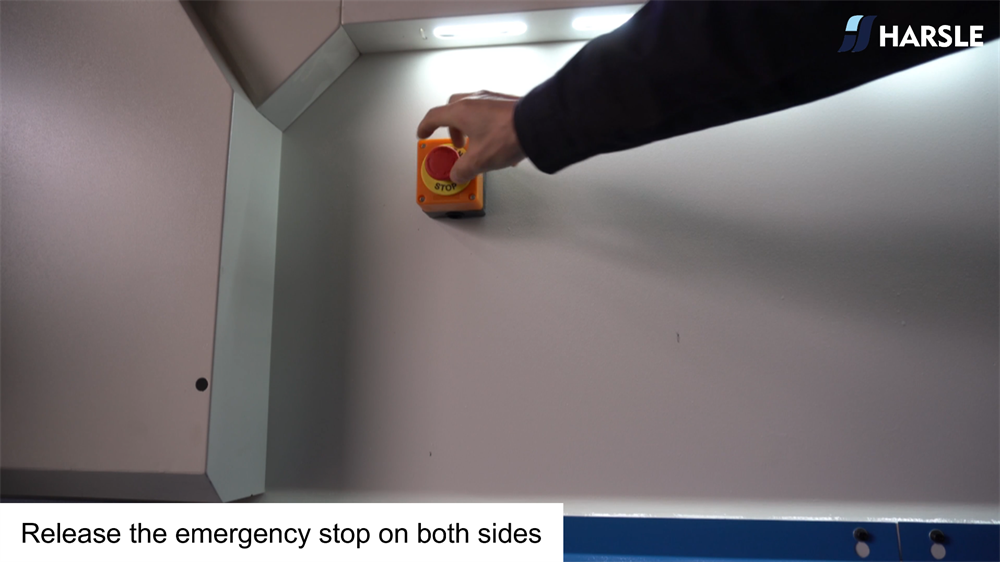
Étape 2 : Release the Emergency Stop
Always check and release all emergency stops to guarantee an uninterrupted operation cycle.

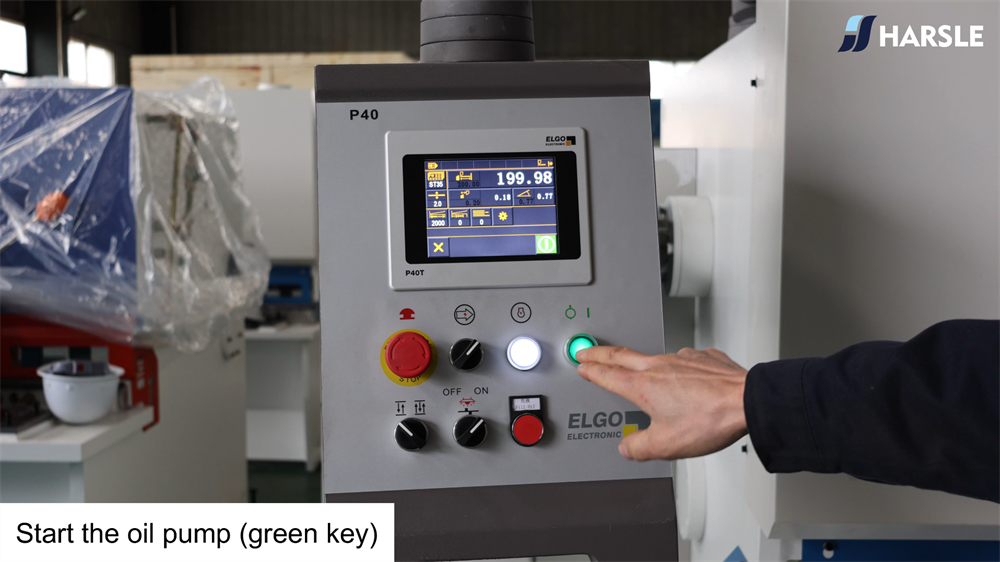
Étape 3 : Start the Oil Pump
The green key on your controller will get the hydraulic system running—an essential prelude to engaging the machine’s functionalities.
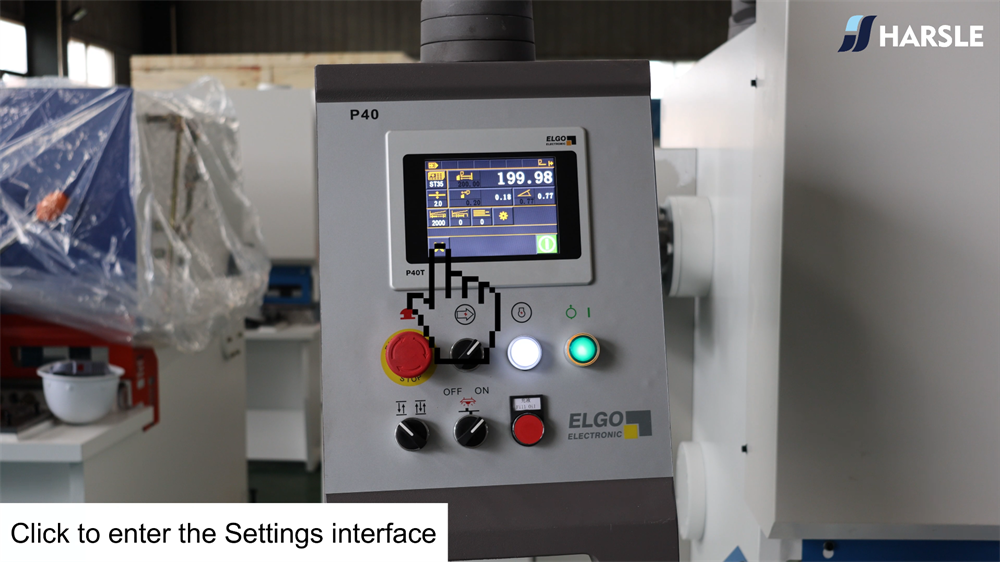
Étape 4 : Access the Settings Interface
Dive into the settings through the interface, preparing for the mode that best suits your task needs.
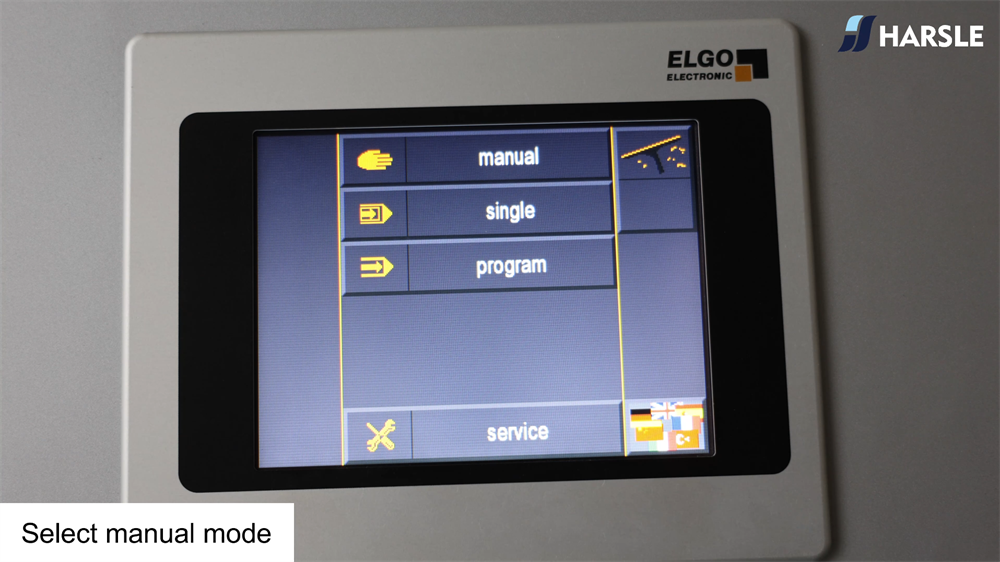
Étape 5 : Select Manual Mode
Opt for manual mode initially; it’s the recommended starting point for newcomers and basic task executions.
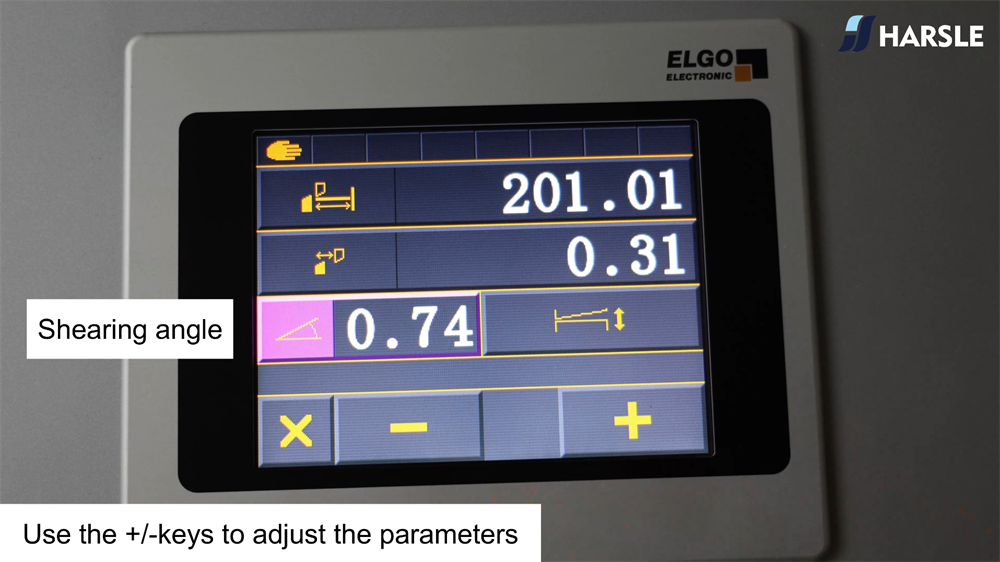
Step 6: Adjust Parameters
Fine-tune the machine’s operations to your specifications via the adjustment keys, ensuring optimal output for each task.


Single-Mode Programming: Simplified Control
Étape 1 : Enter the Settings Page
A simple click on the “X” icon will lead you back to essential configuration settings.

Étape 2 : Select Single Programming Mode
Choose this option for operations needing a straightforward approach or a single task execution.


Étape 3 : Run the Program
Initiate the sequence by pressing the green key and observe the current operation status.


Étape 4 : Activate the Counting Function
Toggle between counting modes to fit your specific task requirements, ensuring precision in quantity.

Étape 5 : Confirm Counting Settings
Finalize your settings to progress seamlessly with the single-mode operation. The counting mode can be selected by clicking the button. You can switch to decreasing mode or increasing mode.


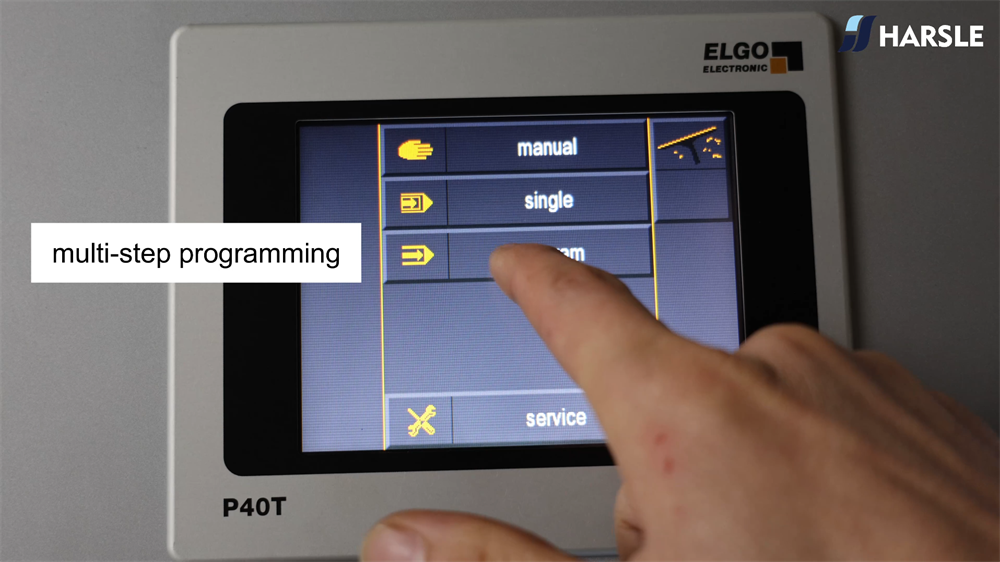
Multi-Step Mode Programming: Handling Complexity
Étape 1 : Choose Program Mode
Access and confirm the specific program sequence needed for your multi-step task execution.
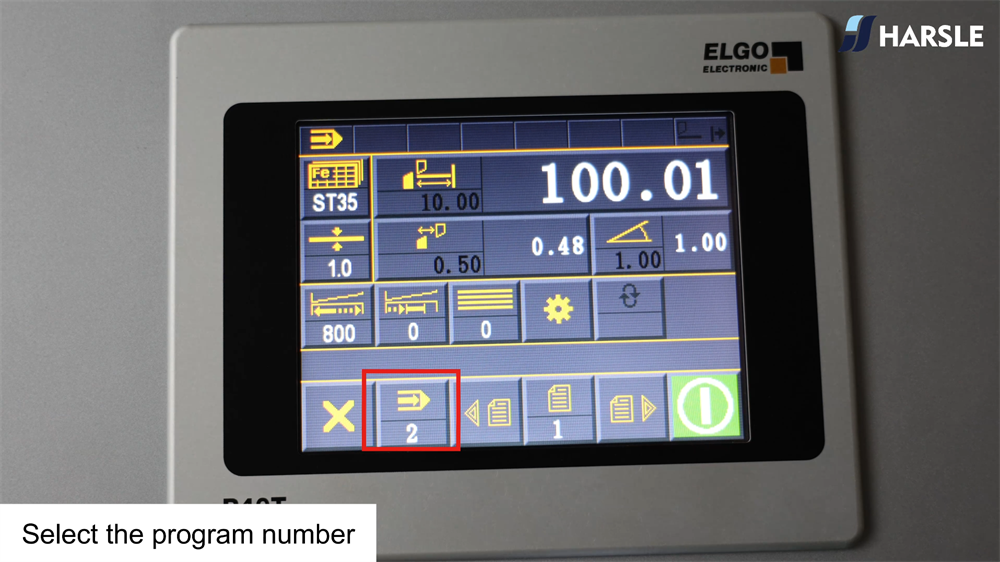
Étape 2 : Confirm Multi-step Programming
Step through your sequence, confirming the parameters set for each individual task step.
Étape 3 : Set X-axis Distance and Number of Cuts
Define each step meticulously in terms of distance and the required number of cuts to ensure precision.


Add a cutting sequence if needed


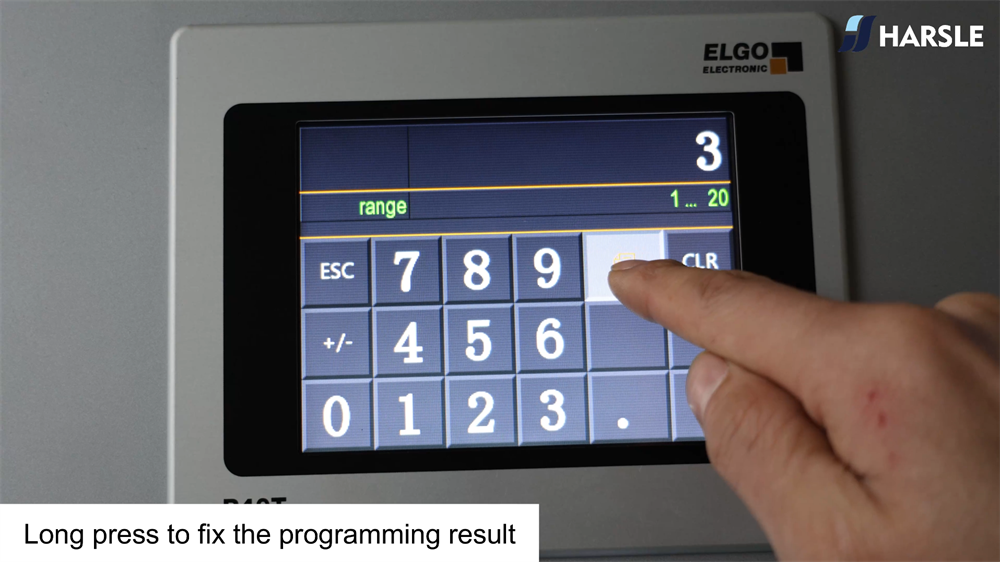
Étape 4 : Save the Programming Result
Secure your program settings to maintain consistency and prepare for repeated operations.
Étape 5 : Start the Program
Engage the full sequence, allowing the machine to execute the predefined order of operations with accuracy.

Error Correction: Ensuring Precision
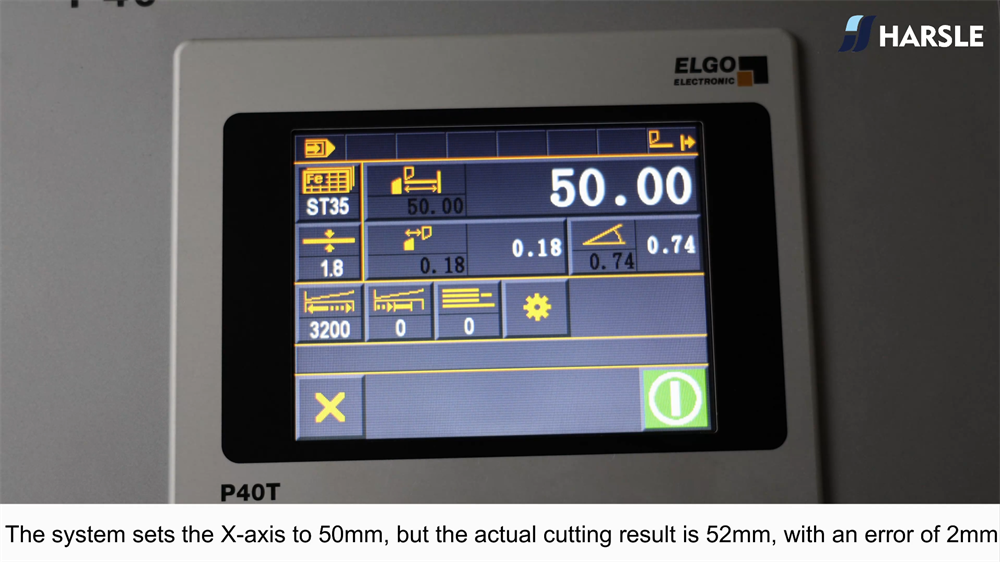
Étape 1 : Identify the Error
Recognize any discrepancies between the expected and actual outcomes, paving the way for adjustments.
Étape 2 : Access the Settings Page
Return to the control hub to address any operational inconsistencies.

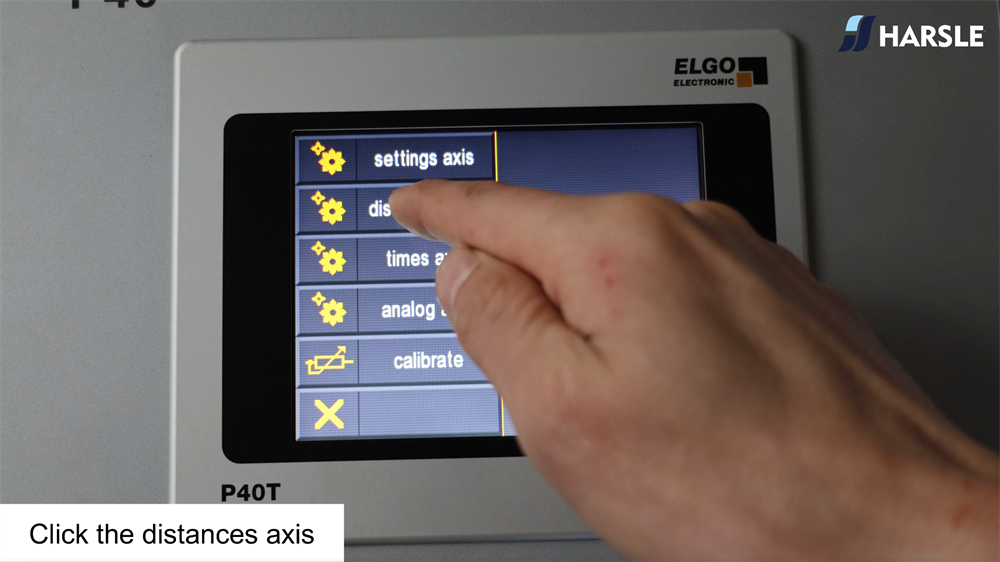
Étape 3 : Enter the Service Menu
Use advanced settings to access adjustable parameters and authenticate adjustments.

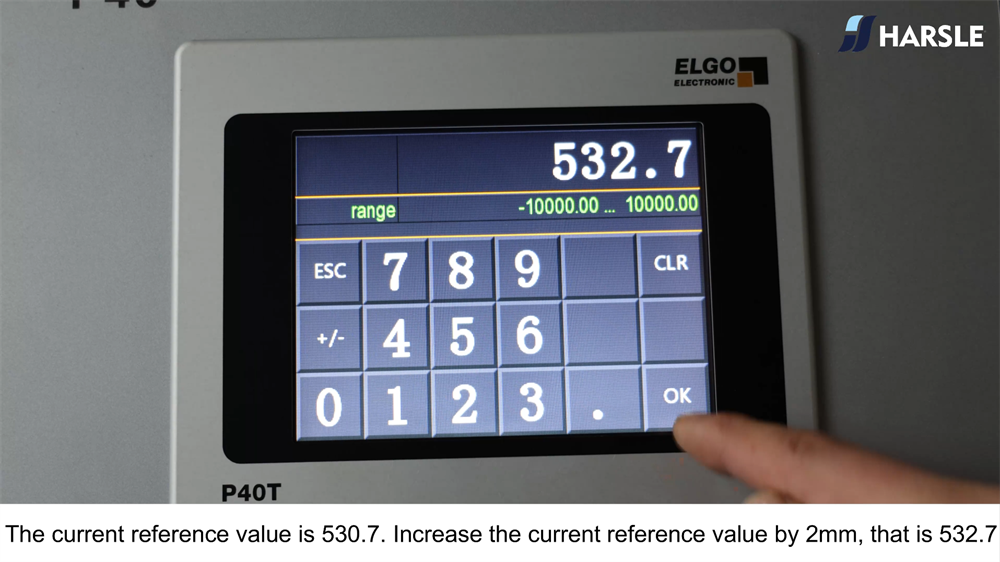
Étape 4 : Adjust Axis Parameters
Fine-tune the axis settings, correcting the offsets detected during operation.


Étape 5 : Apply New Settings
Reaffirm the settings to ensure the adjustments take effect across future operations.

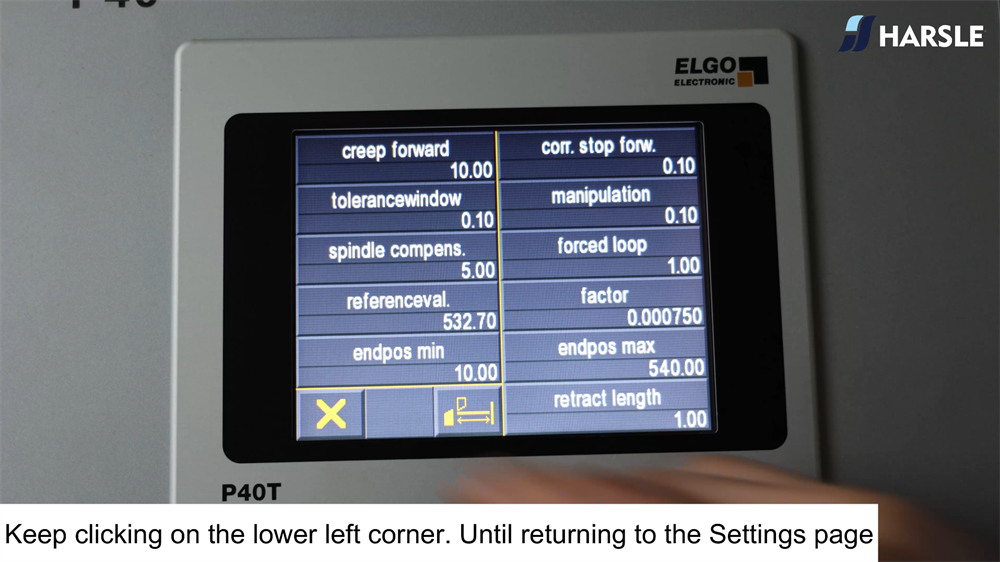
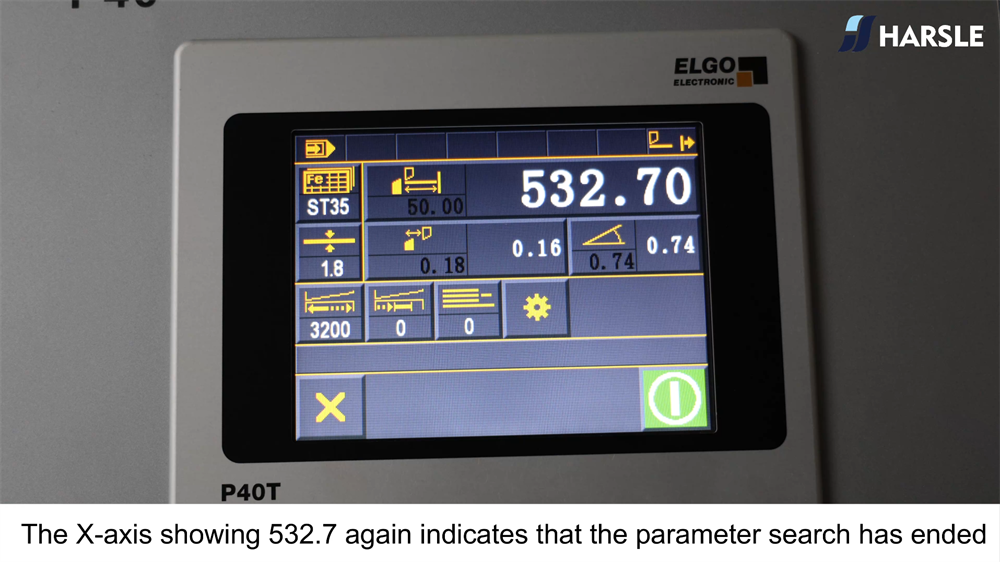
Step 6: Adjust X-axis Parameters
Verify the sequence through parameter search and confirm the corrected values are in place.


Step 7: Complete Error Correction
Confirm the correction by executing a test run, ensuring the machine’s operations align with your settings.

Advantages of the P40T Controller
Le P40T controller provides several advantages that set it apart in the field of metalworking. Its ease of use is marked by an intuitive touchscreen interface coupled with a flexible programming setup that can be adapted for both simple and complex tasks. The machine’s robust design is built to handle industrial demands, ensuring durability over prolonged use. Additionally, features such as quick error correction and versatile programming modes highlight its ability to adapt to diverse cutting requirements, ultimately improving workflow efficiency and productivity.
Conclusion
Mastering the use of the P40T controller shearing machine is more than a technical skill—it’s a pathway to enhanced productivity and precision in metalworking. Its user-centric design, coupled with advanced programming capabilities, offers unmatched flexibility and control. With this thorough understanding, users can exploit its full potential to meet the challenges of modern metalworking tasks. As you delve deeper into the capabilities of the P40T, remember that the advantage lies in its adaptability and precision, making it an indispensable tool in any workshop.


