


Bienvenue dans ce tutoriel complet pour ferronniers sur l'installation et l'utilisation de la ferronnière hydraulique HARSLE. Cette machine puissante et polyvalente est conçue pour effectuer diverses tâches, telles que le poinçonnage, le cisaillage d'acier en U, d'acier d'angle, de tôles et le grugeage. Ce tutoriel vous guidera pas à pas pour garantir l'installation et le bon fonctionnement de votre machine, optimisant ainsi la productivité et l'efficacité de votre atelier.
Conçue pour l'excellence, la ferronnière hydraulique HARSLE offre des performances de précision, que vous perciez des trous précis, cisailliez de l'acier en U, coupiez de l'acier d'angle, rogniez des tôles ou entaillez des motifs complexes. Ses capacités multifonctions vous permettent de rationaliser divers processus, de réduire les temps de réglage et d'optimiser le flux de travail global.
Dans ce tutoriel détailléNous vous guiderons étape par étape pour installer et utiliser correctement cette machine dynamique. En suivant nos instructions, vous vous assurerez que votre ferronnier est prêt à fonctionner efficacement et sans problème. Nous aborderons tous les aspects, de la configuration initiale au réglage précis des commandes pour des performances optimales.
De plus, nous vous donnerons des conseils pour optimiser la productivité et l'efficacité de votre atelier, vous permettant ainsi d'exploiter pleinement le potentiel de votre ferronnier hydraulique HARSLE. Que vous soyez débutant souhaitant apprendre les ficelles du métier ou professionnel expérimenté souhaitant perfectionner ses compétences, ce tutoriel est conçu pour vous donner les connaissances et la confiance nécessaires pour exploiter pleinement cette puissante machine. Préparez-vous à améliorer vos compétences en métallurgie et à transformer vos processus de fabrication !
Préparation avant d'allumer la machine
Avant de mettre en marche votre ferronnier hydraulique HARSLE, il est essentiel de bien préparer la machine, comme indiqué dans ce tutoriel, afin de garantir un fonctionnement sûr et efficace. Suivez ces étapes de préparation initiale :
- Connectez la pédale de commandeCommencez par fixer la pédale de commande à la machine. Elle vous permettra de contrôler les opérations en toute sécurité, confortablement installé.

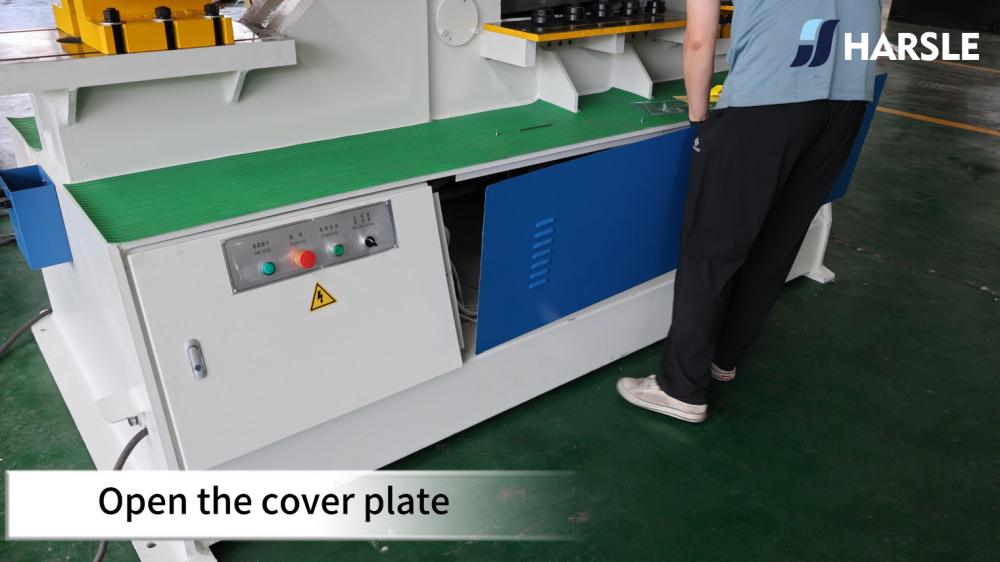
- Ouvrir la plaque de recouvrement: Assurez un accès facile aux composants internes. Cette étape est essentielle pour ajouter de l'huile hydraulique et vérifier les connexions.
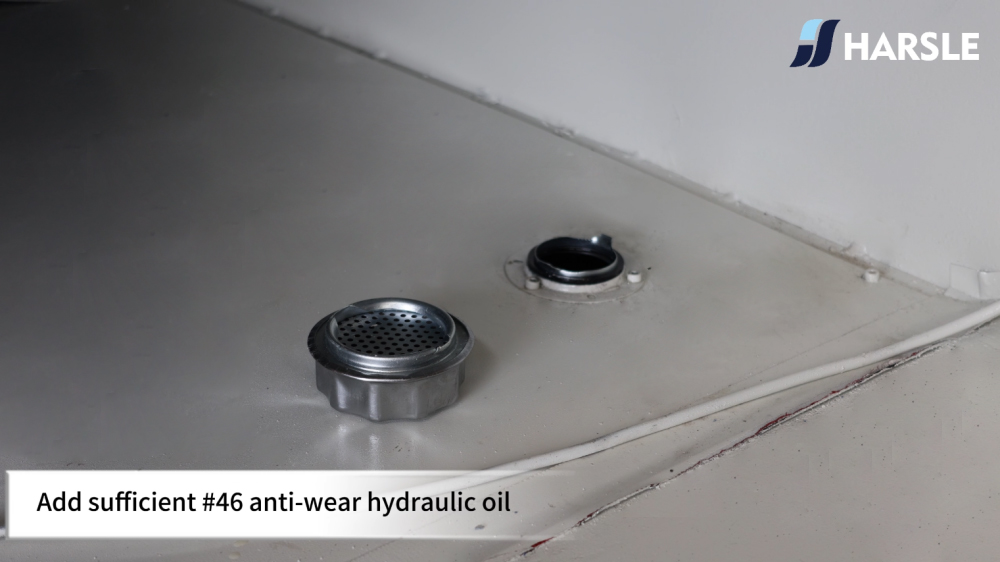
- Ouvrez le bouchon du réservoir de carburantOuvrez soigneusement le bouchon du réservoir de carburant. C'est ici que vous ajouterez l'huile hydraulique nécessaire au fonctionnement de la machine.

- Ajoutez suffisamment d'huile hydraulique anti-usure #46Remplissez le réservoir de carburant avec de l'huile hydraulique anti-usure #46. Ce type d'huile est essentiel car il contribue à réduire les frottements et l'usure, prolongeant ainsi la durée de vie des composants de la machine.
- Ouvrez le boîtier électrique et connectez les lignesAccédez au boîtier électrique de la machine et branchez soigneusement les câbles d'alimentation. Assurez-vous que toutes les connexions sont sécurisées afin d'éviter tout risque électrique.

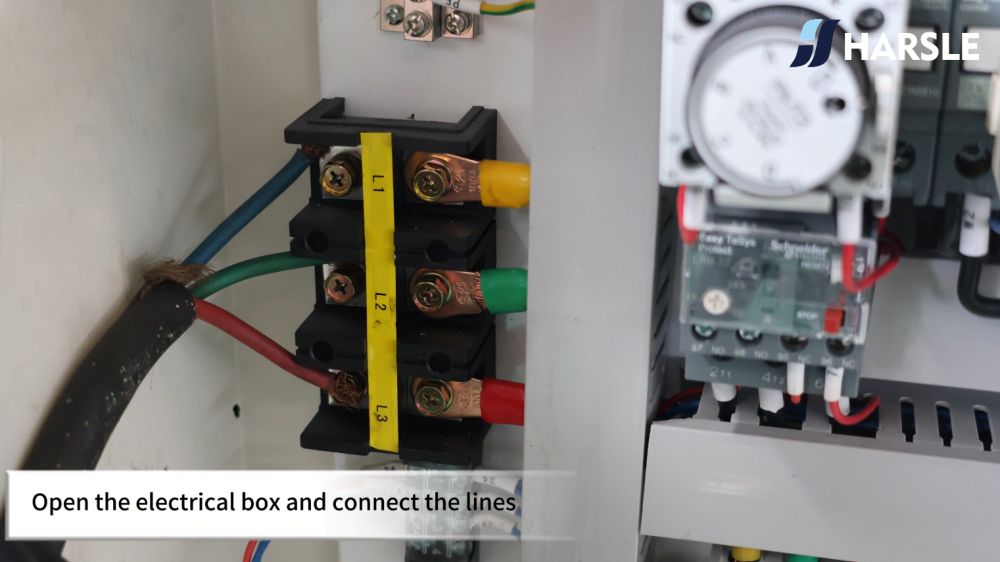
- Connectez l'autre extrémité au boîtier électriqueAssurez-vous que l'autre extrémité du câble d'alimentation est correctement branchée au réseau électrique. Vérifiez soigneusement les connexions pour éviter toute interruption pendant le fonctionnement.

Fonctionnement et démonstrations de la machine
Une fois les étapes préparatoires terminées, vous êtes prêt à explorer les capacités opérationnelles de votre ferronnier hydraulique. Voici comment utiliser chaque fonction :
Perforation
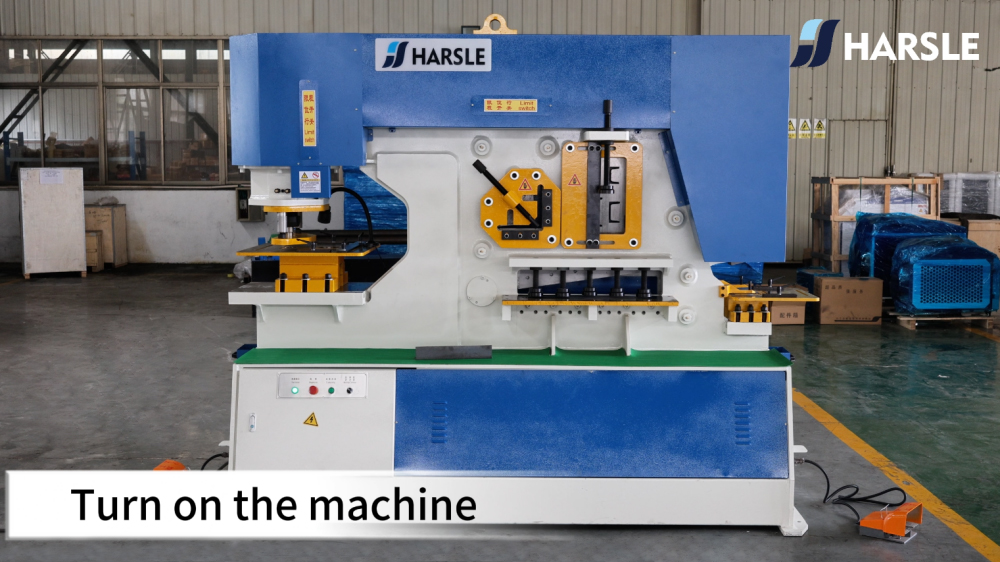
- Allumez la machine: Démarrez l'alimentation en allumant la machine.
- Relâchez le bouton d'arrêt d'urgence et démarrez la pompe à huileAssurez-vous que le bouton d'arrêt d'urgence est relâché. Activez la pompe à huile en appuyant sur le bouton approprié. Cela prépare la machine à l'utilisation.

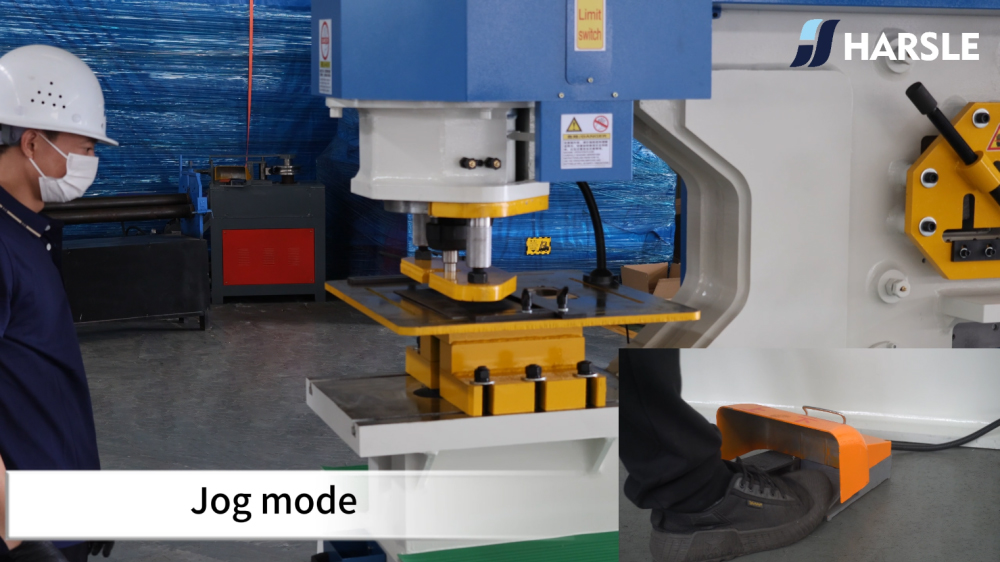
- Démonstration du mode JogEn mode jogging, vous pouvez contrôler la frappe avec des mouvements précis et contrôlés. Ce mode est idéal pour un positionnement et des ajustements précis.
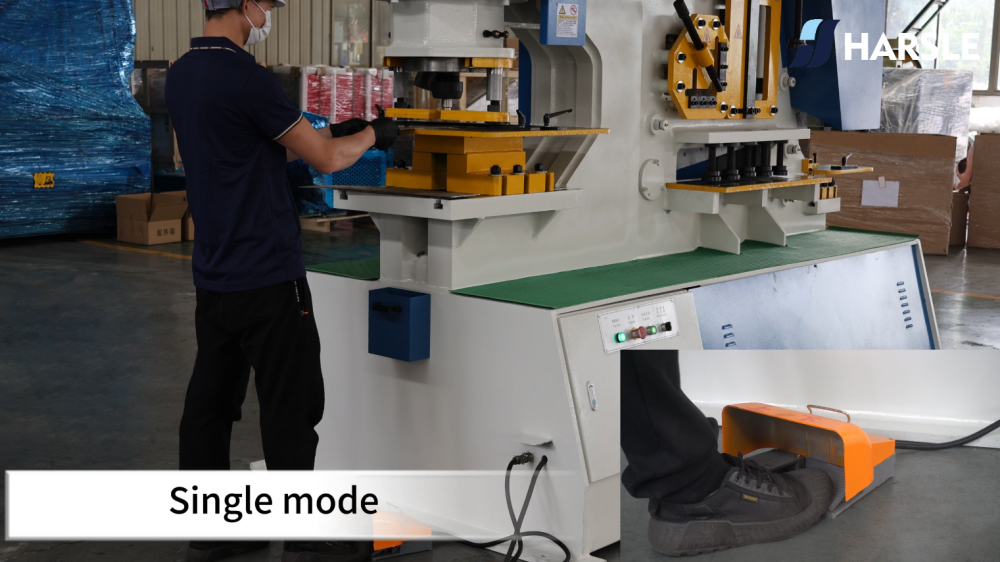
- Démonstration monomode: Démontrer une opération de poinçonnage unique, qui permet un cycle complet par activation, garantissant précision et contrôle dans votre travail.
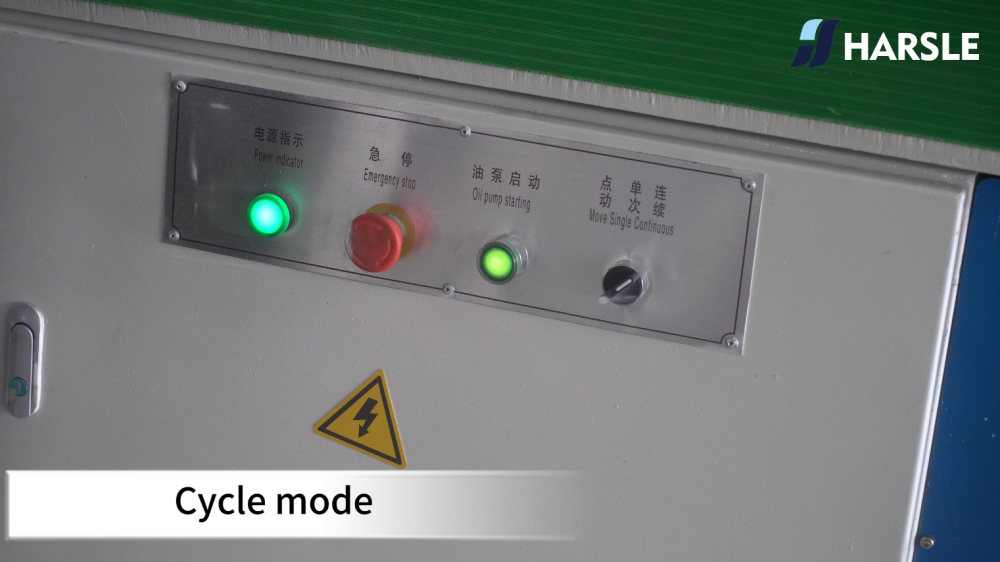
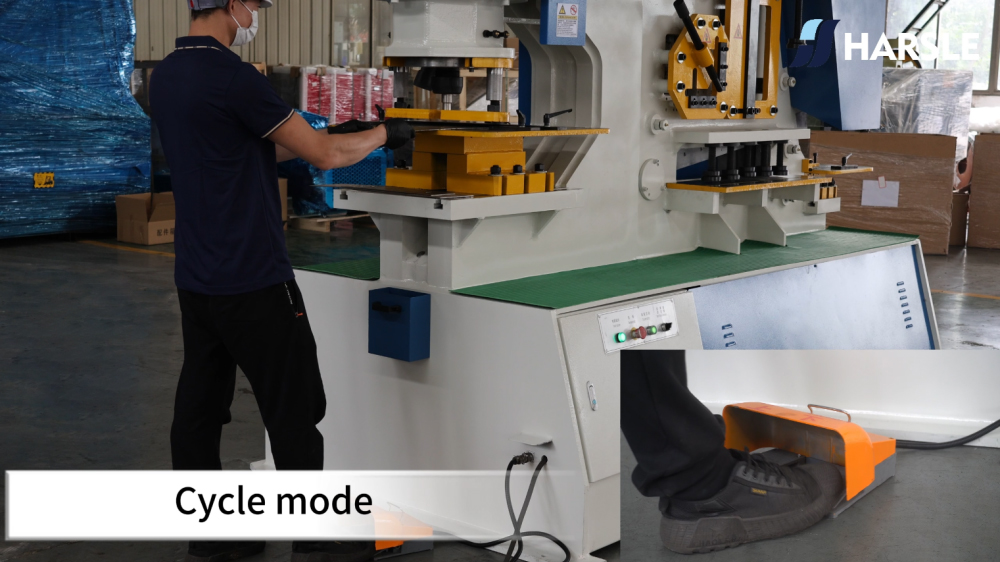
- Démonstration du mode cycle:Le mode cycle permet un fonctionnement continu pour les tâches de poinçonnage répétées, améliorant ainsi la productivité du traitement par lots.
- Ajuster le bloc d'arrêtDéplacez et faites pivoter le bloc d'arrêt en fonction de la taille du matériau à travailler. Cela vous permet de définir des limites précises et de garantir des résultats de poinçonnage constants.
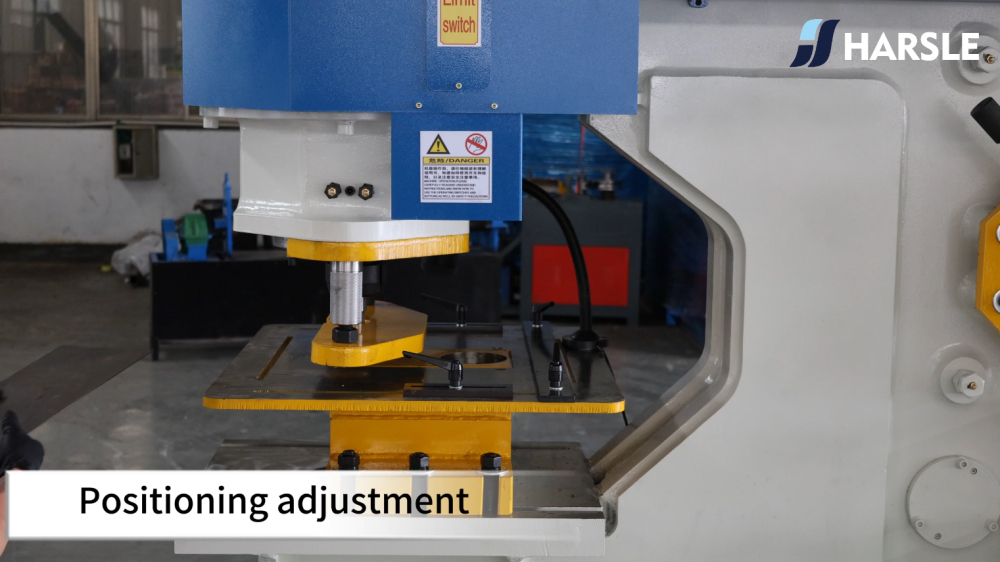


Cisaillage d'acier d'angle
- Insérer du matériel dans le poste de travail: Placez soigneusement l'acier d'angle dans le poste de travail désigné de la machine.

- Tournez la vis: Ajustez la vis jusqu'à ce qu'elle fixe fermement le matériau en place.
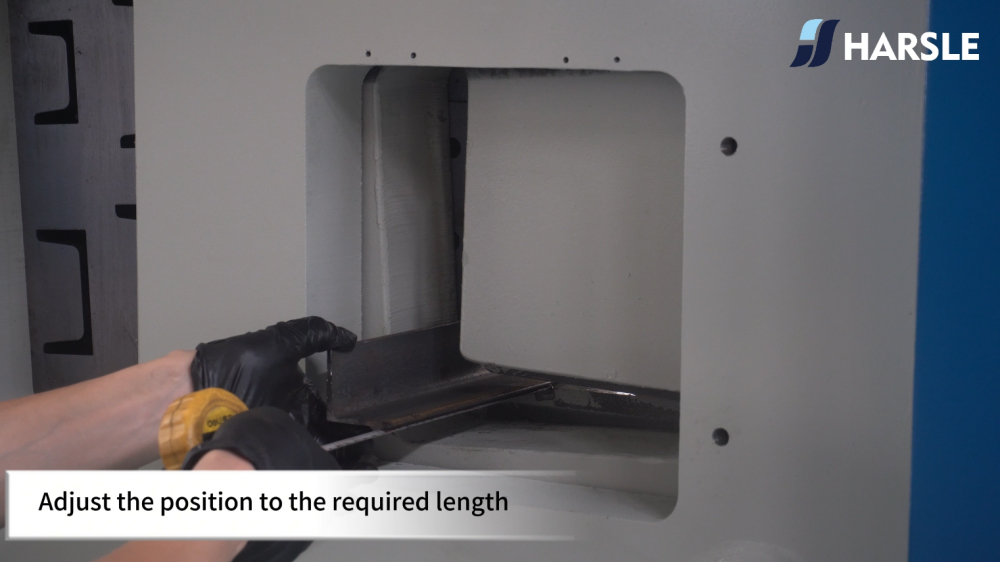
- Ajuster la longueur: Calibrez la position pour obtenir la longueur souhaitée avant le cisaillement.
Cisaillement d'acier en forme de U
- Desserrer et ajuster le déflecteurCommencez par desserrer le déflecteur. Ajustez-le à la position souhaitée avant de le fixer fermement.


- Réinitialiser la pièce: Assurez-vous que la pièce est correctement alignée et réinitialisée pour s'adapter au poste de travail.
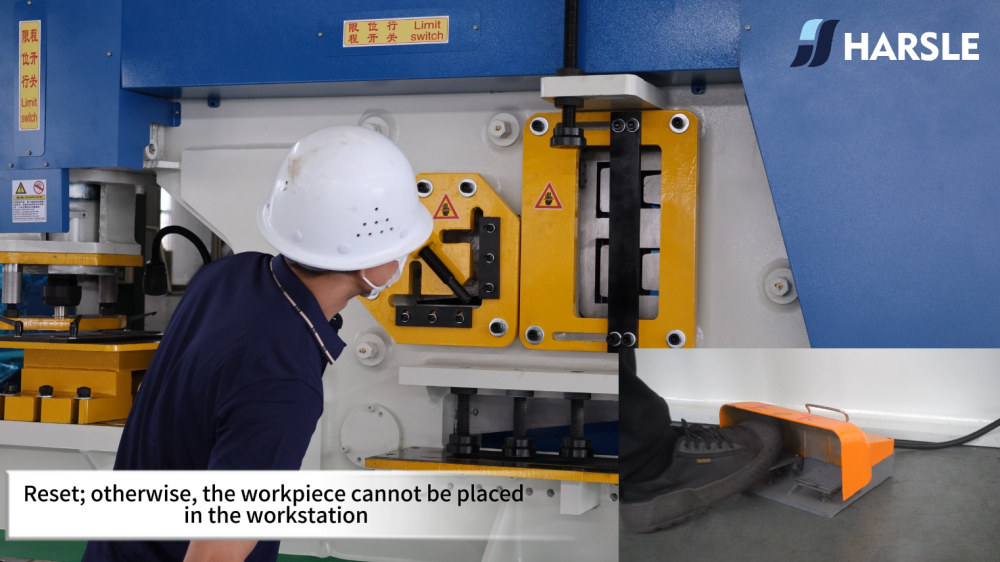
- Tournez la vis: Tournez la vis pour fixer le matériau, en l'ajustant à la longueur requise pour le cisaillement.


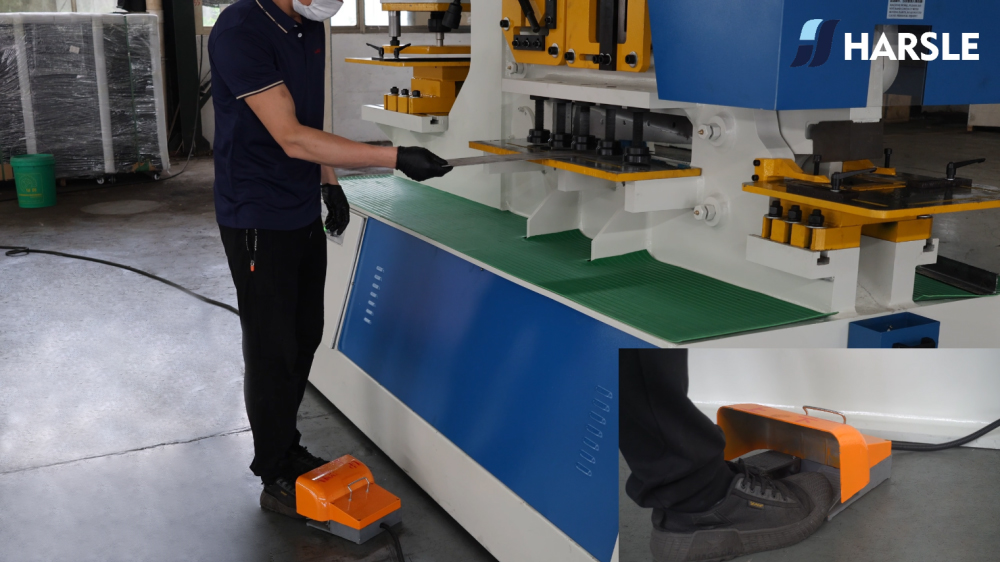
Cisaillement de tôle
Pour cisailler des tôles, placez la feuille sur le poste de travail en veillant à ce qu'elle soit bien positionnée pour un cisaillement précis et net. Utilisez le bloc d'arrêt pour des coupes droites et uniformes.

Entaille
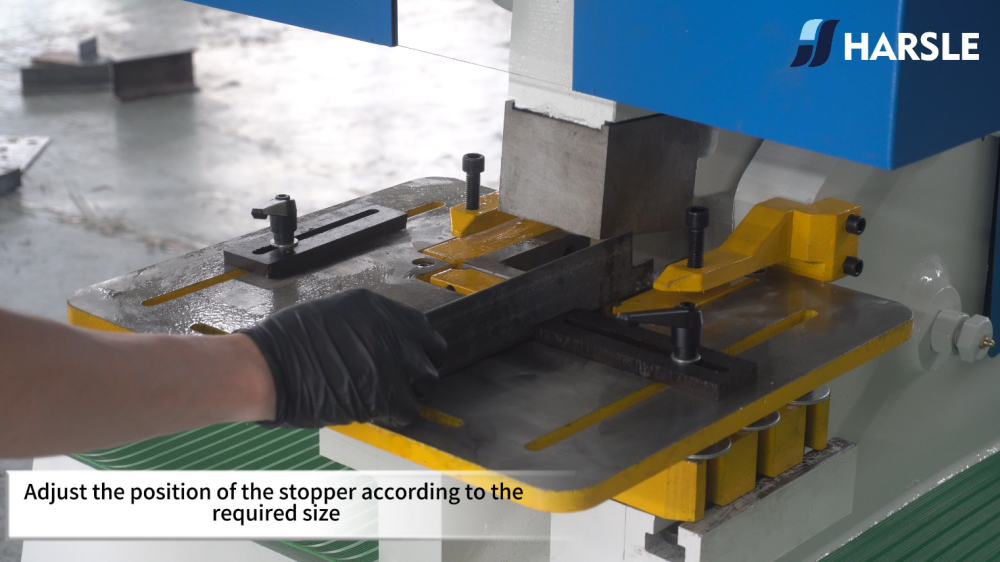
- Ajuster la butée: Positionnez le bouchon selon la taille souhaitée pour un crantage précis et exact.

En suivant les instructions détaillées de notre tutoriel pour monteurs de charpentes métalliques, vous serez en mesure d'installer et d'utiliser efficacement votre monteur de charpentes hydrauliques HARSLE et d'exploiter pleinement ses capacités polyvalentes. Une bonne compréhension et une bonne utilisation de chaque fonction garantissent non seulement l'efficacité, mais aussi la sécurité de l'opérateur et la longévité de la machine. Pour connaître les meilleures pratiques, consultez toujours le manuel de la machine et respectez le calendrier d'entretien recommandé.
Conclusion
Bénéficiez d'une amélioration de votre flux de travail grâce à la précision et à la puissance du HARSLE Monteur de charpentes hydrauliques Grâce à ce tutoriel complet pour ferronniers ! En utilisant efficacement cette machine polyvalente, vous pouvez considérablement améliorer la productivité et l'efficacité de votre atelier. Que vous effectuiez du poinçonnage, du cisaillage ou de l'encochage, la compréhension de chaque fonction vous permettra d'effectuer un large éventail de tâches avec confiance et précision.
N'oubliez pas qu'un entretien régulier et le respect des protocoles de sécurité sont essentiels pour garantir le fonctionnement optimal de votre machine hydraulique. Consacrer du temps à l'apprentissage et à la maîtrise des commandes et des réglages peut éviter les temps d'arrêt imprévus et prolonger la durée de vie de votre machine.


