


A substituição da lente refletiva é uma das tarefas de manutenção mais essenciais para sua pistola de solda a laser, garantindo desempenho e durabilidade ideais. A manutenção do seu equipamento é crucial, e este artigo fornece um guia completo para concluir com eficácia a substituição da lente refletiva da sua cabeça de solda. Seguindo os passos descritos, você poderá realizar a manutenção necessária com confiança e manter seu equipamento funcionando perfeitamente.
Introdução
O processo de substituição de lentes reflexivas é crucial para manter a eficiência e a precisão geral do seu equipamento de soldagem a laser. Com o tempo, a lente pode acumular sujeira, poeira e outros resíduos, causando desgaste significativo. Essa degradação não afeta apenas a capacidade da lente de transmitir e refletir os feixes de laser com eficácia, mas também impacta a qualidade geral dos seus projetos de soldagem. Uma lente comprometida pode resultar em soldas defeituosas, desempenho abaixo do ideal e até mesmo aumento nos custos de reparo. Ao abordar proativamente esses problemas por meio da substituição oportuna da lente, você pode evitar a queda na produtividade e garantir que seu equipamento forneça resultados precisos e consistentes, mantendo os altos padrões exigidos para operações de soldagem bem-sucedidas.
Este guia passo a passo abrangente permite que você realize a substituição de lentes refletivas de forma eficiente e eficaz, sem a necessidade de assistência profissional. Seja você um profissional experiente ou um entusiasta do "faça você mesmo", o guia fornece instruções claras e insights sobre cada fase do processo de substituição. A execução correta dessas etapas não apenas restaura o desempenho ideal do seu equipamento, como também prolonga sua vida útil. Ao manter suas lentes livres de contaminação e desgaste, você evita paradas dispendiosas, aumenta a segurança e garante a precisão das suas soldas. Em última análise, compreender e implementar essas práticas de manutenção é um investimento valioso tanto na confiabilidade do seu equipamento quanto no sucesso dos seus projetos.
Ferramentas e materiais necessários
Antes de começar, você precisará reunir as seguintes ferramentas e materiais:
- Conjunto de chaves de fenda
- Fita adesiva
- Lente reflexiva de substituição
- Pano macio ou lenço de limpeza de lentes
Ter essas ferramentas em mãos agilizará o processo de substituição das lentes reflexivas e garantirá que você não perca nenhuma etapa crucial.
Etapas detalhadas da operação
Nesta seção, vamos nos aprofundar nas etapas exatas necessárias para um r bem-sucedidosubstituição efetiva de lentes. Cada etapa foi projetada para ser facilmente compreendida e seguida, permitindo que você faça a manutenção e o reparo do seu cabeçote de soldagem com confiança em casa ou em uma oficina.
Etapa 1: afrouxe os parafusos de fixação e remova a tampa traseira do motor
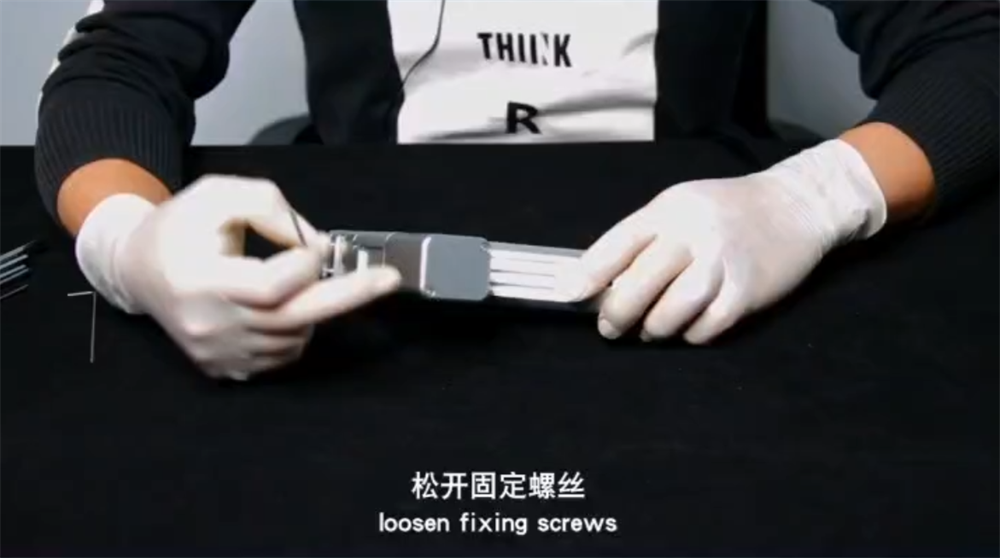
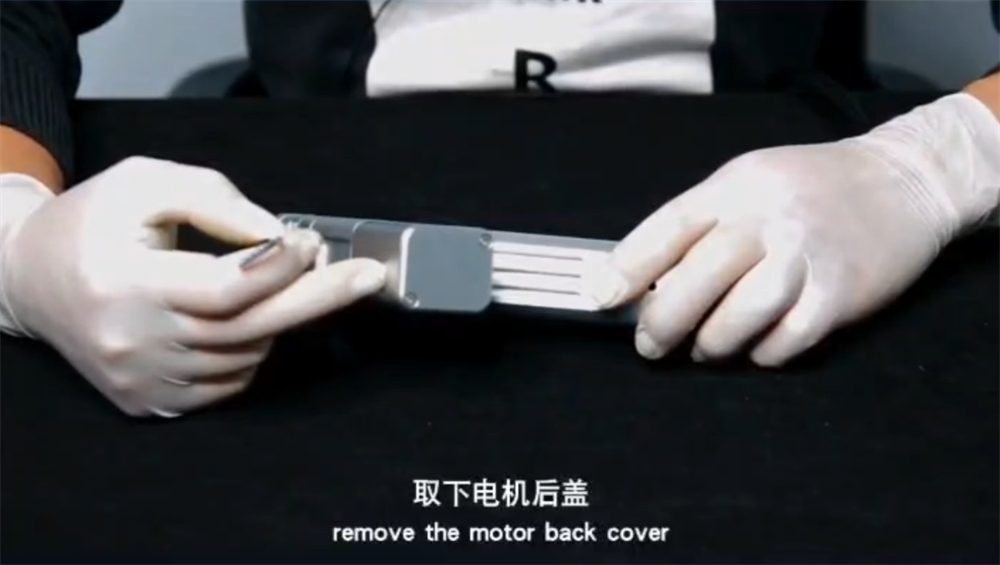

Inicie a substituição da lente reflexiva afrouxando os parafusos de fixação da cabeça de soldagem. Remova cuidadosamente a tampa traseira do motor. Esta etapa fornece acesso aos componentes internos da cabeça de soldagem, abrindo caminho para uma substituição bem-sucedida da lente reflexiva.
Etapa 2: Puxe o cabo lentamente
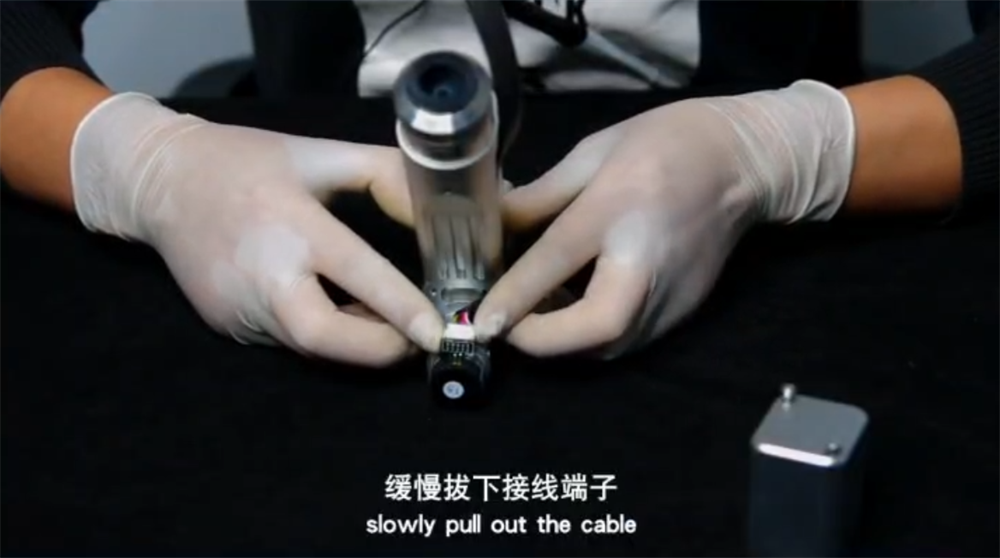
Puxe o cabo com cuidado para garantir espaço suficiente durante a troca da lente reflexiva. Tome cuidado para não danificar ou emaranhar a fiação, pois isso pode complicar a remontagem posteriormente.
Etapa 3: Solte o parafuso de fixação superior

Em seguida, localize e afrouxe o parafuso de fixação superior. Isso permitirá que você prossiga com a remoção do módulo do motor, uma etapa essencial no processo de substituição da lente reflexiva.
Etapa 4: Retire o módulo do motor


Retire cuidadosamente o módulo do motor. Esta etapa é crucial porque lhe dá acesso ao suporte refletivo, onde ocorrerá a substituição da lente refletiva.
Etapa 5: cubra com fita adesiva para evitar a entrada de cinzas

Para evitar que detritos contaminem os componentes internos durante a substituição da lente reflexiva, use fita crepe para cobrir as áreas expostas. Essa medida de precaução garantirá a limpeza e a precisão do processo.
Etapa 6: Solte os parafusos de fixação do suporte refletivo para substituir a lente refletiva
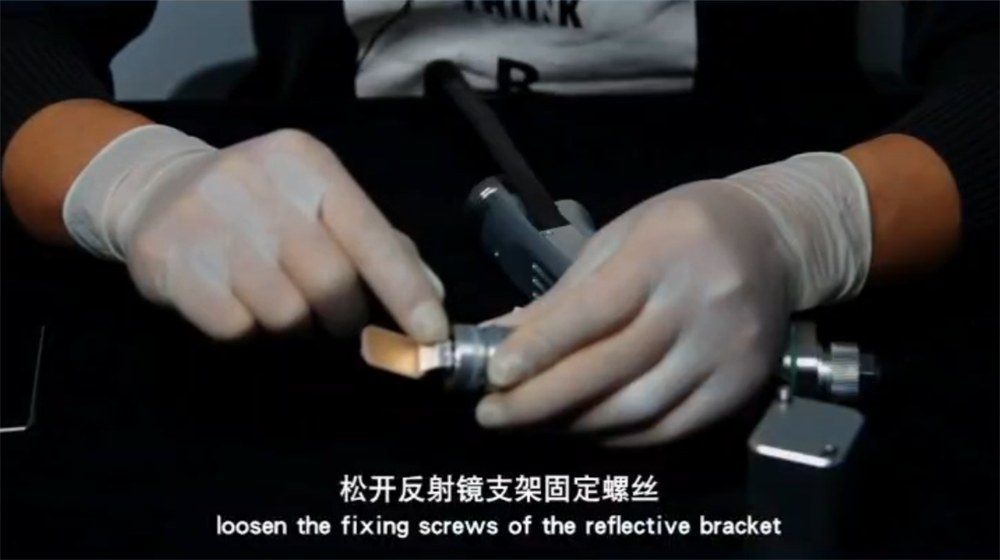
Agora, concentre-se em afrouxar os parafusos de fixação do suporte refletivo. Remova cuidadosamente a lente antiga e prossiga com a substituição da lente refletiva inserindo a nova. Manuseie a nova lente com cuidado, pois qualquer dano pode afetar seu desempenho.
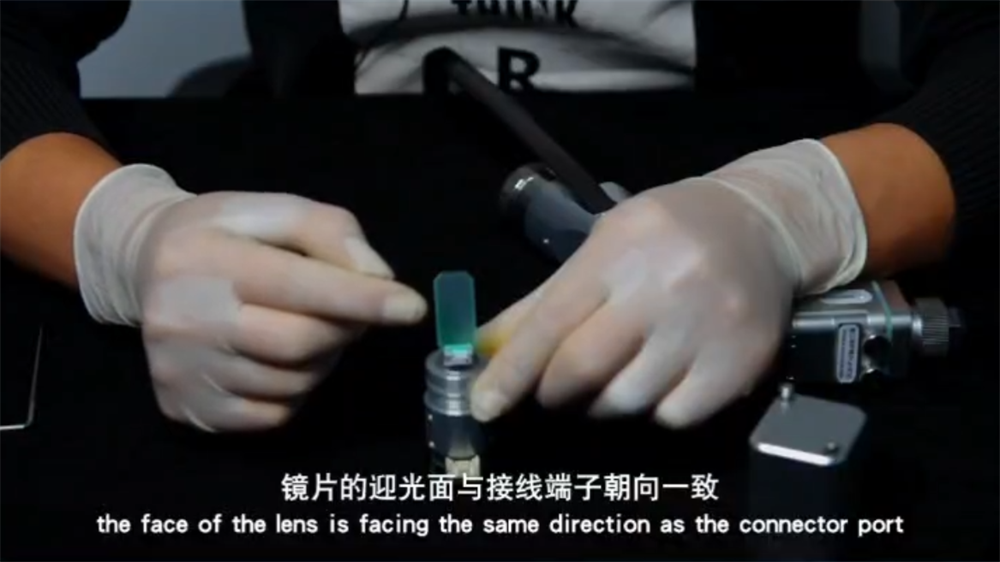
Etapa 7: Tenha cuidado ao instalar uma lente reflexiva
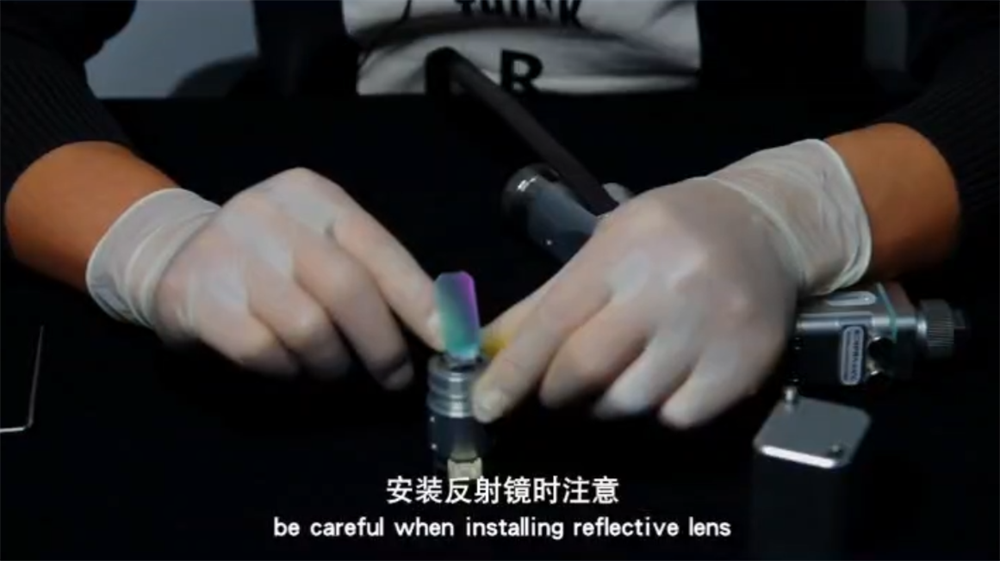
Durante a substituição da lente reflexiva, é fundamental instalar a nova lente voltada para a mesma direção do conector da porta. Isso garante alinhamento e funcionalidade ideais.
Etapa 8: ajuste o ângulo da lente reflexiva


Para concluir as tarefas primárias de substituição da lente reflexiva, ajuste o ângulo da lente. Certifique-se de que ela oscile de um lado para o outro com a mesma amplitude, o que garante que as propriedades reflexivas estejam corretamente alinhadas.
Etapa 9: Monte o módulo do motor de volta na cabeça de soldagem

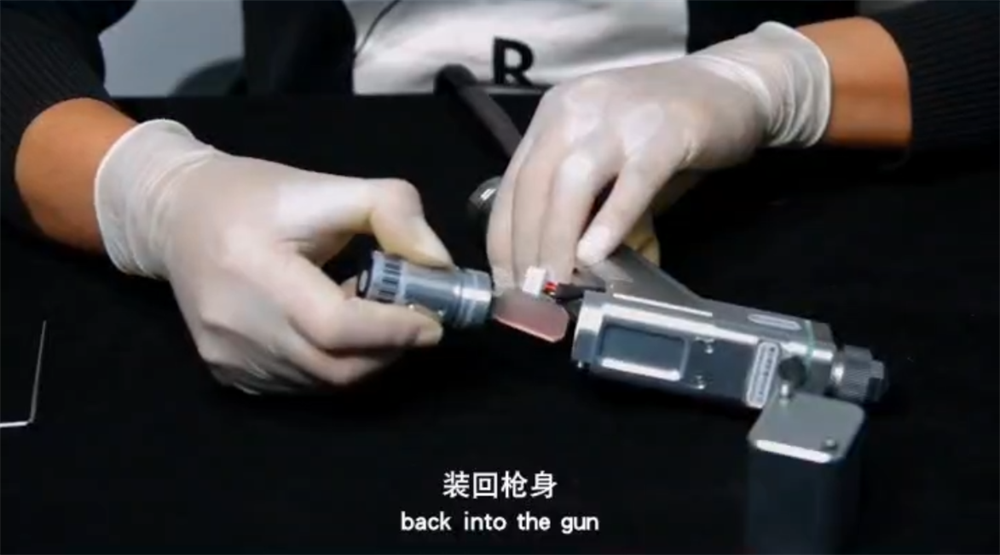
Após a substituição da lente, remonte cuidadosamente o módulo do motor na cabeça de soldagem. Esta é uma etapa crucial após a substituição da lente reflexiva, garantindo que todos os componentes estejam seguros.
Etapa 10: Aperte os parafusos e conecte o cabo novamente

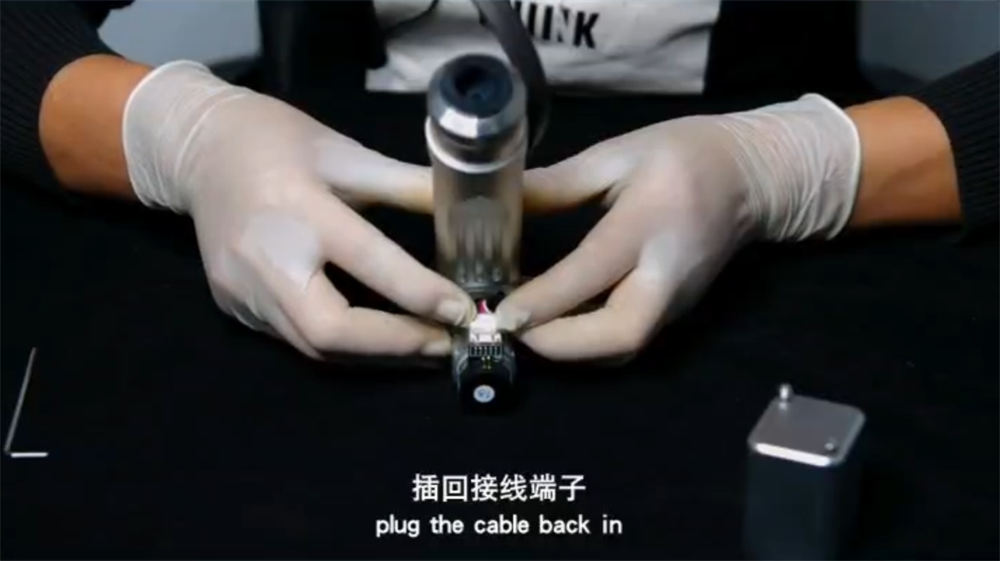
Aperte todos os parafusos e conecte o cabo novamente. Esta etapa finaliza a substituição da lente reflexiva, garantindo que o cabeçote de soldagem esteja pronto para operação.
Etapa 11: é necessário centralizar a luz vermelha antes da próxima etapa


Após concluir a substituição da lente reflexiva, é essencial centralizar a luz vermelha para garantir uma operação precisa e eficiente. O alinhamento é fundamental para a precisão da sua pistola de solda a laser.
Etapa 12: Reinstale a tampa traseira do motor e aperte os parafusos
Por fim, reinstale a tampa traseira do motor e aperte os parafusos, marcando a conclusão do processo de substituição da lente reflexiva. Isso garante que tudo esteja firmemente no lugar para um desempenho ideal.
Conclusão
A substituição da lente refletiva do seu cabeçote de solda a laser é um processo simples quando dividido nestas etapas fáceis de gerenciar. A manutenção regular e a substituição rápida da lente refletiva garantem que seu equipamento permaneça em perfeitas condições, proporcionando resultados confiáveis e precisos sempre. Utilizar este guia permitirá que você execute as tarefas de manutenção necessárias de forma independente, economizando tempo e custos associados à manutenção profissional.
Seguindo essas etapas, seu equipamento permanecerá em ótimas condições, proporcionando o desempenho confiável que você espera. Lembre-se: a substituição frequente das lentes reflexivas é fundamental para obter os melhores resultados em todos os seus projetos de soldagem.


