


Освойте процесс замены коллиматорной линзы для повышения производительности и точности лазерной сварки. Ознакомьтесь с важными советами по обслуживанию, пошаговыми инструкциями и передовыми методами, которые обеспечат долговечность и эффективность оборудования. Поддерживайте максимальную производительность лазерной сварки с помощью нашего подробного руководства.
В мире лазерной сварки, ориентированном на точность, техническое обслуживание оборудования имеет решающее значение для достижения совершенства. Одним из важнейших компонентов является коллиматорная линза. Обеспечение её оптимального состояния путём своевременной замены коллиматорной линзы может значительно повысить производительность сварки. В этой статье подробно описан процесс замены коллиматорной линзы, подчеркнута её важность и даны практические рекомендации по улучшению результатов лазерной сварки.
Понимание важности замены линз коллиматора
Коллиматорные линзы Играют важную роль в эффективной фокусировке лазерных лучей, что делает их критически важными для точности и качества сварочных работ. Со временем эти линзы могут повредиться или загрязниться из-за воздействия тепла, пыли и других факторов окружающей среды, что приводит к снижению производительности. Регулярная замена линз коллиматора гарантирует эффективность вашего лазерного сварочного оборудования, чистоту и точность сварных швов, а также продлевает срок его службы.
Подготовка к замене линзы коллиматора
Перед началом процесса замены важно правильно подготовиться. Убедитесь, что у вас чистое рабочее место и необходимые инструменты, такие как отвёртки, малярный скотч и новая коллиматорная линза. Рекомендуется надеть перчатки, чтобы предотвратить попадание масел и грязи на новую линзу. Правильная подготовка к замене коллиматорной линзы снижает риск ошибок и повышает эффективность процедуры.
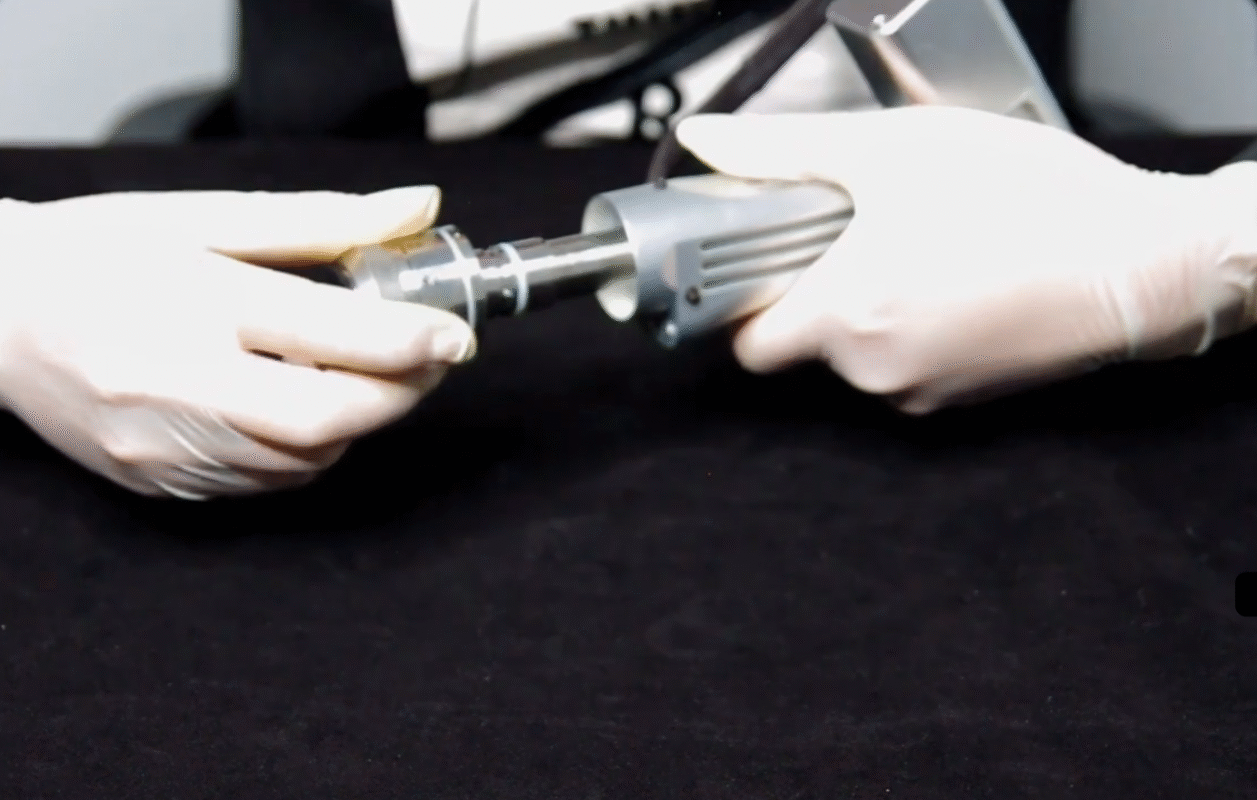
Пошаговое руководство по замене линзы коллиматора
Замена коллиматорной линзы состоит из нескольких точных этапов, каждый из которых способствует успешному выполнению задачи. Тщательно следуйте этим инструкциям:
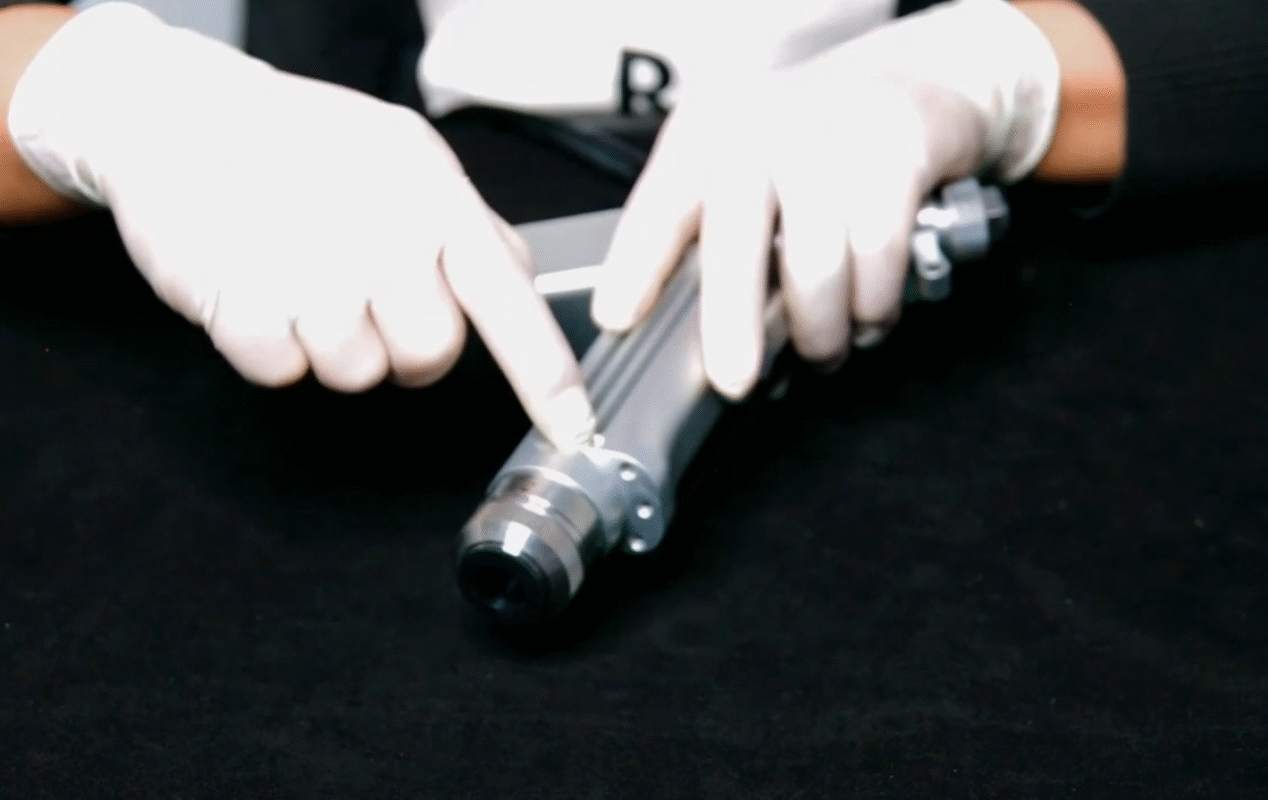
Ослабьте три винта, удерживающие замок QBH.
Начните замену коллиматорной линзы, ослабив три винта, крепящих фиксатор QBH. Этот компонент необходимо освободить для обеспечения беспрепятственного доступа к узлу линзы.


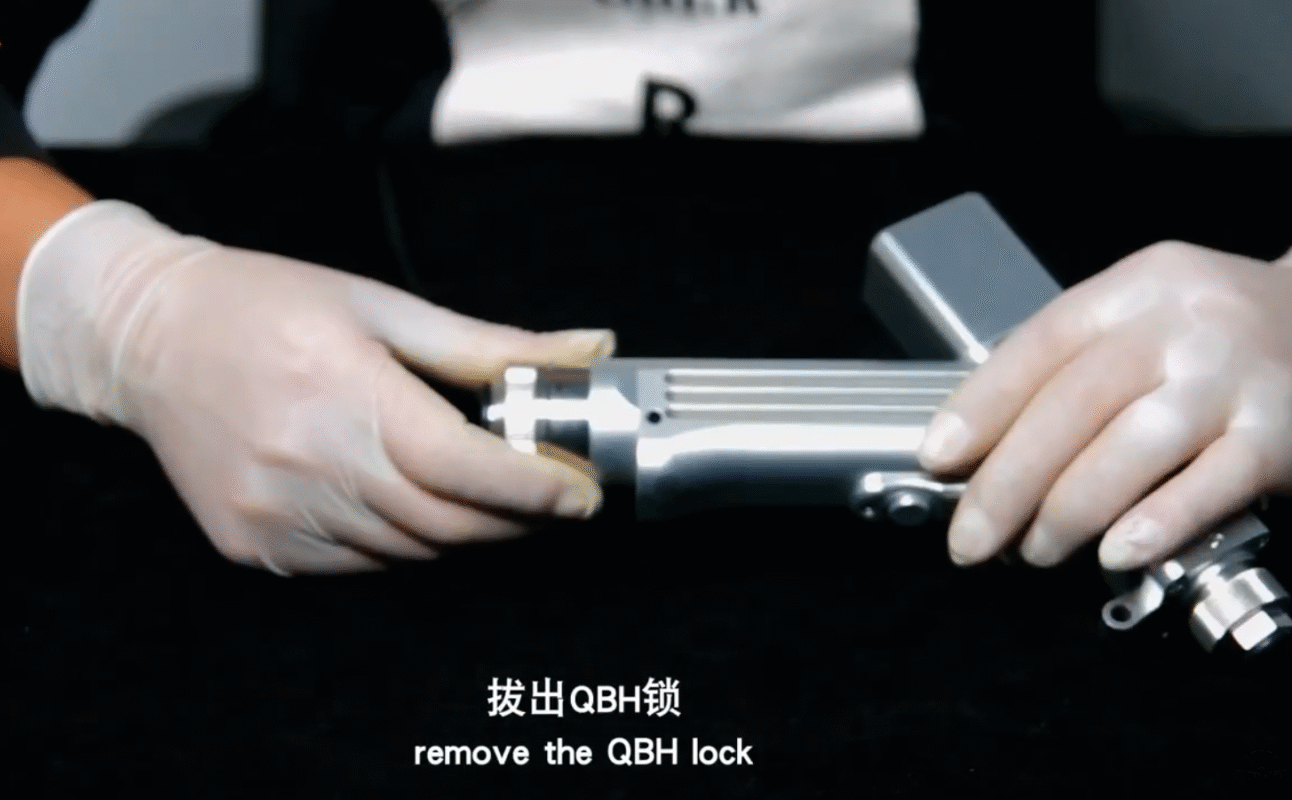
Снимите замок QBH
Ослабив винты, аккуратно снимите замок QBH, стараясь не повредить окружающие детали.
Накройте его липкой лентой, чтобы не допустить попадания пепла
Используйте маскировочную ленту для закрытия открытых участков, чтобы защитить их от загрязнения пеплом или мусором во время процесса замены линзы коллиматора.

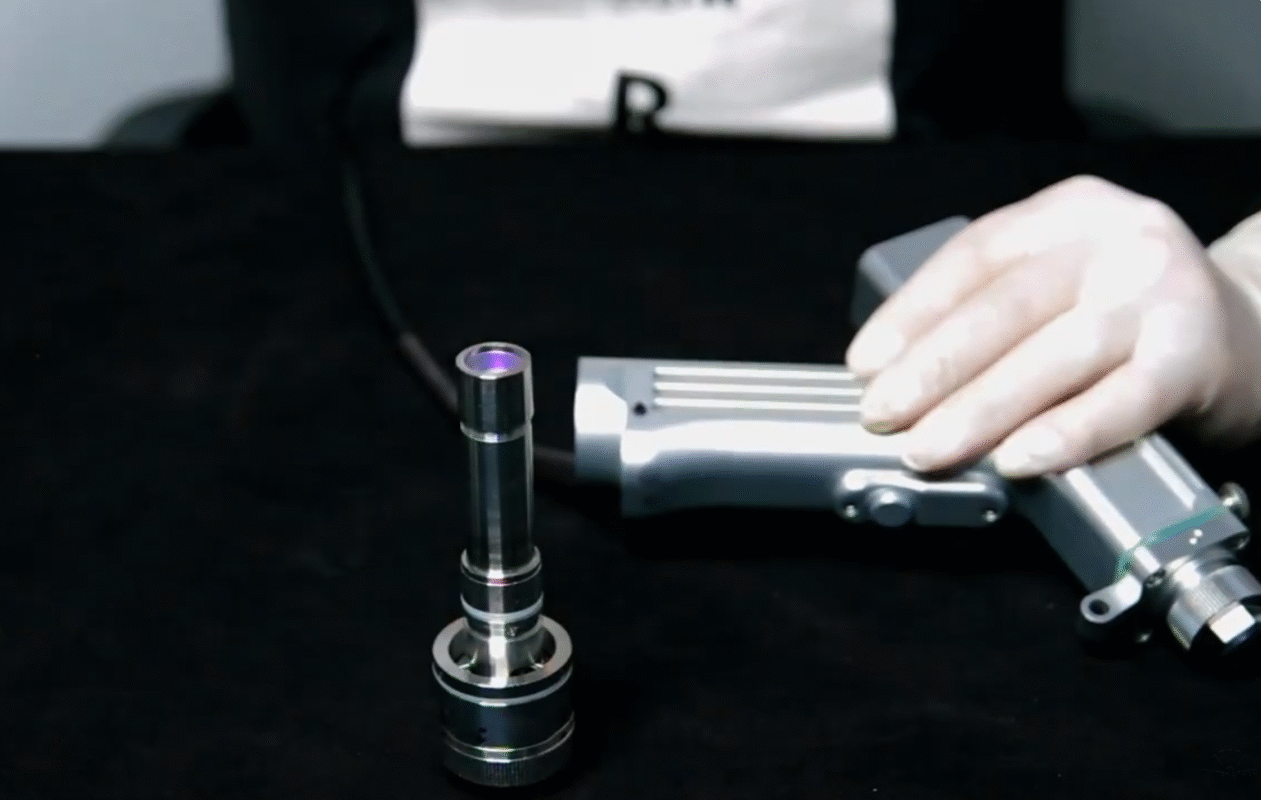
Ослабьте стопорное кольцо.
Продолжайте ослаблять фиксирующее кольцо, которое удерживает на месте имеющуюся линзу коллиматора, что позволяет снять и заменить ее.


Заменить линзу коллиматора
Осторожно снимите старую линзу и установите новую линзу коллиматора, убедившись, что она надежно и правильно закреплена.

Обратите внимание, что выпуклая сторона линзы обращена вверх.
Обратите особое внимание на ориентацию новой линзы: выпуклая сторона должна быть обращена вверх для оптимальной фокусировки лазера.

После замены установите обратно прижимное кольцо.
Установите на место прижимное кольцо, чтобы надежно закрепить новую линзу и сохранить ее положение во время работы.
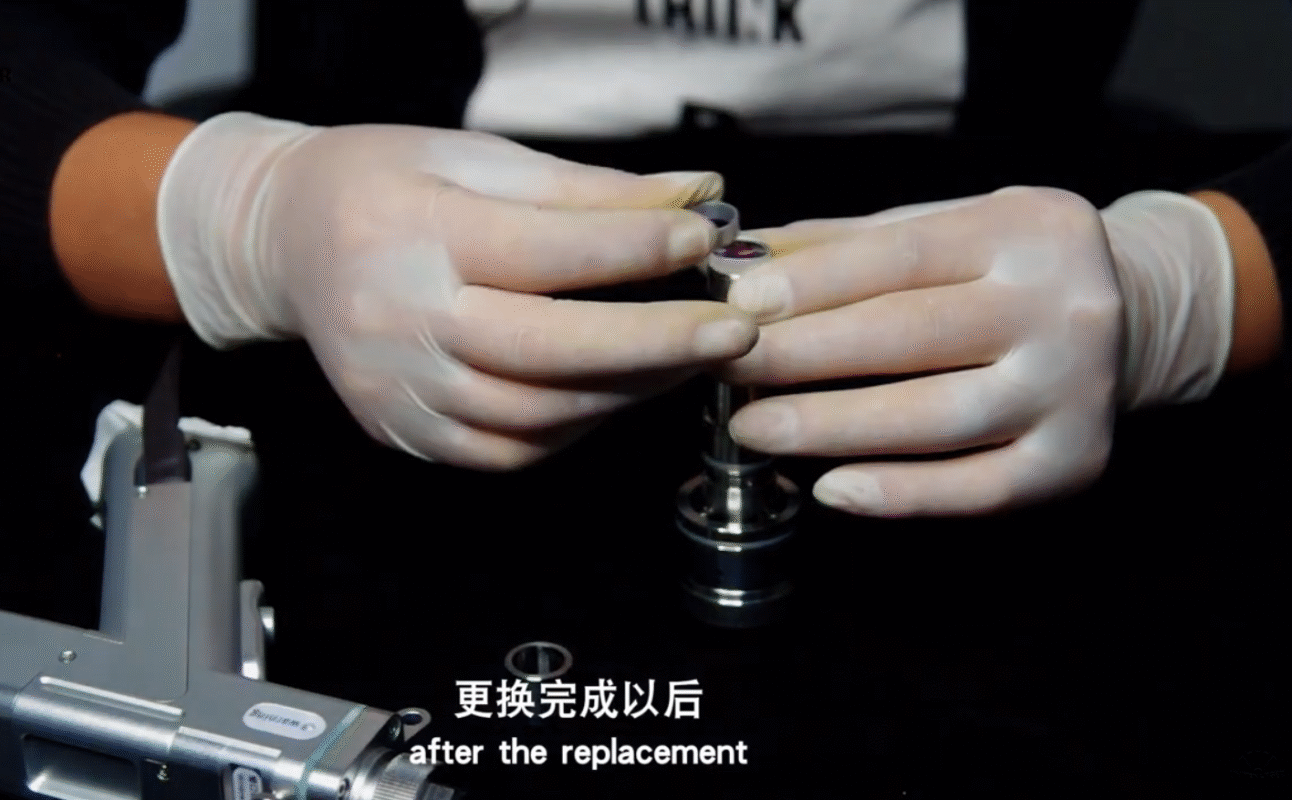

Установите стопорное кольцо
Затем затяните фиксирующее кольцо еще сильнее, чтобы стабилизировать линзовый узел внутри пистолета для лазерной сварки.

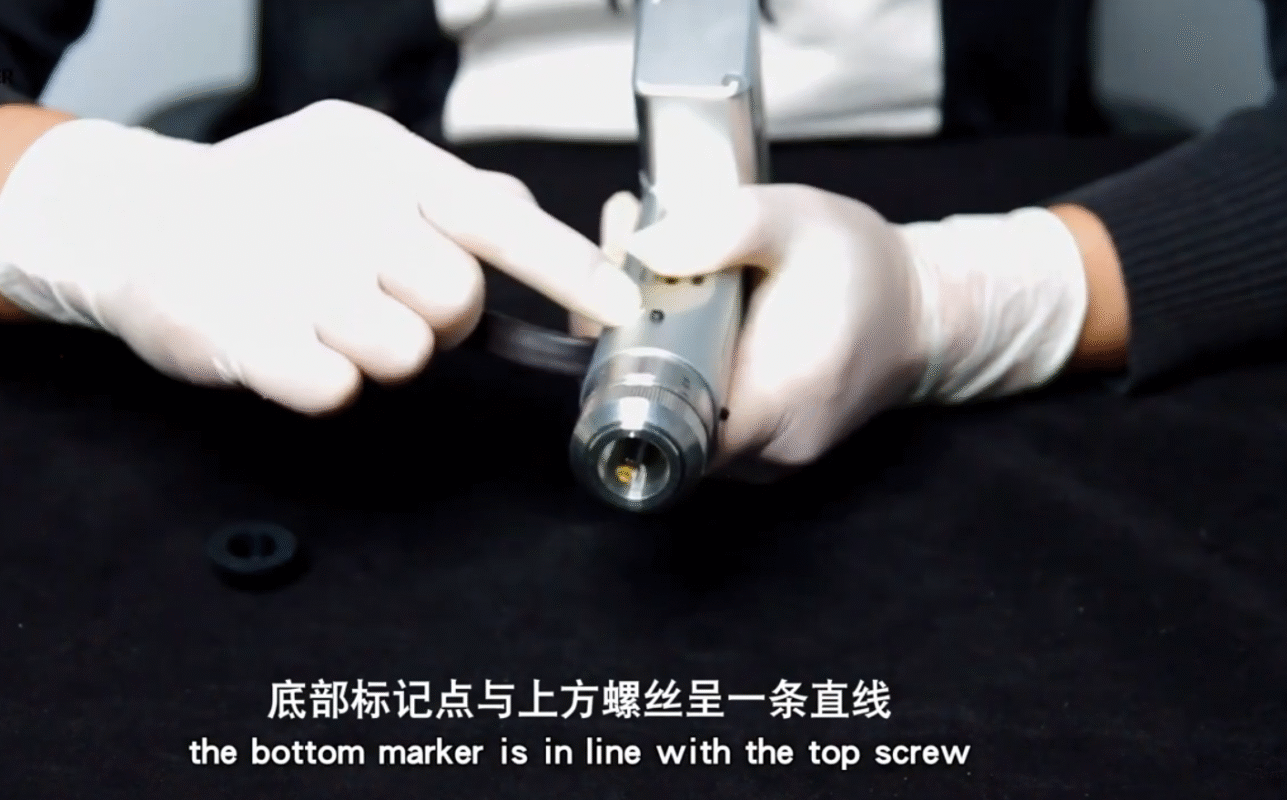
Установите замок QBH обратно в пистолет
Установите замок QBH на место, убедившись, что все компоненты выровнены и правильно установлены.

Обратите внимание, что нижний маркер находится на одной линии с верхним винтом.
Совместите нижний маркер с верхним винтом для правильной ориентации. Это важный шаг в процессе замены линзы коллиматора.

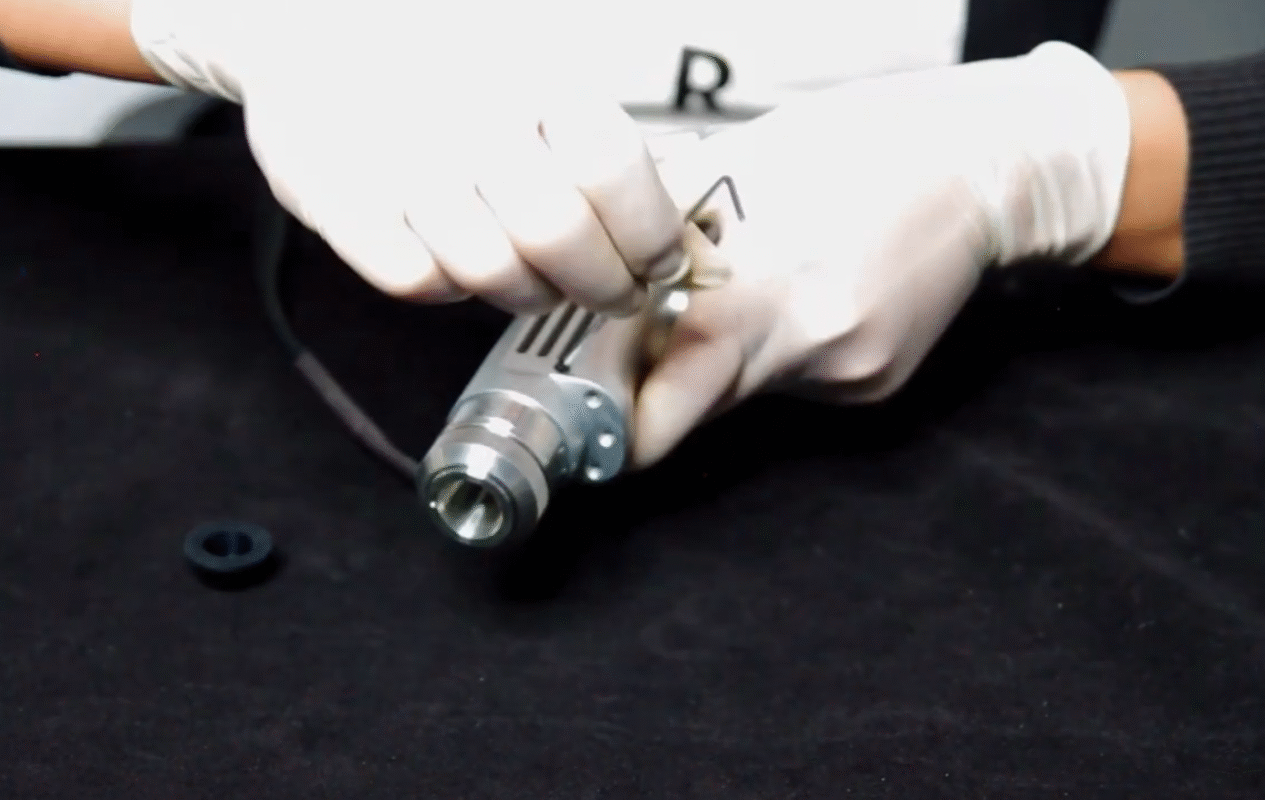
Затем закрепите винты.
Наконец, затяните винты, чтобы закрепить всю сборку, завершив замену линзы коллиматора и вернув оборудование в оптимальное состояние.

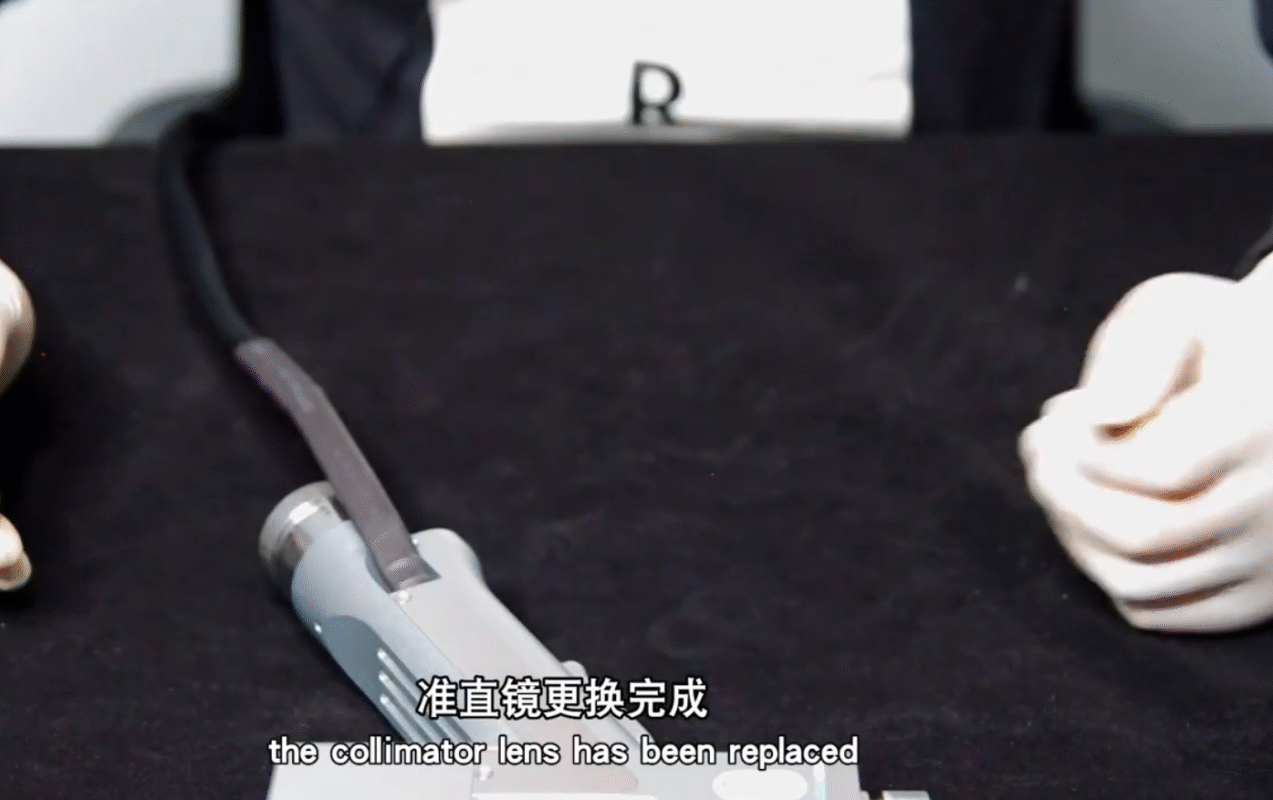
Увеличение производительности вашего оборудования после замены
После замены коллиматорной линзы проведите пробный запуск, чтобы убедиться в плавной и эффективной работе лазерного сварочного пистолета. Контролируйте качество сварки и при необходимости корректируйте её. Регулярные проверки технического состояния и своевременная замена коллиматорной линзы значительно повысят срок службы и производительность вашего оборудования, обеспечивая стабильно высокое качество сварных швов во всех ваших проектах.
Следуя этому всеобъемлющему руководству, замена коллиматорной линзыВы расширяете возможности лазерной сварки, повышая точность и надежность. Поддержание оборудования в идеальном состоянии — это не просто дополнительная возможность, а важнейший фактор успешного выполнения сварочных работ.


