


Find out how to efficiently perform a cylinder replacement on the Y27 hydraulic press with this comprehensive guide. Follow our detailed steps to ensure a smooth and successful maintenance process.
When it comes to maintaining your Y27 hydraulic press, cylinder replacement is a crucial task that ensures optimal performance and extends the lifespan of the machine. Regular maintenance, including replacing the hydraulic cylinder as needed, prevents unexpected downtime and sustain operational efficiency. In this comprehensive guide, we will walk you through the complete process of cylinder replacement on a Y27 hydraulic press, ensuring a smooth and successful maintenance procedure.
Tools and Materials Required for Cylinder Replacement
Before you begin the cylinder replacement process, it’s vital to gather all necessary tools and materials. This preparation will make the process more efficient and help prevent potential issues. You will need:
- A set of wrenches and sockets
- Personal protective equipment (PPE) such as gloves and goggles
- A hydraulic jack
- Replacement cylinder
- Screwdrivers
- A clean cloth or rag
- Lubricating oil
Ensure that these tools and materials are readily accessible before beginning the procedure to streamline the cylinder replacement process.
Safety Precautions
Safety is paramount when working with heavy machinery like the Y27 hydraulic press. Before you start the cylinder replacement, adhere to the following safety precautions:
- Wear appropriate PPE, including gloves and safety goggles, to protect yourself from potential hazards.
- Ensure the work area is clean and free of any obstructions or debris.
- Make sure the machine is powered off and disconnected from the power source to prevent accidental operation.
- Familiarize yourself with the manufacturer’s safety guidelines specific to the Y27 hydraulic press.
Step-by-Step Guide to Cylinder Replacement
Step 1: Preparing the Workbench
Start by preparing your workbench. Correctly position support blocks on the workbench to stabilize the components of the hydraulic press during the cylinder replacement process. This will keep the machine steady while you work.

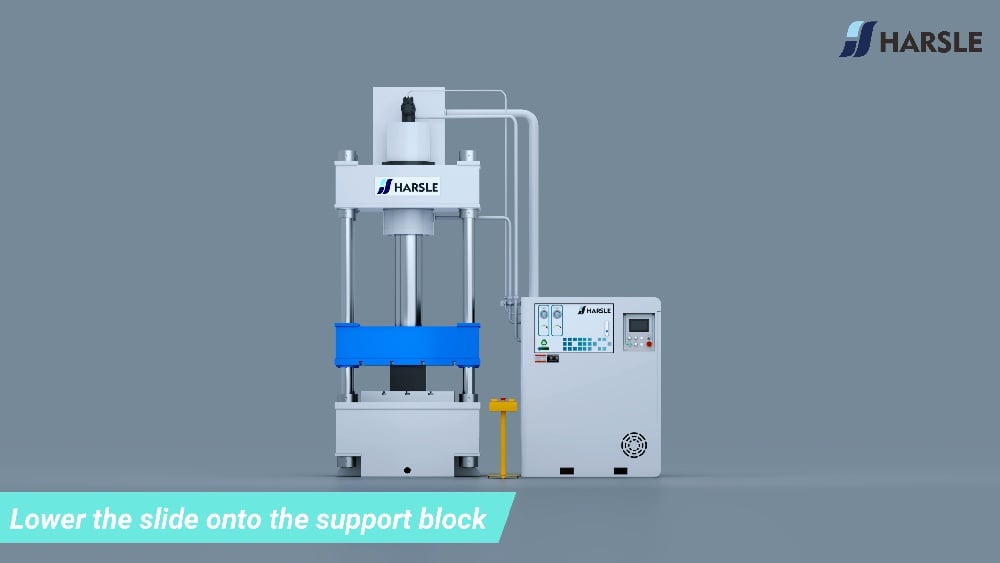
Step 2: Lowering the Slide
Next, carefully lower the slide onto the support blocks. This step is essential to ensure that no harm comes to the hydraulic cylinder or other components during the replacement process.
Step 3: Loosening the Slide Fixing Screws
With the slide securely supported, proceed to loosen the slide fixing screws. Use the appropriate size wrench or socket to prevent damaging the screws or the slide itself during the cylinder replacement.

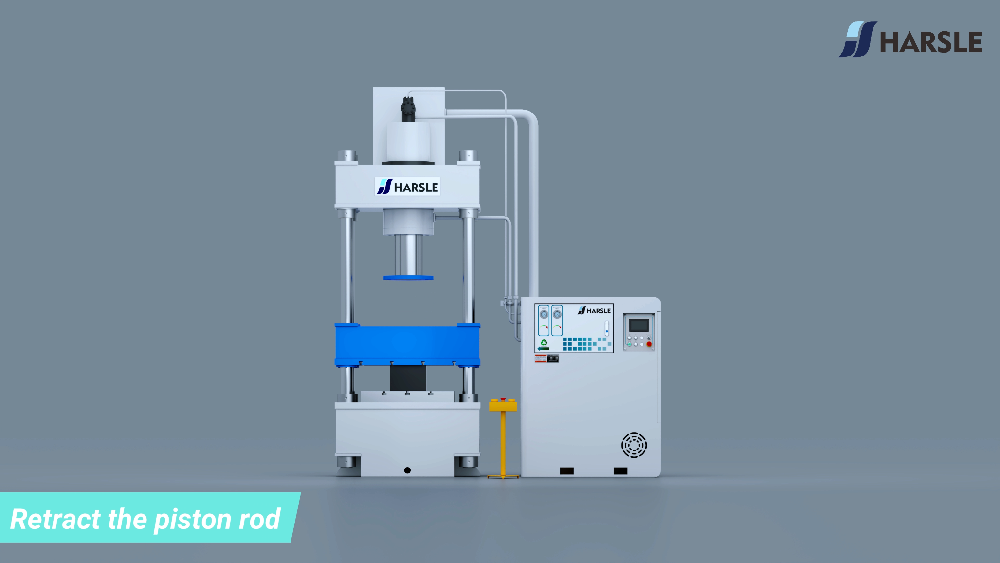
Step 4: Retracting the Piston Rod
Retracting the piston rod is the following step. Slowly retract the rod to provide access to the cylinder. Be cautious during this stage to avoid any sudden movements that could damage the machine or harm you.
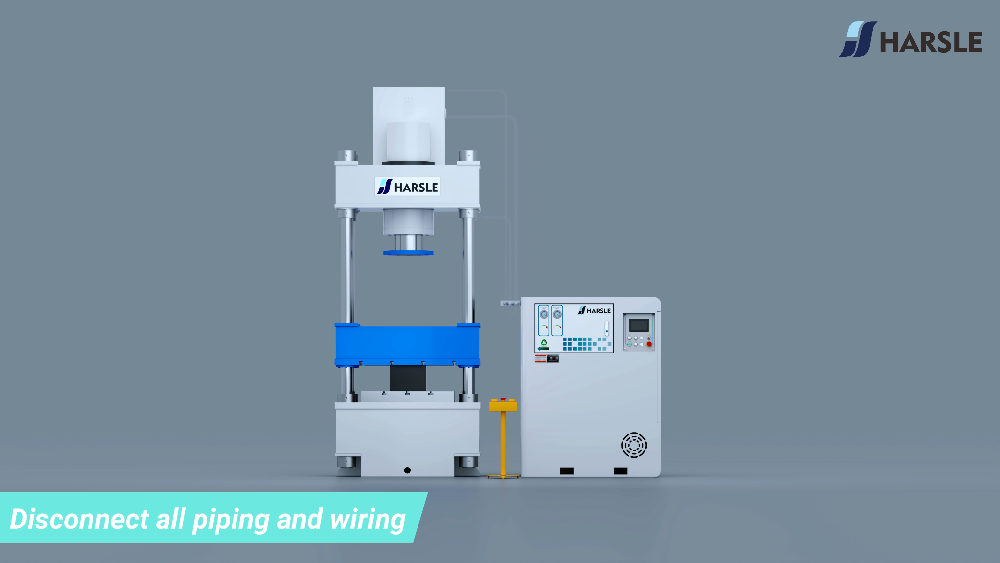
Step 5: Disconnecting Piping and Wiring
To ensure uninterrupted access for cylinder replacement, disconnect all piping and wiring attached to the hydraulic cylinder. Carefully label each connection to simplify reassembly later.
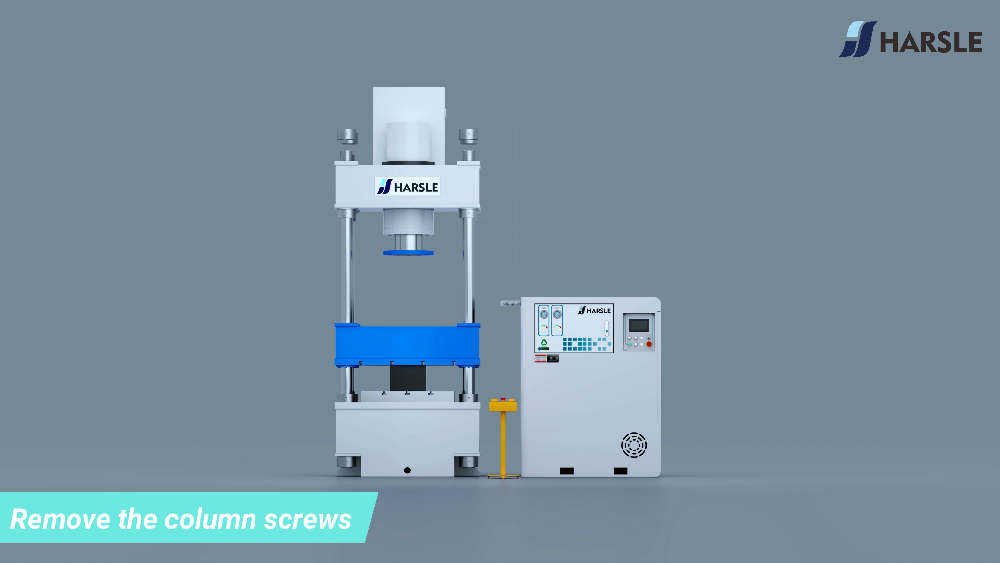
Step 6: Removing Column Screws
Next, remove the column screws using the proper tools. This will allow you to detach the components connected to the hydraulic cylinder, facilitating its removal.
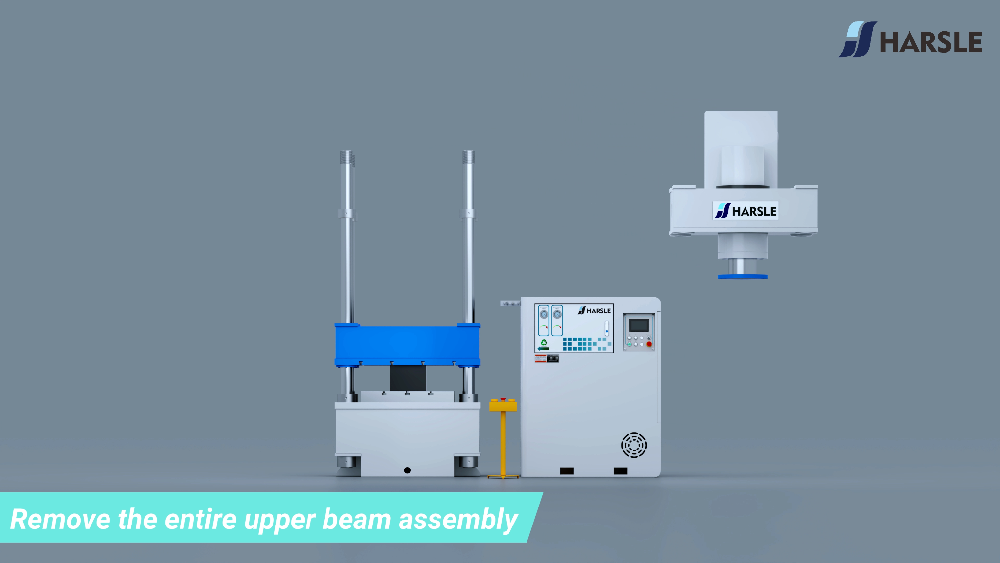
Step 7: Removing the Upper Beam Assembly
Detach the upper beam assembly by following the previous separation of the column screws. Exercise caution while doing so to prevent damaging nearby components.
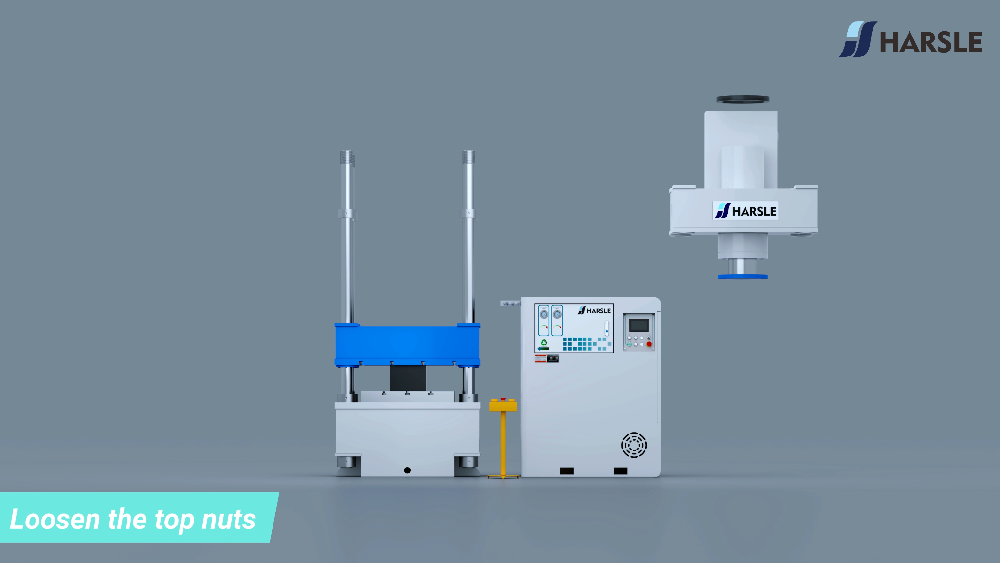
Step 8: Loosening the Top Nuts
Loosen the top nuts that secure the hydraulic cylinder. Ensure you have the right tools for the task to avoid slipping or rounding off the nut edges.
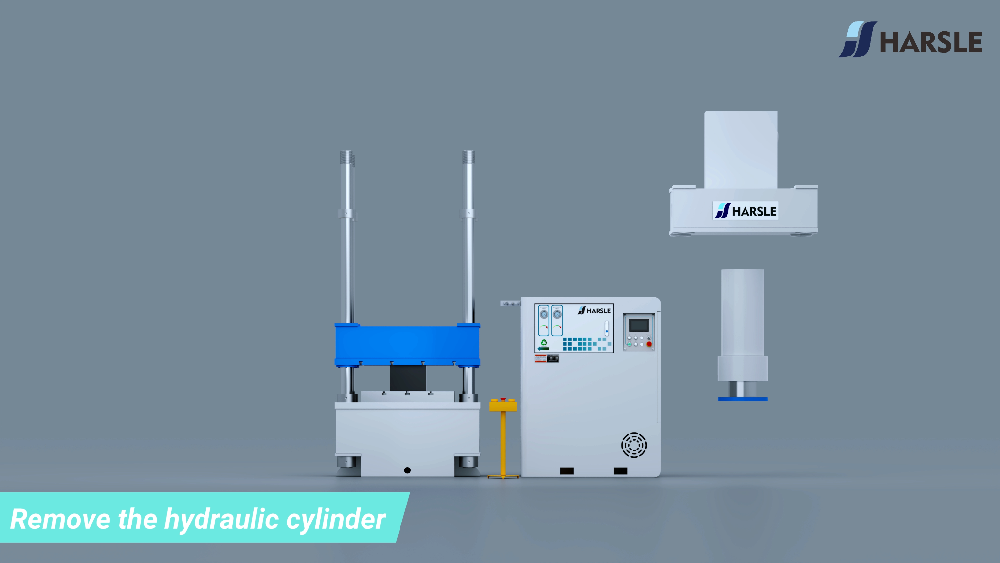
Step 9: Removing the Hydraulic Cylinder
With all securing components loosened, proceed to remove the hydraulic cylinder. Carefully lift it out of its housing, maintaining stability and control throughout the process.
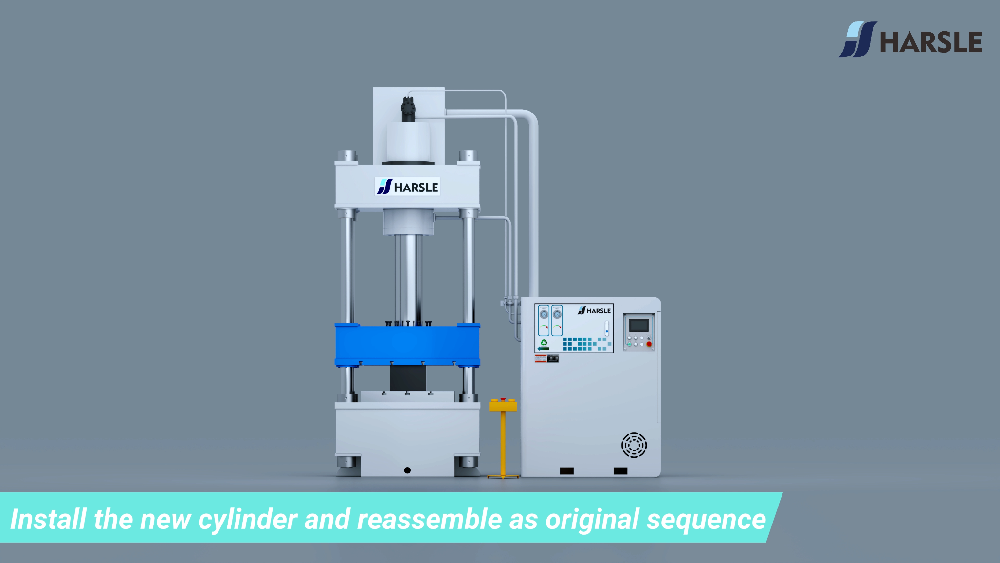
Step 10: Installing the New Cylinder
Now it’s time to install the new hydraulic cylinder. Position it precisely where the previous one was located. Reverse the removal steps to securely fit the new cylinder in place.
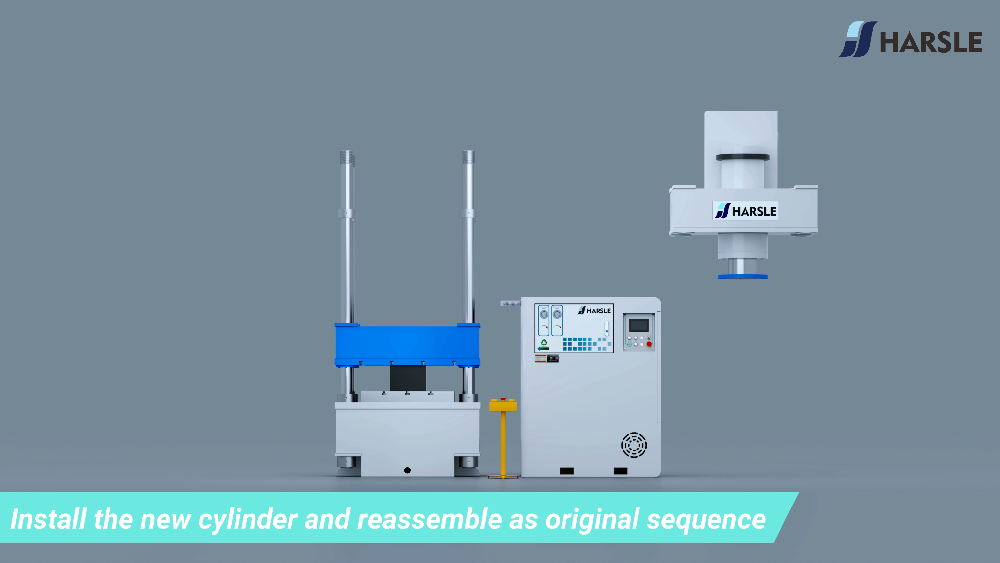
Step 11: Reassembling the Press
Reassembly involves the reverse order of the disassembly process. Begin by securing the top nuts, followed by the upper beam assembly, column screws, and reconnection of piping and wiring. Double-check all connections for security.
Testing the Newly Installed Cylinder
After reassembly is complete, it’s crucial to test the newly installed cylinder. Power on the Y27 hydraulic press and perform a few trial runs to ensure the cylinder operates smoothly and all components function together seamlessly.
Tipps zur Fehlerbehebung
Despite meticulous execution, issues can sometimes arise after cylinder replacement. Here are some common troubleshooting tips:
- If there is a leak, inspect all connections for tightness and the presence of sealing elements.
- Should the press fail to operate, confirm that all electrical connections have been correctly reestablished.
- Unusual noises may signify improper installation; revisit the steps to ensure precise alignment of all components.
Abschluss
Cylinder replacement on a Y27 hydraulic press is a crucial maintenance task that enhances performance and prolongs the machine’s lifespan. By following this detailed guide, you can ensure a safe and successful cylinder replacement process. Regular maintenance, including such replacements, is essential to maintain the reliability and operational efficiency of your hydraulic press. Embrace proactive upkeep strategies to prevent unexpected downtime and extend the life of your equipment.


