


Manuelles Einstellen des Klingenabstands an Schermaschinen

Als erfahrener Schermaschine Bediener, ich weiß, dass die manuelle Einstellung des Klingenabstands entscheidend für präzise Schnitte und eine längere Lebensdauer Ihrer Geräte ist. Der richtige Abstand sorgt für einen sauberen Schnitt ohne Grate oder Verformungen und reduziert gleichzeitig den Verschleiß der Klingen. In dieser Anleitung erkläre ich Schritt für Schritt, wie Sie den Klingenabstand an Ihrem Schermaschine, einschließlich der benötigten Werkzeuge, wichtiger Faktoren wie der Materialstärke und Tipps zur Optimierung der Maschinenleistung. Die Beherrschung dieser Einstellung kann sowohl die Effizienz als auch die Schnittqualität erheblich verbessern.
Überblick
- Lösen Sie die Schrauben, die an der Klinge befestigt sind

2. Treten Sie den Fußschalter und lassen Sie den oberen Balken in die richtige Position herunterkommen.
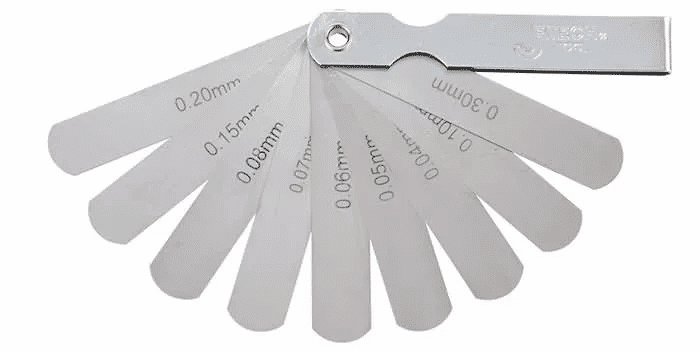
3. Setzen Sie die Fühlerlehre zwischen obere und untere Klinge und stellen Sie den Abstand der linken Klinge auf bis zu 0,5 mm ein
4. Senken Sie die obere Klinge ab, bis die mittleren Bereiche beider Klingen auf gleicher Höhe sind
5. Setzen Sie die Fühlerlehre zwischen obere und untere Klinge und stellen Sie den Abstand der mittleren Klinge auf bis zu 0,5 mm ein
6. Senken Sie die obere Klinge ab, bis die rechten Bereiche beider Klingen auf gleicher Höhe sind
7. Setzen Sie die Fühlerlehre zwischen obere und untere Klinge und stellen Sie den rechten Klingenabstand auf bis zu 0,5 mm ein
8. Setzen Sie die Fühlerlehre zwischen die beiden Klingen und bewegen Sie sie von links nach rechts, um den Klingenabstand zu prüfen und eine Feineinstellung vorzunehmen, wenn etwas nicht stimmt.


