


Se stai cercando di configurare una macchina ESA S860, sei nel posto giusto. Ti guiderò attraverso i passaggi essenziali necessari per configurare l'ESA S860, assicurandoti che la tua macchina funzioni senza intoppi ed efficientemente. Comprendere il processo di configurazione è fondamentale per massimizzare le prestazioni della macchina e ridurre al minimo i tempi di fermo.
In questo articolo, non solo illustrerò la procedura passo passo, ma condividerò anche suggerimenti per migliorare la vostra esperienza con la configurazione della macchina ESA S860. Che siate operatori esperti o alle prime armi con questa apparecchiatura, questa guida vi aiuterà a iniziare con sicurezza.
Fase 1: Preparazione dell'area di lavoro dell'ESA S860
Prima di iniziare il ESA S860 Durante la configurazione della macchina, assicurarsi che l'area di lavoro sia pulita e organizzata. Liberare lo spazio da eventuali detriti che potrebbero interferire con il processo di configurazione. Questo aiuta a prevenire potenziali danni sia alla macchina che ai pezzi in lavorazione. Inoltre, verificare che il pavimento sia livellato, poiché qualsiasi superficie irregolare può compromettere la precisione delle operazioni.
Fase 2: accensione NC e configurazione iniziale
Dopo aver preparato l'area di lavoro, il passaggio successivo nella configurazione della macchina ESA S860 è l'accensione del sistema NC. La prima pagina disponibile è la maschera Home.
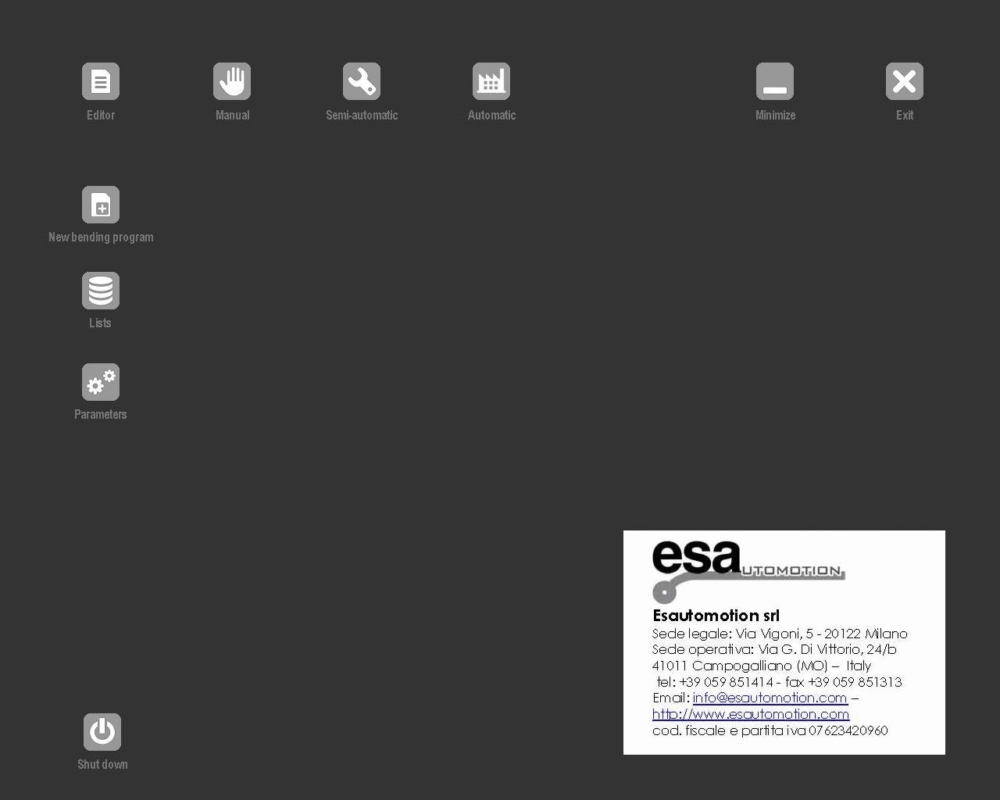

Da qualsiasi altra maschera, premendo questa icona, è possibile accedere alla maschera Home.
Ecco cosa puoi fare da questa pagina:
– per entrare in Impostazioni, premendo

– per entrare in Manuale, premendo

– per entrare in Semiautomatico, premendo

– per entrare in Automatico, premendo

– per ridurre al minimo l’applicazione secondo necessità, premendo

– per uscire dall’applicazione, premendo

– realizzare un nuovo programma di piegatura, pressatura

– per selezionare una delle liste (Programma, Punzoni, Matrici), premendo

– per selezionare i parametri della maschera per operazioni specifiche, premendo

– per garantire che il Controllo Numerico sia spento in modo sicuro quando non in uso, premendo

Passaggio 3: Ambiente touch e tastiera virtuale
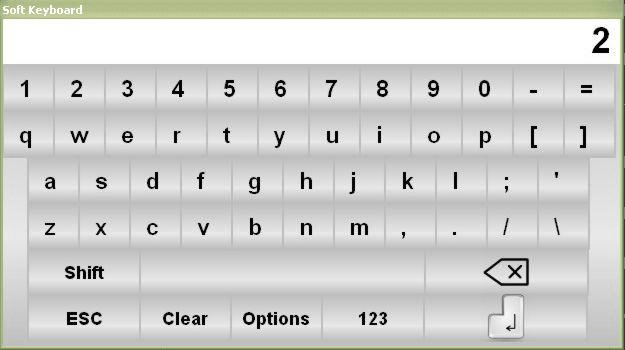
La tastiera virtuale entra in gioco ogni volta che è necessario inserire dati nei campi di input, modificarli o accedere agli strumenti di disegno, portando la praticità di una tastiera virtuale direttamente sullo schermo. Questa tastiera interattiva e completa garantisce che gli utenti non perdano di vista le modifiche visive durante l'esecuzione delle operazioni. Mantiene tutte le funzionalità di una tastiera per PC, ottimizzando efficacemente il flusso di lavoro.
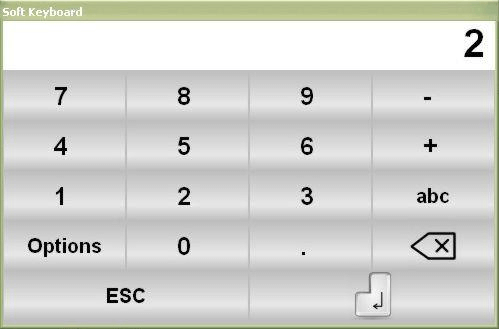

Questo tasto significa Elimina

Questo tasto significa Conferma – INVIO
Quando si conferma un dato inserito, normalmente la tastiera virtuale si chiude.
Dopo aver confermato l'inserimento di dati, la tastiera virtuale si chiude automaticamente, a meno che non si scelga di mantenerla sullo schermo premendo "Opzione" e selezionando la funzione "cuscino", che blocca la tastiera in primo piano.
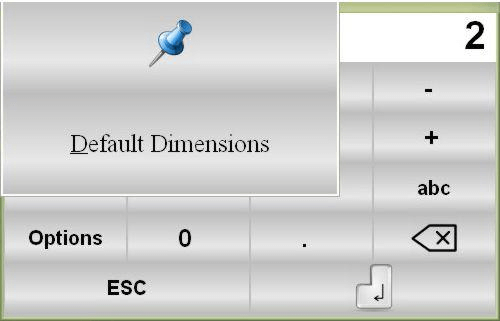
È anche possibile ridimensionarlo alle dimensioni standard utilizzando "Dimensioni predefinite" o passare ai caratteri letterali premendo "abc" per nominare programmi e strumenti.
Fase 4: Operazioni essenziali di configurazione della macchina
Dopo l'accensione, è necessario completare le operazioni chiave per eseguire efficacemente la configurazione della macchina ESA S860. Il dimensionamento della RAM è fondamentale per l'ingresso nella fase automatica e l'esecuzione affidabile dei programmi di lavoro.
Il dimensionamento della mazza è obbligatorio per accedere alla fase automatica ed eseguire un programma di lavoro. Il dimensionamento degli assi di arresto è facoltativo. Si consiglia di dimensionarli in caso di dubbi sulla correttezza degli attuali target degli assi di arresto. I target attuali potrebbero non essere corretti se un asse viene mosso manualmente a controllo numerico spento.
Procedura di dimensionamento del RAM
Per l'ESA S860, seguire questi passaggi per dimensionare accuratamente la RAM:
- premere
– se la ram è sollevata, premere il tasto pedale giù per spostarlo sotto i segni zero
– premere il tasto pedale su; questa operazione attiverà la risalita manuale se la macchina è stata resettata.
La slitta si muoverà verso l'alto fino a incontrare entrambe le tacche di zero delle linee ottiche dei due cilindri in cui avviene la calibrazione. Sarà ora possibile eseguire un programma in modalità automatica.
Per ripetere la procedura di reset senza spegnere il NC:
- premere [Ripetizione delle dimensioni];
– premere il pedale di risalita.
Dimensionamento degli assi di arresto
La calibrazione accurata degli assi di arresto è fondamentale per la precisione. Seguire questi passaggi:
- premere
- premere

Gli assi di arresto si muovono verso il finecorsa di dimensionamento. Una volta toccato il finecorsa, invertono la direzione e, dopo aver rilasciato il finecorsa, dimensionano fino alla prima tacca di zero dell'encoder.
Fase 5: Suggerimenti per la risoluzione dei problemi e la manutenzione
Una configurazione della macchina ESA S860 ben mantenuta è essenziale per un'efficienza continuativa:
- Eseguire ispezioni di routine per verificare usura e danni.
- Assicurare una lubrificazione e una pulizia adeguate per mantenere prestazioni ottimali.
- Implementare misure preventive per ridurre al minimo i tempi di fermo e prolungare la durata delle apparecchiature.
Domande frequenti (FAQ)
Come posso ottimizzare l'ambiente touch durante la configurazione della macchina ESA S860?
L'ambiente touch dell'ESA S860 è intuitivo. Utilizzate la tastiera virtuale per l'inserimento dei dati interagendo direttamente con lo schermo. Sfruttate le funzionalità della tastiera virtuale, come la funzione "cuscino", per mantenere la tastiera accessibile durante il lavoro, ottimizzando così l'efficienza del flusso di lavoro.
È necessario dimensionare gli assi di arresto ogni volta che utilizzo la macchina?
Sebbene il dimensionamento degli assi di arresto sia facoltativo durante ogni configurazione della macchina ESA S860, è consigliabile in caso di incertezza sui target correnti. Se il controllo numerico è spento e un asse viene spostato manualmente, il ridimensionamento garantisce precisione e allineamento con la tacca di zero dell'encoder.
Con quale frequenza deve essere eseguita la manutenzione sulla macchina ESA S860?
La manutenzione ordinaria deve essere eseguita ogni 500 ore di funzionamento. Questa include ispezioni di routine, pulizia e lubrificazione per garantire che la macchina rimanga in condizioni di funzionamento ottimali e per prevenire tempi di fermo imprevisti.
Conclusione
In sintesi, l'installazione della macchina ESA S860 prevede diversi passaggi critici: la preparazione dell'area di lavoro, l'accensione e la configurazione del sistema NC, l'utilizzo dell'interfaccia touch e della tastiera virtuale per un facile inserimento dei dati e il dimensionamento accurato degli assi di spinta e di arresto per prestazioni ottimali della macchina. Seguendo scrupolosamente questa guida, potrete garantire un funzionamento fluido ed efficiente della vostra macchina.
Una corretta installazione e manutenzione sono essenziali per garantire la longevità e le prestazioni del tuo Macchina ESA S860Ispezioni regolari, pulizie e manutenzione preventiva possono ridurre significativamente i tempi di fermo e aumentare la produttività. Per un supporto più dettagliato o per qualsiasi domanda, non esitate a contattare il nostro team. Inoltre, visitate il nostro sito web per ulteriori risorse e documentazione su argomenti correlati.


