


If you’ve been looking to perform an ESA S860 Machine Setup, you’re in the right place. I’ll guide you through the essential steps required for setting up the ESA S860, ensuring that your machine runs smoothly and efficiently. Understanding the setup process is critical for maximizing the machine’s performance and minimizing downtime.
In this article, I’ll not only cover the step-by-step procedure but also share tips to enhance your experience with the ESA S860 Machine Setup. Whether you’re a seasoned operator or new to this equipment, this guide will help you get started with confidence.
Step 1: Preparing the ESA S860 Work Area
Before beginning the ESA S860 Machine Setup, ensure that your work area is clean and organized. Clear the space of any debris that could interfere with the setup process. This helps prevent potential damage to both the machine and the workpieces. Additionally, verify that the floor is level, as any uneven surface can compromise the accuracy of your operations.
Step 2: NC Powering and Initial Configuration
After preparing the work area, the next step in the ESA S860 Machine Setup is powering up the NC system. The first available page is the Home mask.
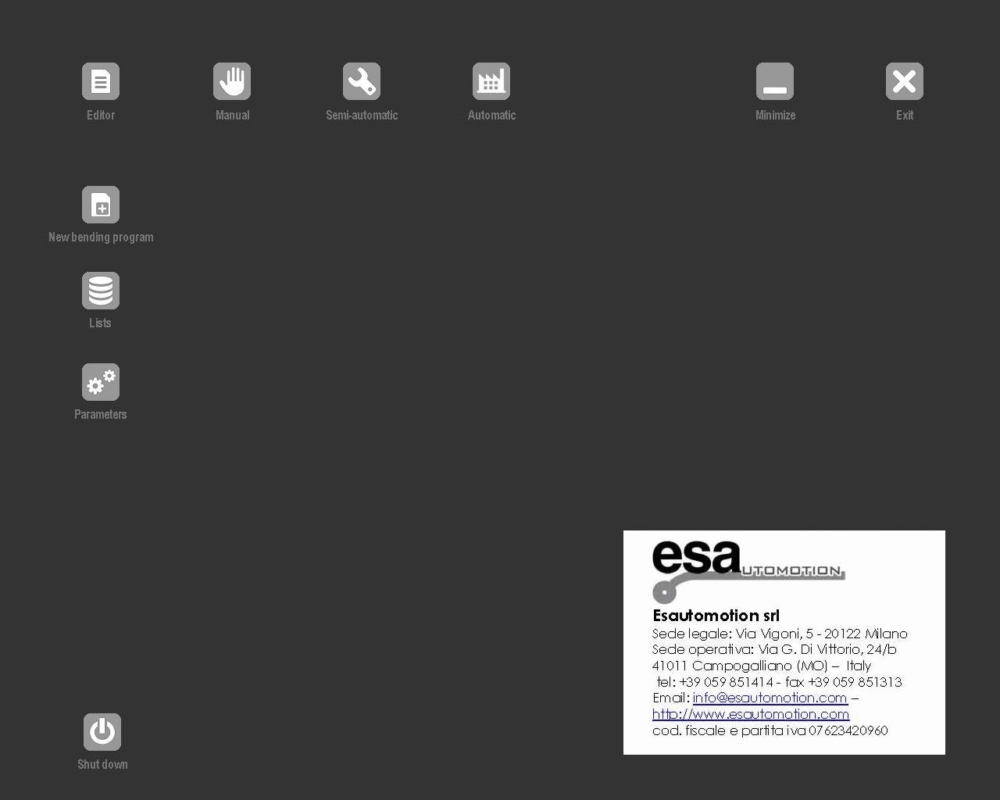

From any other mask, pressing this icon, you can enter on the Home mask.
Here’s what you can do from this page:
– to enter in Settings, pressing

– to enter in Manual, pressing

– to enter in Semiautomatic, pressing

– to enter in Automatic, pressing

– to minimize the application as required, pressing

– to exit from the application, pressing

– to realize a new programme of bend, pressing

– to select one of the lists (Programme, Punches, Dies), pressing

– to select mask parameters for specific operations, pressing

– to ensure the Numerical Control is turned off safely when not in use, pressing

Step 3: Touch Environment and Soft Keyboard
The Soft Keyboard emerges whenever you need to enter data into input fields, edit data, or access drawing tools, bringing the convenience of a virtual keyboard directly onto the screen. This interactive and comprehensive keyboard ensures that users don’t lose sight of their visual changes while performing operations. It retains all the functionalities of a PC keyboard, optimizing the workflow effectively.
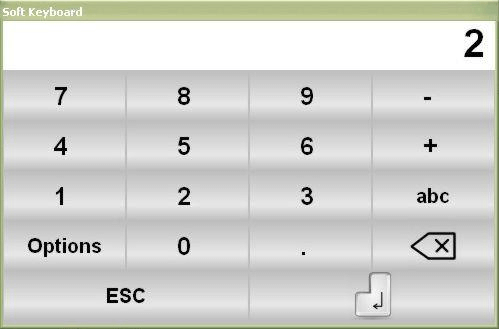

This key means Delete

This key means Confirm – ENTER
When you confirm a given inserted, the Soft Keyboard normally closes.
Upon confirming any data entry, the Soft Keyboard closes automatically, unless you choose to keep it on the screen by pressing “Option” and selecting the “pincushion” function, which pins the keyboard in the foreground.
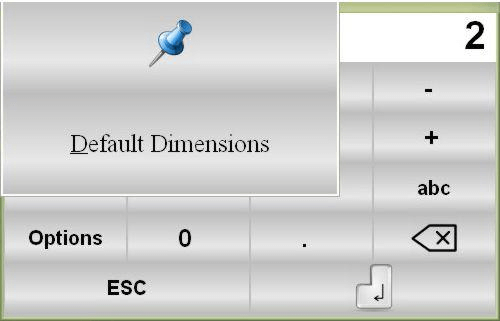
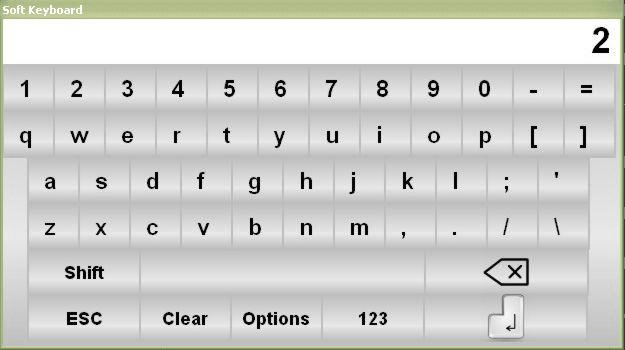
You can also resize it to standard dimensions using “Default Dimensions” or switch to literary characters by pressing “abc” for naming programs and tools.
Step 4: Essential Machine Setup Operations
After powering on, key operations must be completed to carry out the ESA S860 Machine Setup effectively. Sizing the ram is crucial for entering the automatic phase and executing work programs reliably.
It is obligatory to size the ram in order to access the automatic phase and execute a work programme. Sizing of the stop axes is optional. It is advisable to size them if there are doubts about the correctness of the current stop axes targets. The current targets may not be correct if an axis is moved manually when the numeric control is off.
Ram Sizing Procedure
For the ESA S860, follow these steps to size the ram accurately:
– press
– if the ram is up, press the down pedal to move it down below the zero marks
– press the up pedal; this operation will activate manual re-ascent if the machine has been reset.
The ram will move upwards until it meets both the zero marks of the optic lines of the two cylinders where sizing takes place. It will now be possible to execute a programme in automatic mode.
To repeat the resetting procedure without turning off the NC:
– press [Repeat Sizing];
– press the re-ascent pedal.
Sizing the Stop Axes
Accurate calibration of the stop axes is vital for precision. Follow these steps:
– press
– press

The stop axes move towards the sizing limit switch. Once the limit switch has been touched, they will reverse their direction and, after having released the limit switch, they will size to the first zero mark of the encoder.
Step 5: Troubleshooting and Maintenance Tips
A well-maintained ESA S860 Machine Setup is essential for ongoing efficiency:
- Conduct routine inspections for wear and damage.
- Ensure proper lubrication and cleaning to maintain optimum performance.
- Implement preventive measures to minimize downtime and extend equipment lifespan.
Perguntas Frequentes (FAQ)
How can I optimize the touch environment during ESA S860 Machine Setup?
The touch environment on the ESA S860 is user-friendly. Use the Soft Keyboard for data entry by interacting directly with the screen. Take advantage of the virtual keyboard features, such as the “pincushion” function, to keep the keyboard accessible while working, thus optimizing workflow efficiency.
Is it necessary to size the stop axes every time I use the machine?
While sizing the stop axes is optional during every ESA S860 Machine Setup, it is advisable if there’s uncertainty about the current targets. If the numeric control is off and an axis is moved manually, resizing ensures accuracy and alignment with the encoder’s zero mark.
How often should maintenance be performed on the ESA S860 machine?
Regular maintenance should be carried out every 500 hours of operation. This includes routine inspections, cleaning, and lubrication to ensure the machine remains in optimal working condition and to prevent unexpected downtimes.
Conclusão
In summary, performing the ESA S860 Machine Setup involves several critical steps: preparing the work area, powering and configuring the NC system, utilizing the touch interface and soft keyboard for easy data entry, and accurately sizing the ram and stop axes for optimal machine performance. By meticulously following this guide, you can ensure your machine operates smoothly and efficiently.
Proper setup and maintenance are essential to ensure the longevity and performance of your ESA S860 machine. Regular inspections, cleaning, and preventive maintenance can significantly reduce downtime and boost productivity. Should you need more detailed support or have any questions, please feel free to contact our team. Additionally, explore our website for more resources and documentation on related topics.


