


Struggling to improve your welding precision? This laser welding machine tutorial helps you master welding skills effortlessly and achieve professional results.
Mastering welding skills with a laser welding machine requires understanding its functions, practicing control techniques, and maintaining precision. Follow this tutorial to learn step-by-step methods for achieving perfect welds, even as a beginner.
Ready to take your welding expertise to the next level? Let’s dive into the complete tutorial.
In this tutorial, we will take you through each step of the process, from the initial setup of key components like the water cooling system, wire feeder, and gas connections, to the finer details of calibrating the pendulum welding head for optimal precision. You’ll learn how to safely and efficiently manage the machine’s power systems, connect the argon gas source, and monitor the water temperature, all while following best practices to avoid errors and ensure smooth operation.
With safety being a top priority, this guide will also highlight important operational checks, such as monitoring water temperatures and pressure levels, ensuring that all connections are secure, and performing routine maintenance to prevent common issues like burning or flaming during use. By following these instructions carefully, you’ll not only improve the quality of your welds but also extend the lifespan of your laser welding machine.
By the end of this laser welding machine tutorial, you will have the confidence and expertise needed to unlock the full potential of your HARSLE laser welding machine, making it a valuable tool for your business or manufacturing processes. Whether you’re welding stainless steel, aluminum, or other metals, this guide will help you achieve professional-grade results with unmatched precision and efficiency. Let’s get started and take your welding operations to the next level!
Wire and Gas Connection
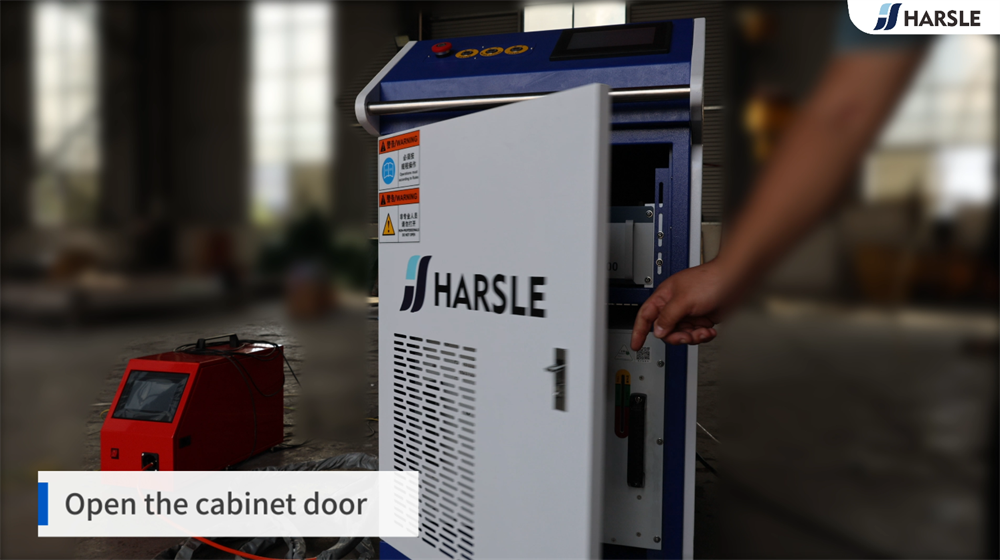
Properly Open the Cabinet Door for Maintenance
Opening the cabinet door of a machine is a simple yet crucial step in maintenance and troubleshooting. Before proceeding, ensure the machine is powered off to avoid any electrical hazards. Locate the handle or latch, and firmly grip it while applying gentle pressure to unlock the mechanism. Slowly pull or swing the door open, making sure not to force it, as excessive pressure may damage the hinges. Once open, inspect the internal components and proceed with necessary adjustments or repairs. Always close the cabinet securely after completing maintenance to ensure safety and proper machine operation.
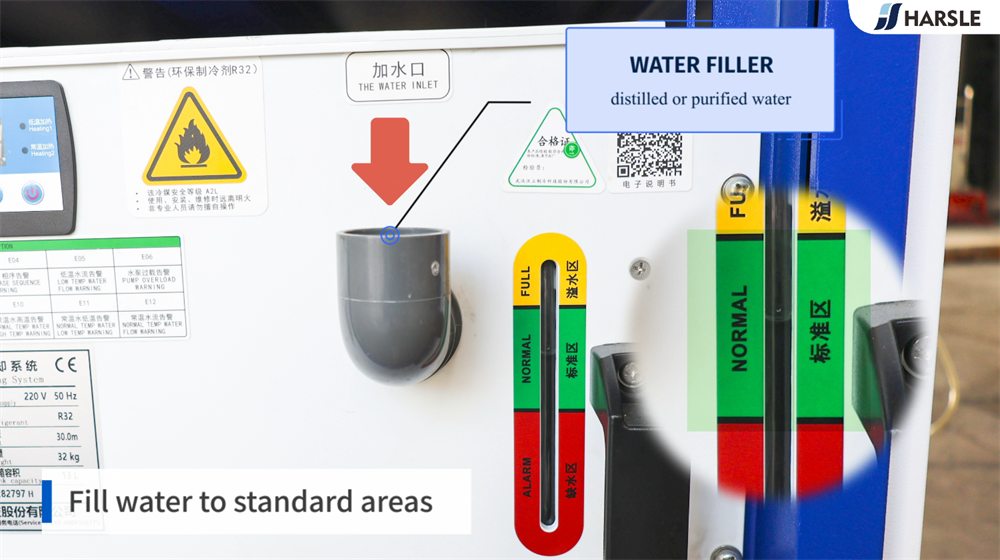
Water Filler for Laser Welding: Proper Usage Guide
To ensure optimal performance and longevity of your laser welding machine, it is essential to use distilled or purified water when filling the water tank. This prevents mineral buildup, which can negatively impact the cooling system and overall efficiency. Always fill the water to the standard level indicated on the machine to maintain proper heat dissipation and avoid overheating. Using impure water may lead to corrosion and blockages, reducing the machine’s lifespan. Regularly check and refill the water as needed to ensure smooth operation. Following these steps helps maintain consistent welding quality and machine reliability.
Sewerage Maintenance: Change Water Monthly
To ensure proper sanitation and system efficiency, it is essential to maintain the sewerage outlet and regularly change the water source. A well-functioning sewerage outlet prevents blockages and odors, keeping the drainage system running smoothly. It is recommended to inspect and clean the outlet periodically to avoid clogs. Additionally, changing the water source once a month helps maintain water quality, preventing contamination and mineral buildup. This practice is especially crucial in industrial, commercial, and residential settings where water purity impacts equipment performance and hygiene. Regular maintenance enhances longevity and ensures a healthier environment.

Proper Wiring and Air Switch for Laser Welding Machines
When setting up a laser welding machine, proper electrical connections are crucial for safety and optimal performance. Always connect the earth wire to ensure stable grounding and prevent electrical hazards. Additionally, it is highly recommended to use an air switch of no less than C63, which provides adequate protection against overcurrent and ensures a stable power supply. These precautions help maintain smooth operation, extend machine lifespan, and enhance welding precision. Following these guidelines ensures safe and efficient laser welding in industrial and fabrication applications.

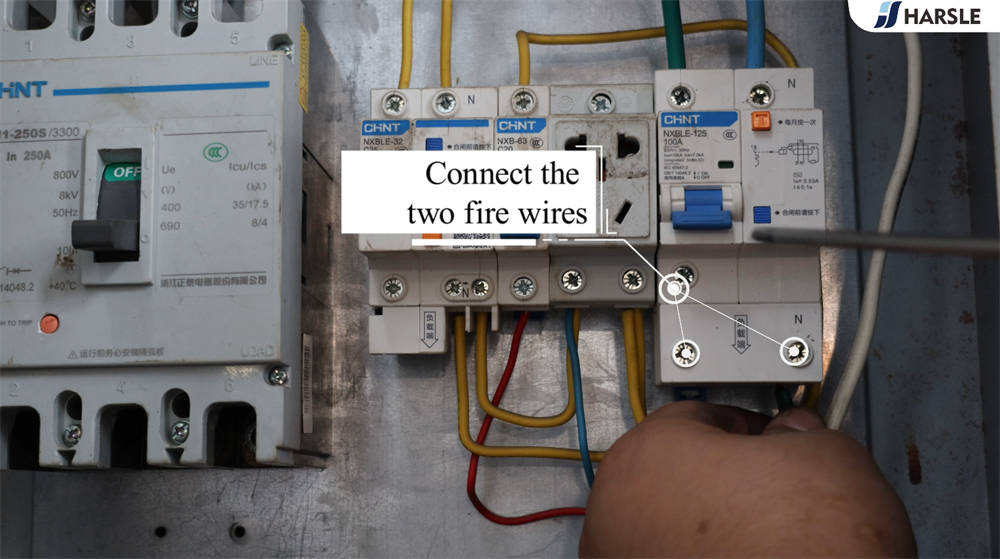
Properly Connect the Two Fire Wires
When connecting two fire wires, ensure safety by turning off the power supply before starting. Use high-quality insulated connectors to securely join the wires, preventing short circuits or loose connections. Strip the wire ends appropriately, twist them together firmly, and apply a heat shrink tube or electrical tape for insulation. If using terminal blocks, tighten them properly to avoid overheating. Always follow local electrical codes and standards to ensure a safe and reliable connection. For industrial applications, consider using professional crimping tools for a more secure bond. Regularly inspect the connections to prevent any risks of electrical faults or hazards.
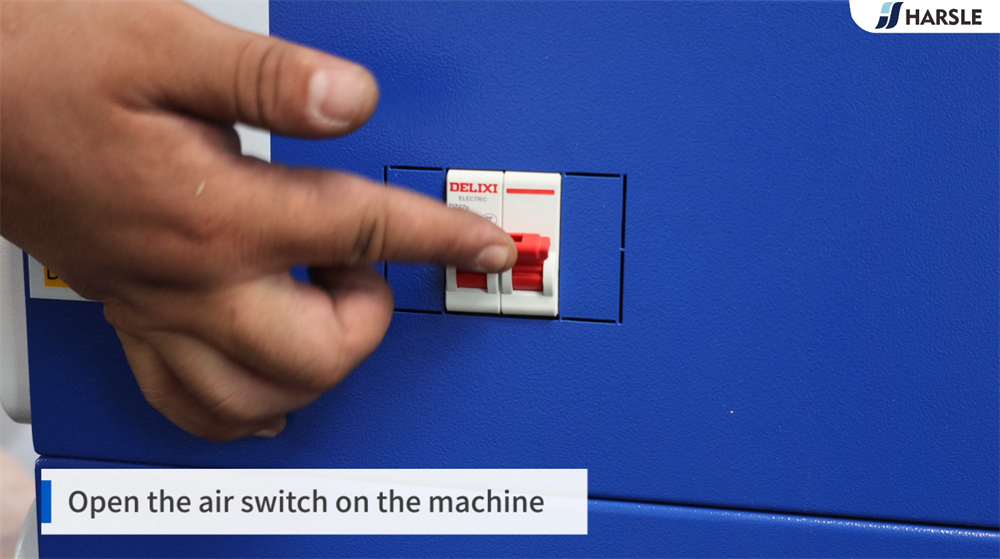
Open the air switch
Opening the air switch is a crucial step in ensuring the proper functioning of a welding machine. Before turning it on, make sure the machine is properly connected to the power supply. Locate the air switch, usually found on the control panel or power distribution box. Flip the switch to the “ON” position carefully to allow electrical flow. Always wear protective gloves and check for any loose connections or damage before proceeding. A stable power source is essential to prevent electrical faults. Once activated, verify that the machine powers up correctly and is ready for operation.

Properly Open the Air Switch on a Laser Welding Machine
To start the laser welding machine safely, first, locate the air switch on the machine’s control panel. Ensure the machine is properly connected to a stable power source. Then, gently push the air switch to the “ON” position to activate the electrical circuit. This step supplies power to the system, allowing other components, such as the laser source and cooling system, to function properly. Always check for any abnormalities, such as unusual noises or unstable power indicators. If issues arise, turn off the switch immediately and inspect the connections. Proper operation ensures machine longevity and welding efficiency.
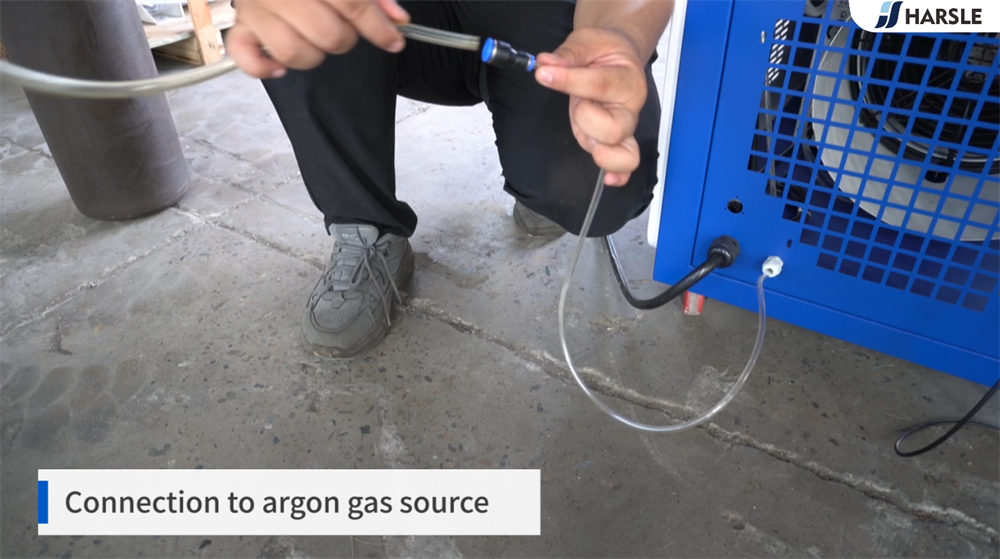
Connection to argon gas source. Laser welding machine
Proper connection to an argon gas source is essential for achieving high-quality laser welding results. Argon acts as a shielding gas, preventing oxidation and ensuring a clean, strong weld. To connect your laser welding machine, start by securing the gas hose to the argon tank using a pressure regulator. Adjust the flow rate according to your material and welding settings. Ensure all connections are tight and leak-free before starting the welding process. Using the correct gas flow helps maintain weld stability, minimizes contamination, and improves weld penetration. Always follow safety guidelines when handling gas cylinders.
Recommended Argon Pressure for Welding Stainless Steel
When welding stainless steel, maintaining the correct argon gas pressure is crucial for achieving high-quality welds. The recommended pressure setting is 0.2 MPa, which provides adequate shielding to prevent oxidation and ensure a clean, strong weld. Proper gas coverage enhances fusion, reduces porosity, and minimizes spatter during the welding process. Before starting, ensure the gas regulator is set to the correct pressure and check for leaks in the system. Adjusting the gas flow based on the material thickness and welding speed can further improve weld quality. Following these guidelines ensures precise, durable, and aesthetically smooth welds.
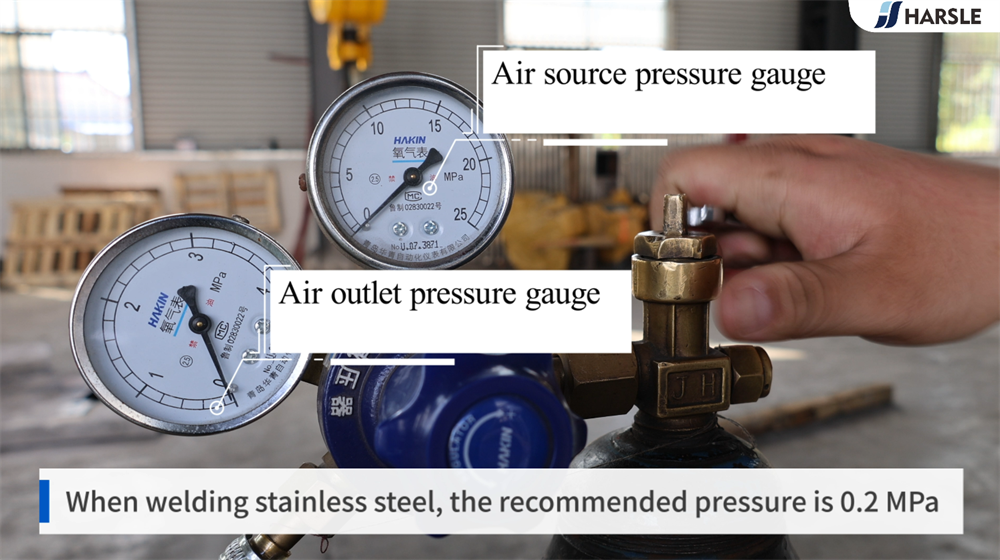
Setting the Outlet Pressure to 0.2MPa for Laser Welding Machines
For optimal performance, a laser welding machine requires precise argon gas pressure regulation. Adjust the outlet pressure to 0.2MPa using the pressure regulator on the argon gas tank. This ensures a stable shielding gas flow, preventing oxidation and contamination during the welding process. A consistent gas supply helps maintain weld quality, improves fusion, and reduces porosity. Before welding, check for leaks in the gas connections and ensure proper flow. Setting the correct pressure enhances penetration depth and weld consistency, leading to stronger and cleaner welds. Regular monitoring of gas pressure is essential for maintaining precision welding performance.

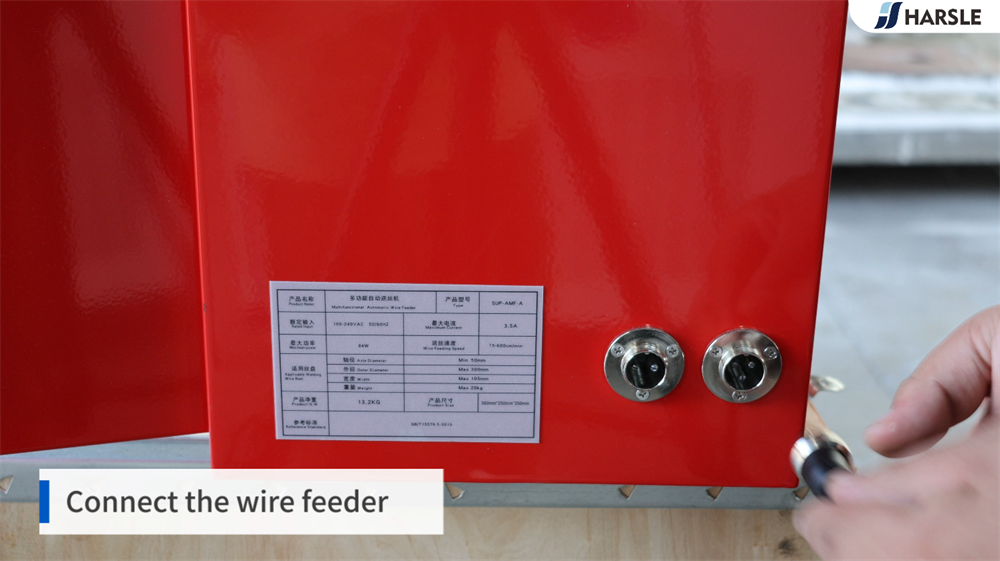
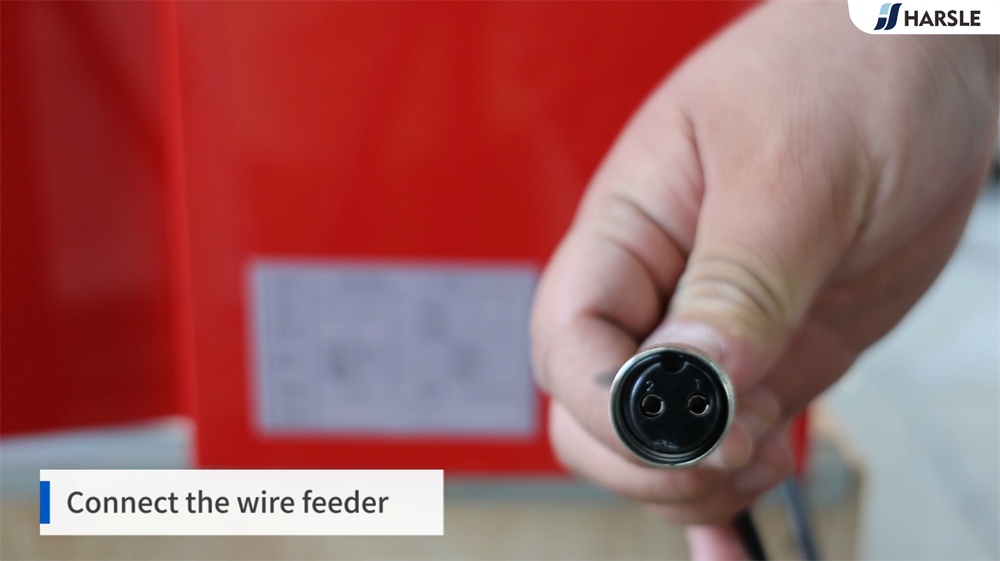
Connect the wire feeder
Connecting the wire feeder correctly is essential for smooth and efficient laser welding operations. Begin by securing the wire spool onto the feeder, ensuring it is properly aligned to prevent tangling or feeding issues. Next, guide the welding wire through the feeder mechanism and into the welding torch nozzle, making sure there are no obstructions. Adjust the tension settings to maintain a stable wire feed and prevent slipping. Once connected, test the wire flow by triggering the feeder and confirming smooth movement. A properly connected wire feeder ensures consistent welding performance, precise wire delivery, and high-quality welds with minimal defects.
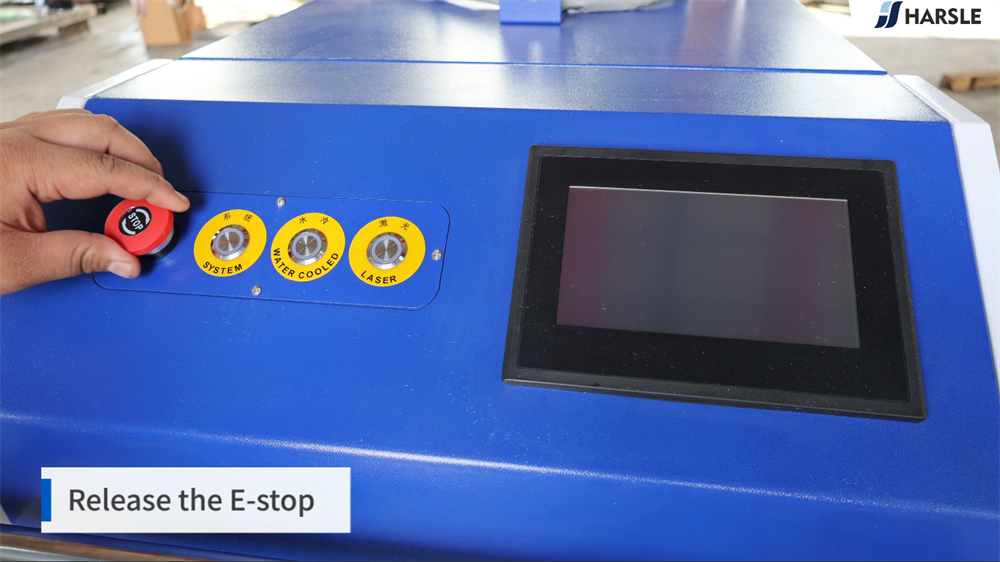
Release the E-stop
Releasing the E-stop (Emergency Stop) on a laser welding machine is a critical step in restoring normal operation after an emergency shutdown. First, ensure that the machine is in a safe state and that there are no active hazards. Locate the E-stop button, usually a large red button on the control panel. Twist or pull the button, depending on the design, to reset it. Once released, the machine’s control system may require a restart or reset command. Always verify that all safety systems are functional before resuming welding operations. Following proper E-stop procedures ensures a safe and efficient workflow.
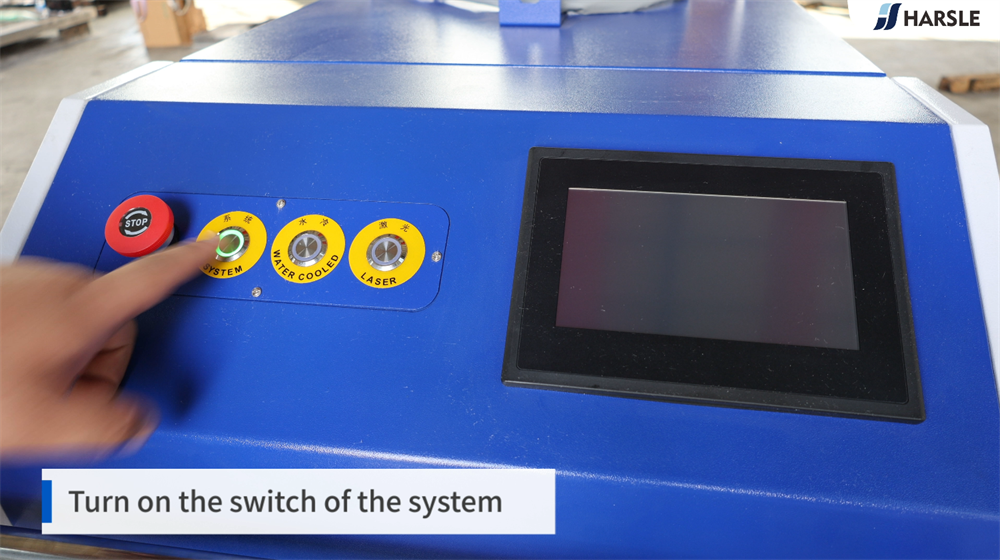
Turn on the switch of the system
Before operating a laser welding machine, it is essential to follow the correct startup procedure by turning on the system switch. First, ensure that the machine is properly connected to a stable power source. Locate the main switch on the control panel and turn it to the ON position. Wait for the system to initialize, allowing all components to undergo self-checks. Monitor the display screen for any error messages or system alerts before proceeding. A proper startup ensures stable performance, prevents electrical faults, and enhances the efficiency and lifespan of the welding system. Always follow safety guidelines during operation.
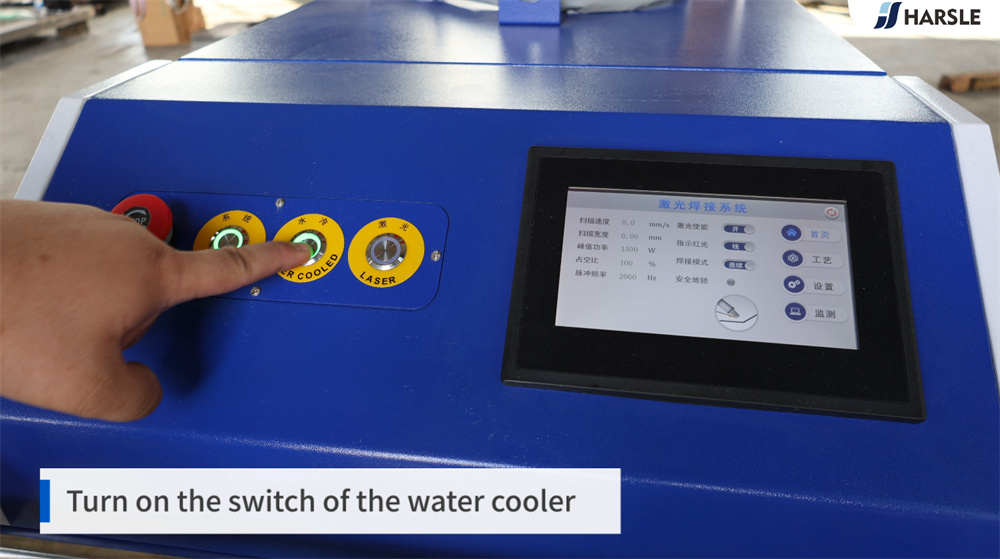
Turning on the Water Cooler
Before operating a laser welding machine, it is essential to turn on the switch of the water cooler to prevent overheating and ensure stable performance. The water cooler circulates coolant through the laser source and optical components, maintaining an optimal operating temperature. To activate it, check the water level, ensure proper hose connections, and then switch on the cooler. Allow the system to reach the desired cooling temperature before welding. A properly functioning water cooling system enhances machine lifespan, improves weld consistency, and prevents thermal damage to sensitive components. Regular maintenance ensures efficient cooling and uninterrupted welding operations.
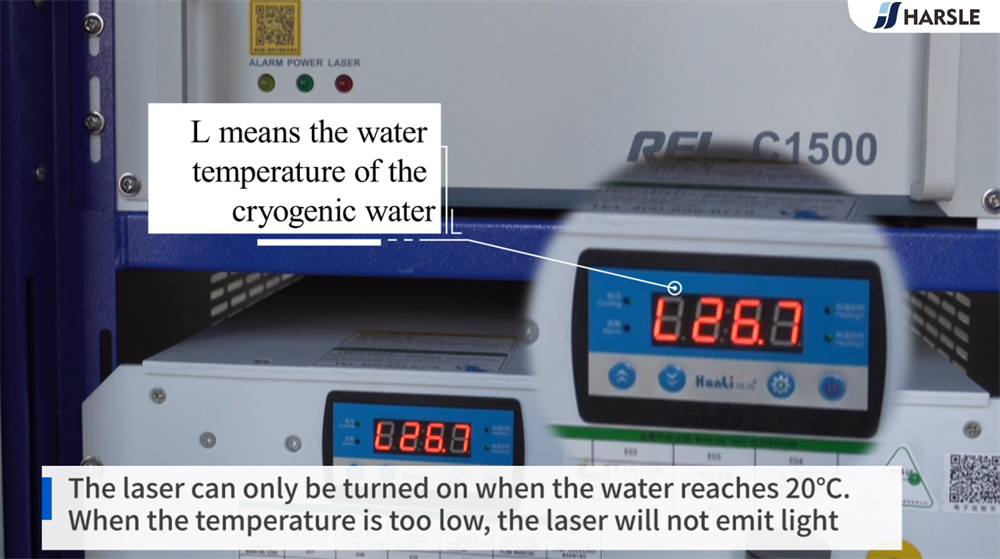
Water Temperature Requirements for Laser Operation
The letter “L” represents the water temperature of the cryogenic water cooling system in a laser welding machine. The laser can only be activated once the water temperature reaches 20°C (68°F), ensuring proper cooling and preventing thermal damage. If the temperature is too low, the laser will not emit light, as inadequate cooling can lead to system malfunctions or reduced efficiency. Maintaining the correct water temperature is essential for stable laser performance and prolonging the lifespan of the machine. Regularly monitoring and adjusting the cooling system helps prevent operational issues and ensures optimal welding results.
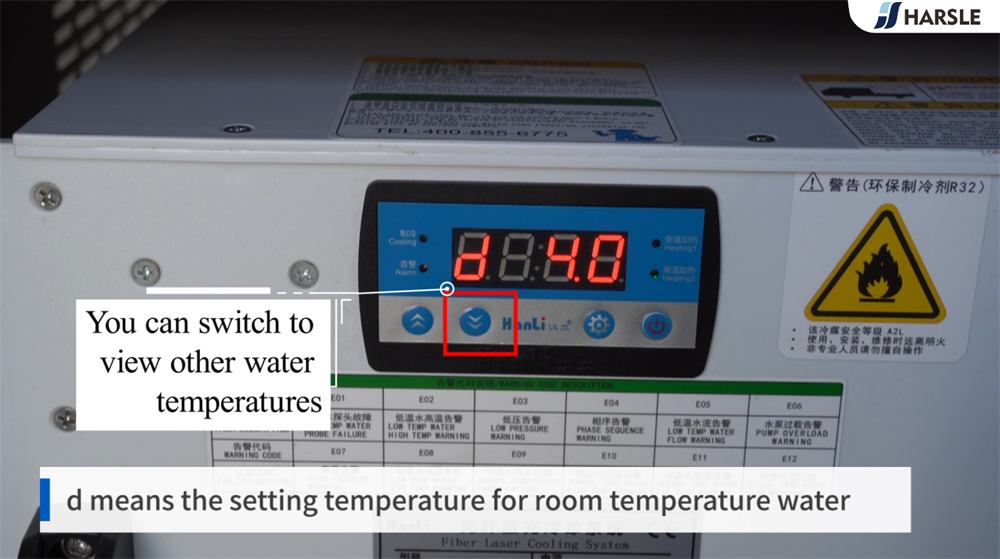
Switching and Viewing Different Water Temperature Settings
On the control panel, you can switch to view different water temperatures based on your preferences. This feature allows users to monitor and adjust the temperature for optimal operation. The letter “D” represents the preset temperature for room temperature water, ensuring a stable and comfortable water output. By toggling through the available settings, you can easily check and regulate the temperature to suit specific needs. This function is especially useful for maintaining efficiency, ensuring safety, and improving performance in various applications. Always refer to the user manual for precise adjustments and proper handling of temperature settings.
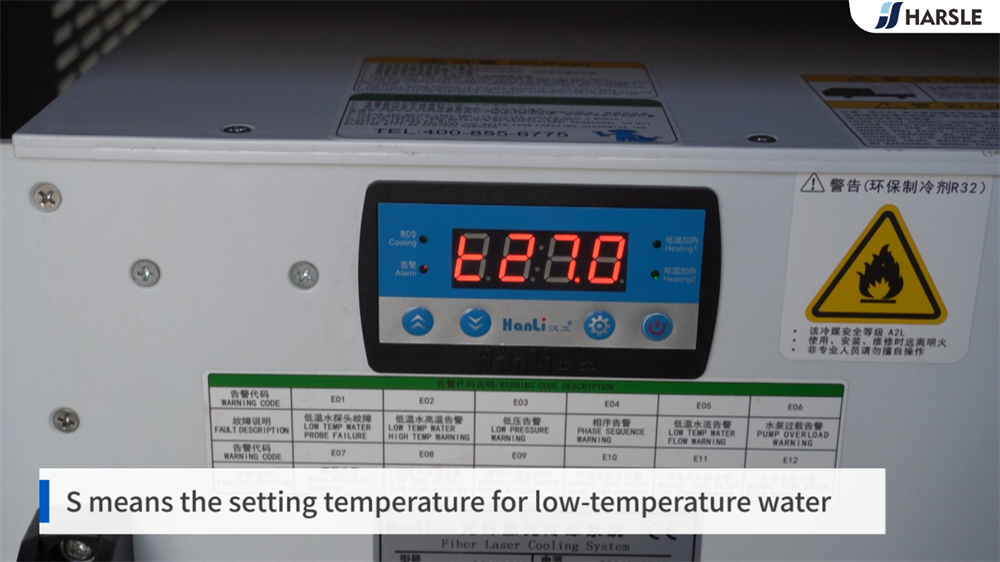
S Represents the Setting Temperature for Low-Temperature Water
In temperature control systems, S refers to the setting temperature specifically for low-temperature water. This value determines the desired cooling level in applications such as industrial cooling systems, HVAC units, and laser welding machines. Properly adjusting the S value ensures stable performance, prevents overheating, and maintains optimal operating conditions for equipment. The setting can be adjusted through the control panel based on environmental and process requirements. Regular monitoring of the set temperature helps achieve energy efficiency, prevents condensation issues, and extends the lifespan of machinery. Ensuring the correct S value improves system efficiency and reliability in temperature-sensitive processes.
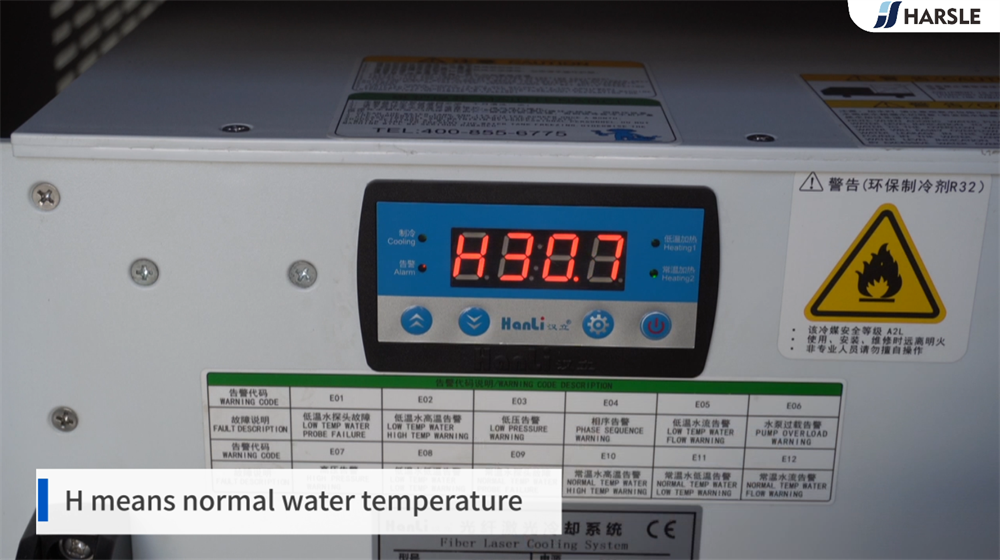
H means normal water temperature
In laser welding machines and other industrial cooling systems, the letter “H” is commonly used to indicate normal water temperature. It signifies that the cooling water is within the optimal operating range, ensuring efficient heat dissipation and preventing overheating of critical components such as the laser source and welding head. Maintaining the correct water temperature is essential for stable performance and extended machine lifespan. If the temperature exceeds the recommended limit, an alarm or error code may appear, requiring adjustments. Regular monitoring of the cooling system helps prevent welding defects and ensures consistent welding quality in long-term operations.
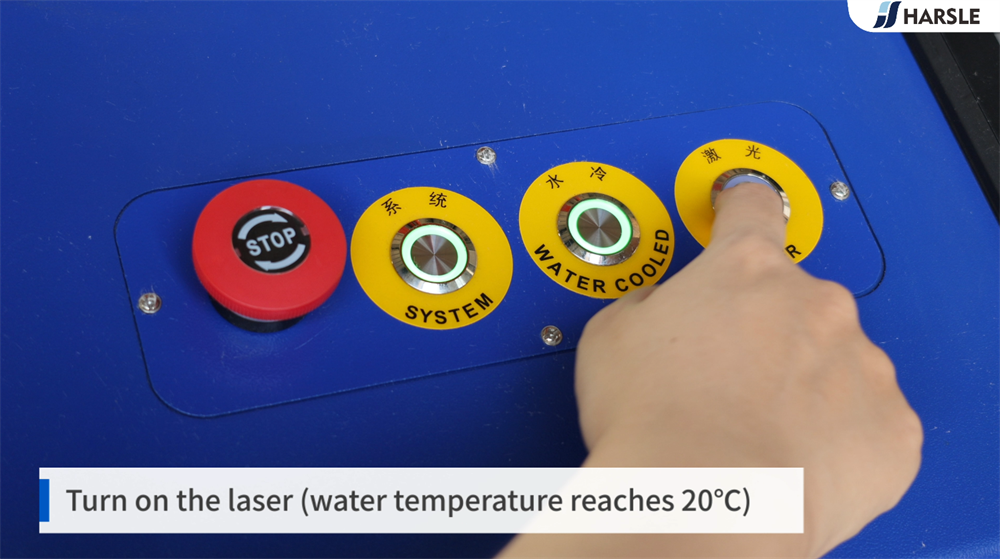
Turning on the Laser and Monitoring Water Temperature
Before starting a laser welding machine, it is essential to ensure that the cooling system is functioning correctly. After turning on the laser, the water chiller should stabilize the temperature to 20°C (68°F) to prevent overheating and maintain optimal performance. A stable water temperature helps extend the lifespan of the laser source and ensures consistent welding quality. If the water temperature is too high, it may lead to laser instability or component damage. Always monitor the temperature display, ensure proper coolant circulation, and check for any alarm signals to keep the system running efficiently and safely.
Successful Power Supply and Laser Source Connection
A successful power supply is essential for the proper operation of a laser welding machine. When the machine is powered on and functioning correctly, the green indicator light confirms a stable electrical connection. Additionally, the laser source must be securely connected to ensure seamless operation. A successful connection allows the system to generate a consistent and powerful laser beam, essential for high-quality welding. Before use, it is crucial to verify all cables and power settings to prevent interruptions. Proper connection and system checks ensure safety, efficiency, and optimal performance in laser welding applications.

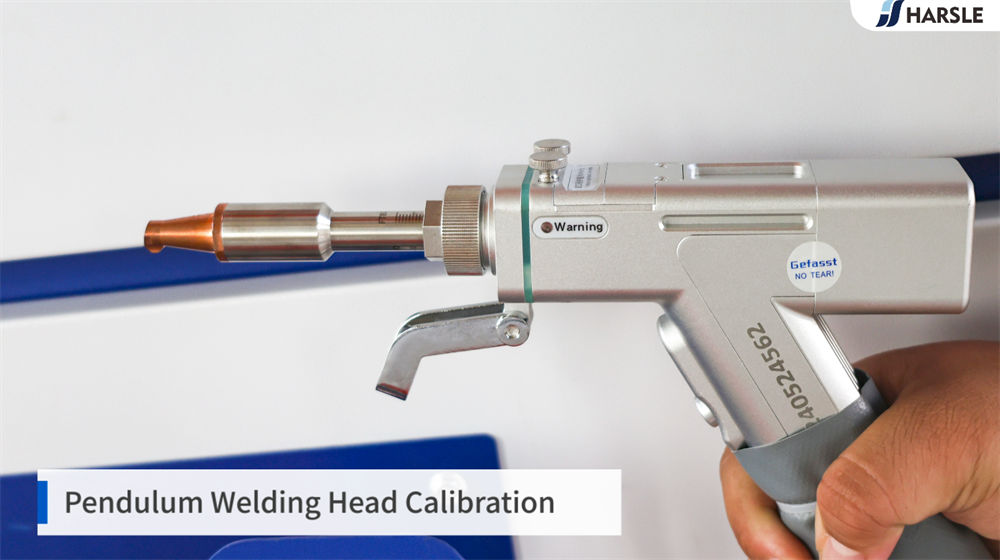
Pendulum Welding Head Calibration
Ensuring Proper Alignment of the Red Light in Laser Welding
When using a laser welding machine, it is crucial to check whether the red light alignment is correct. The red light indicator serves as a guide to ensure accurate positioning of the laser beam. If the center highlight is shifted to the right, it indicates a misalignment in the laser path. To correct this, adjust the laser head position or check for any obstructions affecting the beam. Proper alignment is essential for achieving precise welds, reducing material defects, and ensuring consistent welding quality. Regularly inspecting and calibrating the red light alignment enhances the efficiency and accuracy of the welding process.

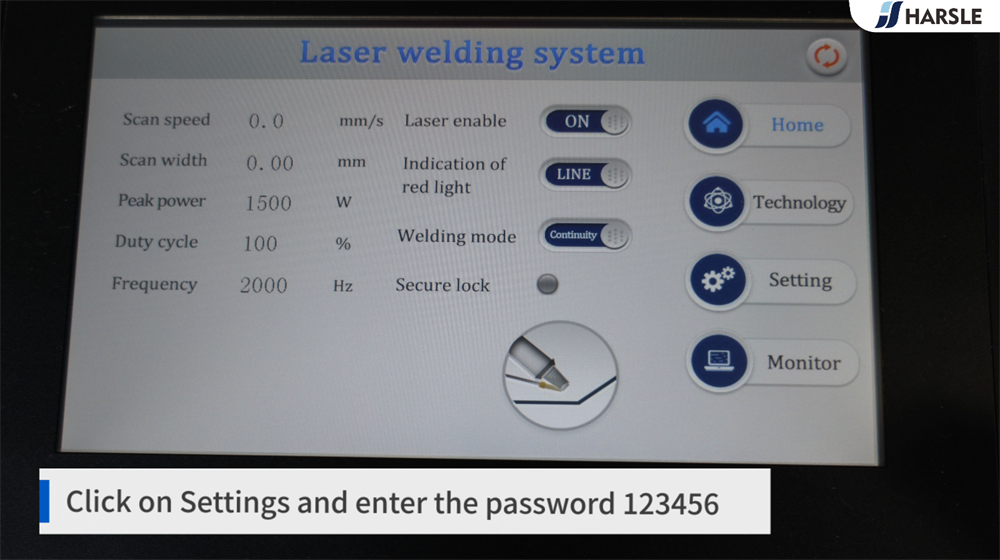
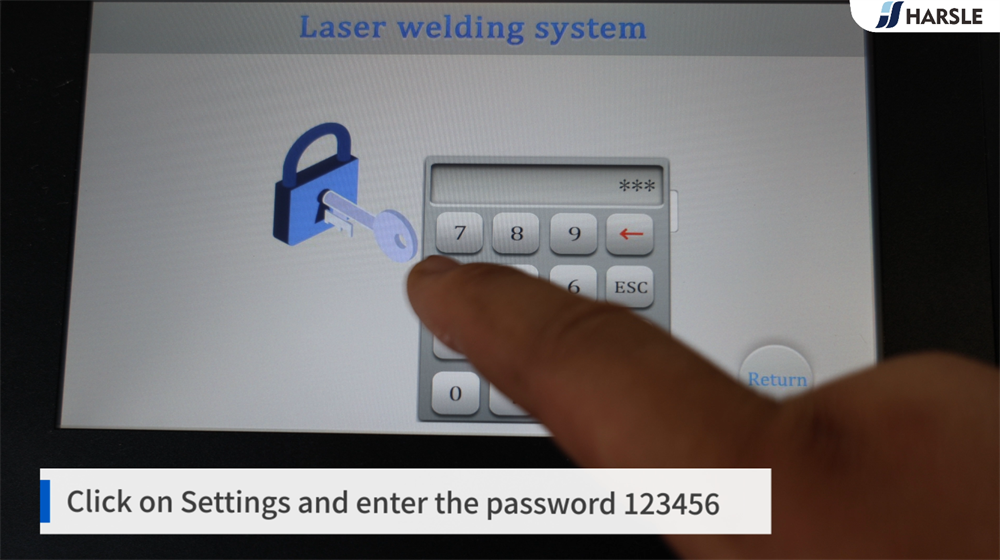
Click on Settings and enter the password 123456
To access the settings menu on your device, start by locating and clicking on the Settings icon from the main interface. Once inside, navigate to the password entry field and input the default password 123456. Ensure that the password is entered correctly to avoid login errors. If successful, you will gain access to the configuration options, allowing you to adjust system preferences, security settings, and other operational parameters. For enhanced security, it is recommended to change the default password after initial setup. Always keep your updated password stored securely to prevent unauthorized access to the system.
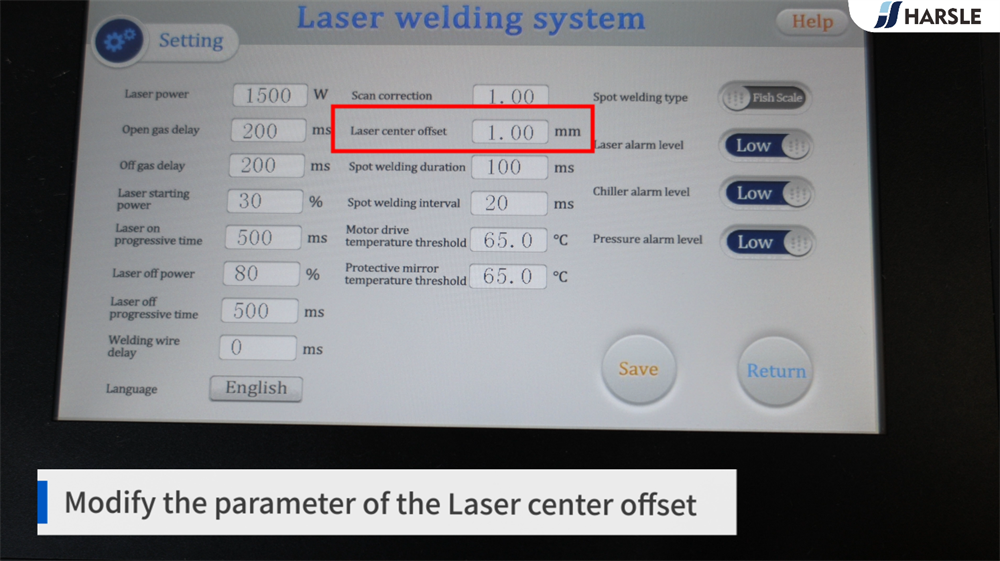
Modify the parameter of the Laser center offset
Modifying the laser center offset parameter is crucial for achieving precise and consistent welding results. This parameter adjusts the position of the laser beam relative to the welding seam, ensuring optimal alignment and penetration. To modify it, access the machine’s control panel, navigate to the laser settings, and adjust the offset value according to the material thickness and welding requirements. A properly calibrated offset helps minimize weld defects, improves fusion accuracy, and enhances welding efficiency. Always perform test runs after adjustments to confirm alignment and ensure high-quality welds. Regular calibration maintains optimal machine performance and welding consistency.
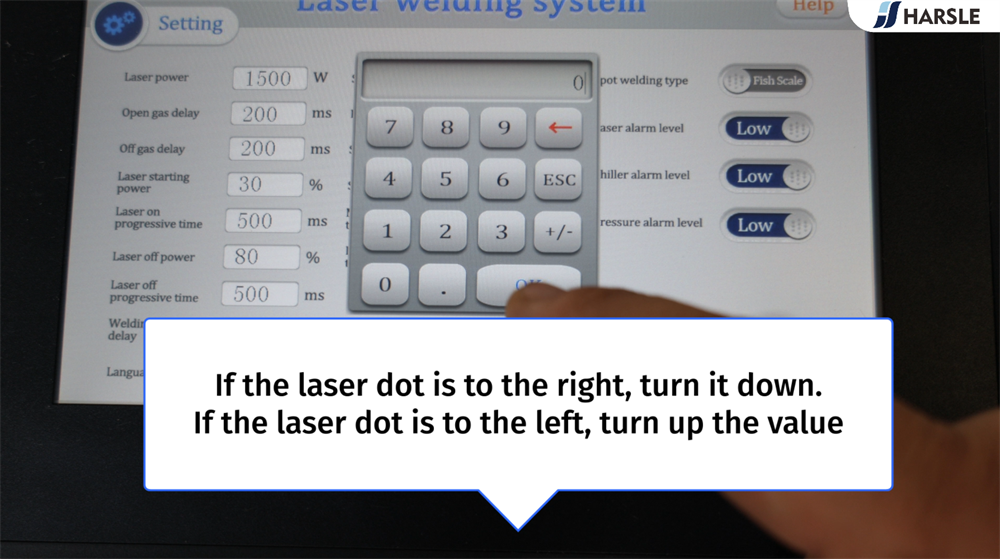
Adjusting the Laser Dot Position for Optimal Welding Accuracy
Proper laser dot alignment is crucial for achieving precise and consistent welding results. If the laser dot appears to the right of the target position, it indicates a misalignment that could affect weld quality. To correct this, carefully turn the adjustment knob downward to shift the laser dot back to the center. Make incremental adjustments while monitoring the dot’s position to ensure accuracy. Misalignment can lead to incomplete fusion or uneven welds, so it’s essential to check calibration regularly. Proper laser alignment not only enhances welding precision but also extends the lifespan of the laser welding machine.
Adjusting Laser Dot Position for Precise Welding Alignment
When using a laser welding machine, proper alignment of the laser dot is crucial for achieving accurate welds. If the laser dot appears to the left of the intended welding position, you need to increase the corresponding adjustment value in the machine’s settings. This adjustment helps reposition the laser beam for optimal accuracy. Gradually increase the value while monitoring the dot’s movement until it aligns with the correct position. Proper calibration ensures clean, precise welds, prevents misalignment issues, and improves overall welding quality. Always test on a sample material before proceeding with actual welding to confirm correct positioning.
Click on Save
After configuring the desired welding parameters on your laser welding machine, it is essential to save the settings to avoid re-entering them for future operations. Once all adjustments, including power, speed, pulse frequency, and gas flow rate, are correctly set, locate the Save button on the machine’s control panel or touchscreen interface. Click on Save to store the current settings permanently. This ensures consistency in welding quality and improves efficiency in repeated tasks. Always verify that the settings have been successfully saved before exiting the menu. Properly saving parameters helps streamline workflow and prevents setup errors.

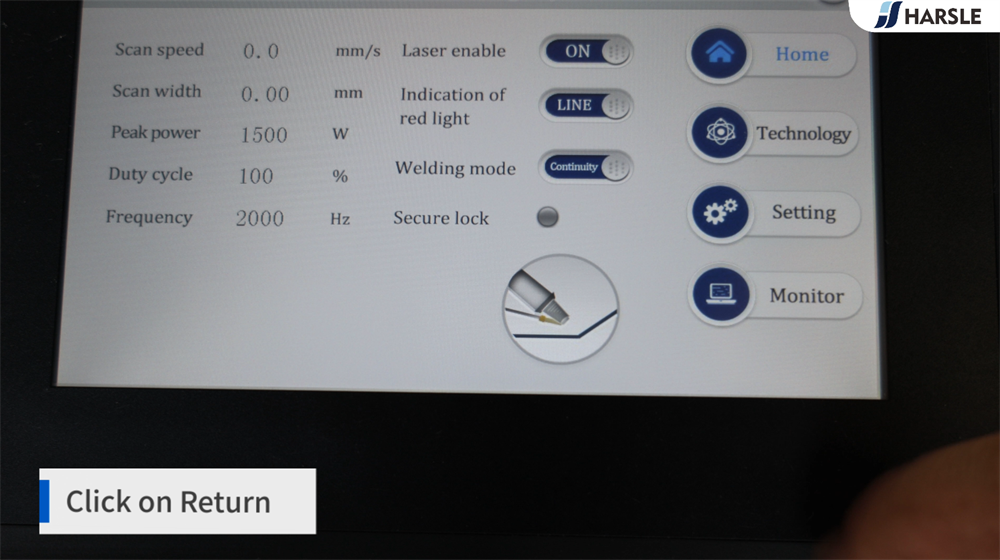
Click on Return
When using a machine interface or software, clicking on Return is a crucial step to confirm your selection or complete an action. This function is commonly used in laser welding machines, CNC systems, and industrial controllers to execute commands, reset settings, or navigate back to a previous menu. After making adjustments, ensure all parameters are correctly set before clicking Return to avoid errors. Some systems may prompt a confirmation message to verify changes. Properly using this function helps streamline workflow efficiency and ensures that settings are correctly applied for optimal machine performance and welding accuracy.
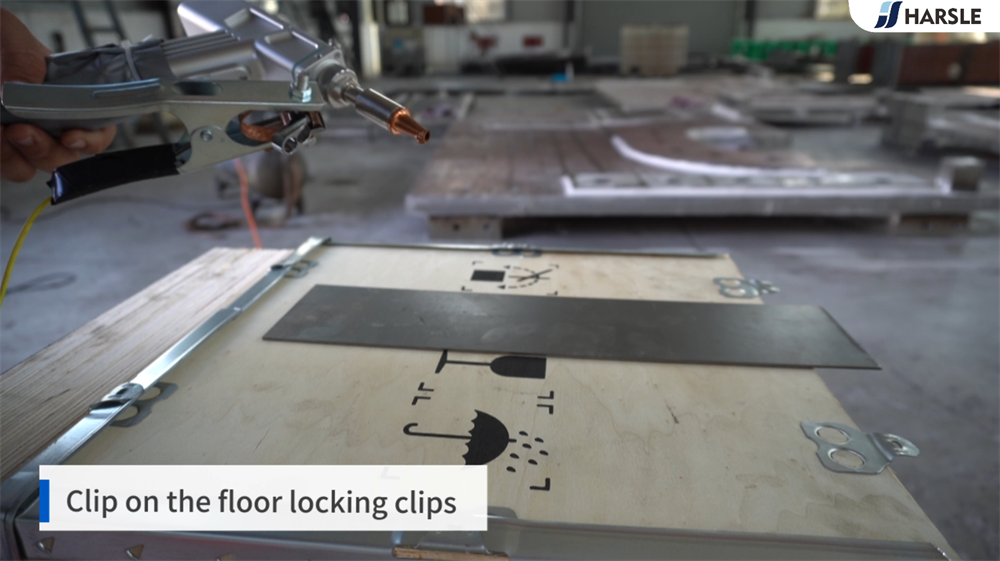
Securely Clipping the Floor Locking Clips in Place
Properly securing the floor locking clips is essential for maintaining stability and safety in various applications, such as machinery, workstations, or mobile platforms. To clip them in place, align the locking clips with the designated slots on the floor or base structure. Press firmly until you hear a click, ensuring a secure fit. Double-check each clip to confirm it is fully engaged and provides the necessary support. Proper installation prevents shifting or movement, enhancing safety and durability. Regularly inspect the locking mechanism to ensure it remains in good condition and functions effectively under different working conditions.
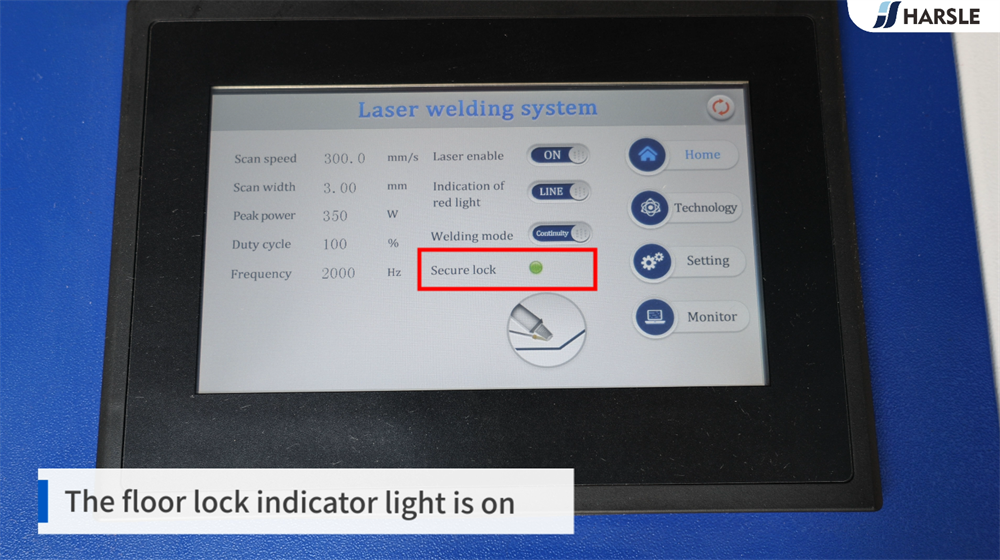
Understanding the Floor Lock Indicator Light on Your Machine
When the floor lock indicator light is on, it signals that the machine’s floor lock system is engaged. This feature ensures the machine remains stable and securely positioned during operation, preventing unintended movement. If the indicator stays illuminated, verify that the floor lock mechanism is properly activated and that there are no obstructions. In cases where the light remains on unexpectedly, check for sensor malfunctions or electrical issues. Regular maintenance and inspections help keep the system functioning correctly. If troubleshooting does not resolve the issue, consult the machine’s manual or seek assistance from a qualified technician.
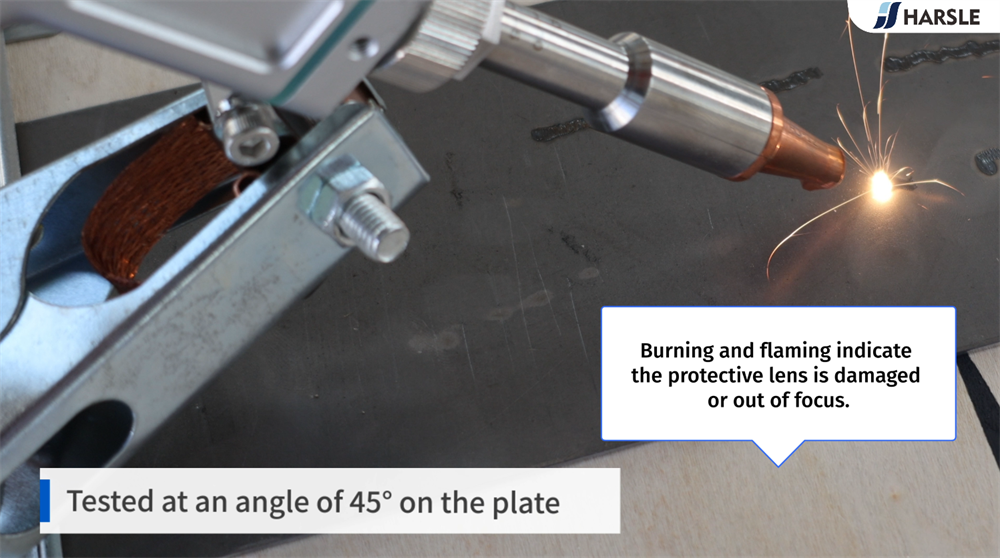
Testing Laser Welding at a 45-Degree Angle for Lens Safety
During laser welding, tests were conducted at a 45-degree angle on the plate to evaluate performance and lens protection. If burning or flaming occurs, it indicates that the protective lens may be damaged, contaminated, or out of focus. A damaged lens can lead to improper energy distribution, reducing welding quality and causing potential safety hazards. Regular inspection and cleaning of the protective lens are crucial to maintaining stable laser output. If signs of burning appear, immediate troubleshooting is required to replace the lens or adjust the focus position, ensuring efficient and precise welding results while preventing further damage.

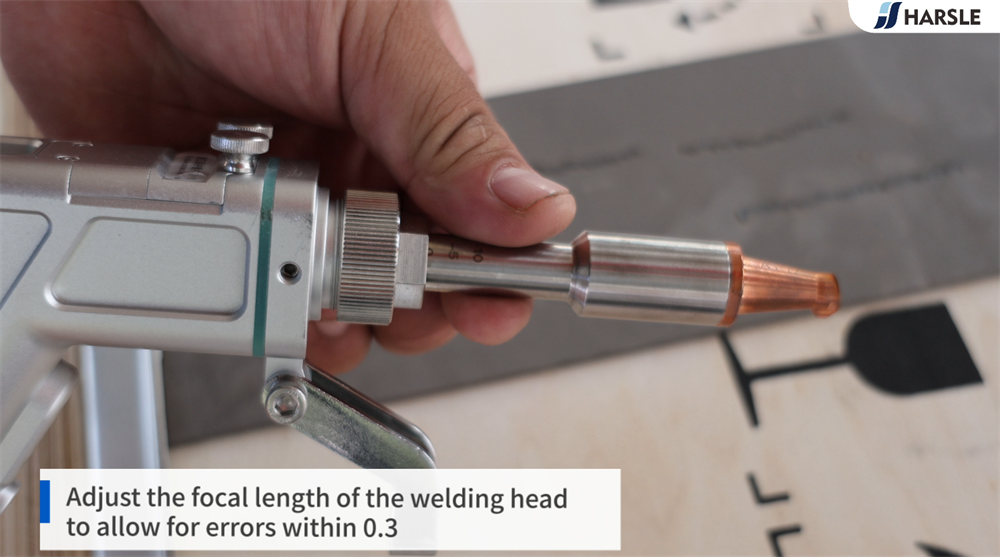
Precise Adjustment of Welding Head Focal Length for Accuracy
Adjusting the focal length of the welding head is crucial for achieving high-precision and consistent weld quality. To allow for minimal errors within 0.3mm, fine-tune the focal position based on the material thickness and welding parameters. Proper alignment ensures optimal laser energy concentration, resulting in deep penetration and strong welds. Use a calibration tool or an automatic focusing system for accurate settings. Regularly check for misalignment or lens contamination, as these can affect weld precision. A correctly adjusted focal length improves stability, reduces defects, and enhances the overall efficiency of the laser welding process.
Sparks and Smooth White Weld Marks Indicate Normal Laser Welding
During laser welding, the presence of sparks is completely normal, indicating proper energy transfer and material fusion. These sparks result from the high-intensity laser melting the metal surface, creating a strong weld. Additionally, normal weld marks should appear smooth and white, signifying a clean and oxidation-free weld. A consistent argon gas flow helps achieve this smooth finish by preventing contamination. If the weld marks appear rough, discolored, or porous, it may indicate improper gas shielding or incorrect welding parameters. Maintaining the right settings and ensuring a stable welding environment will produce high-quality, defect-free welds with a strong bond.

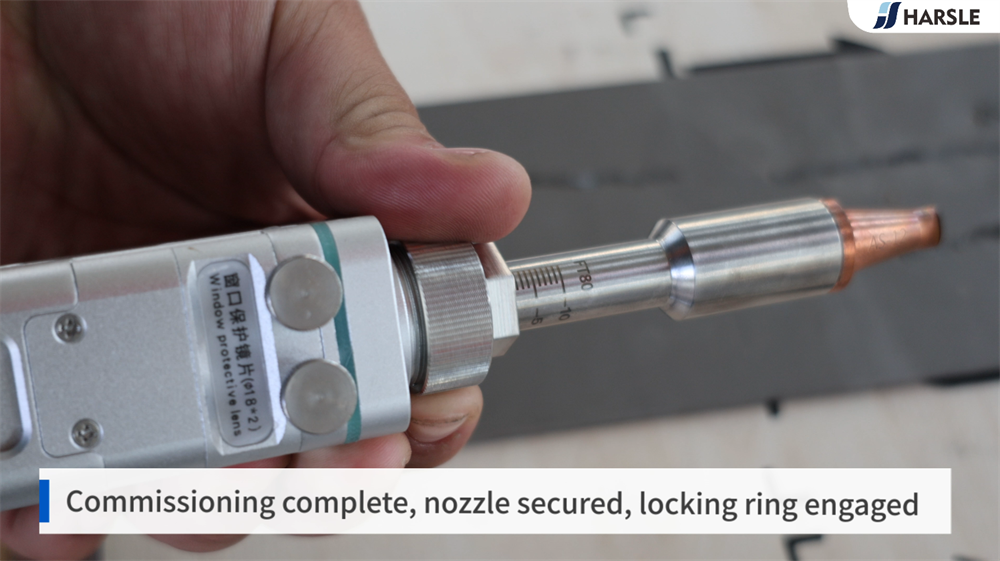
Nozzle Secured and Locking Ring Engaged After Commissioning
After completing the commissioning process of a laser welding machine, it is crucial to ensure that all components are securely in place for optimal performance. The nozzle must be properly positioned and firmly secured to guarantee precise gas flow and prevent contamination. Additionally, the locking ring should be fully engaged to maintain stability during operation. A properly installed nozzle and locking ring help achieve consistent weld quality and prevent misalignment. Before starting the welding process, perform a final check to confirm all connections are tight and the system is operating correctly to ensure safe and efficient welding results.
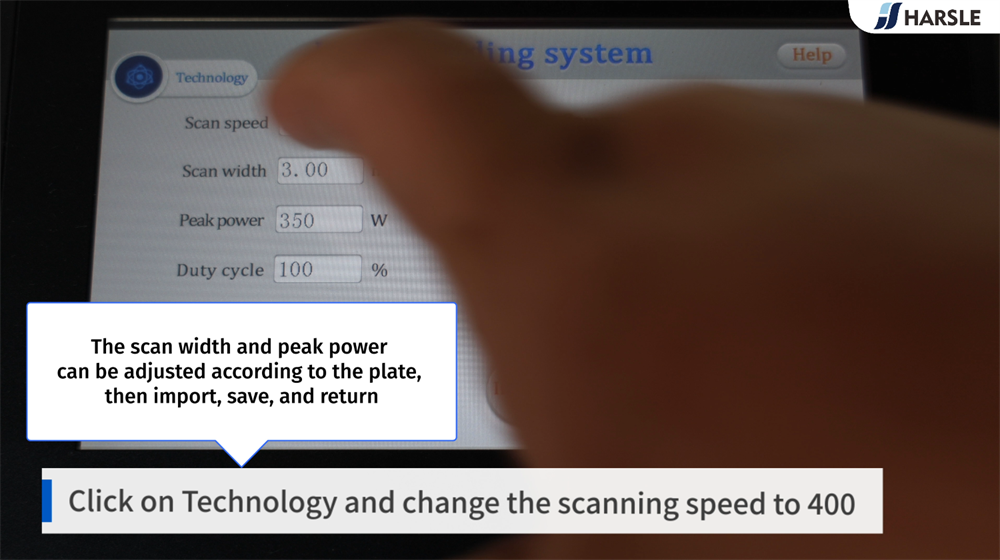
Adjusting Scanning Speed and Power in Laser Welding Technology
To optimize laser welding performance, navigate to the Technology settings and adjust key parameters. Start by changing the scanning speed to 400, ensuring smooth and precise welding. The scan width and peak power should be adjusted based on the material type and thickness for optimal weld quality. After configuring the settings, import the changes, then save and return to apply them. Proper adjustments enhance weld penetration, reduce defects, and improve efficiency. Always verify the parameters before welding to achieve consistent and high-quality results. Fine-tuning these settings is essential for precision and control in laser welding operations.
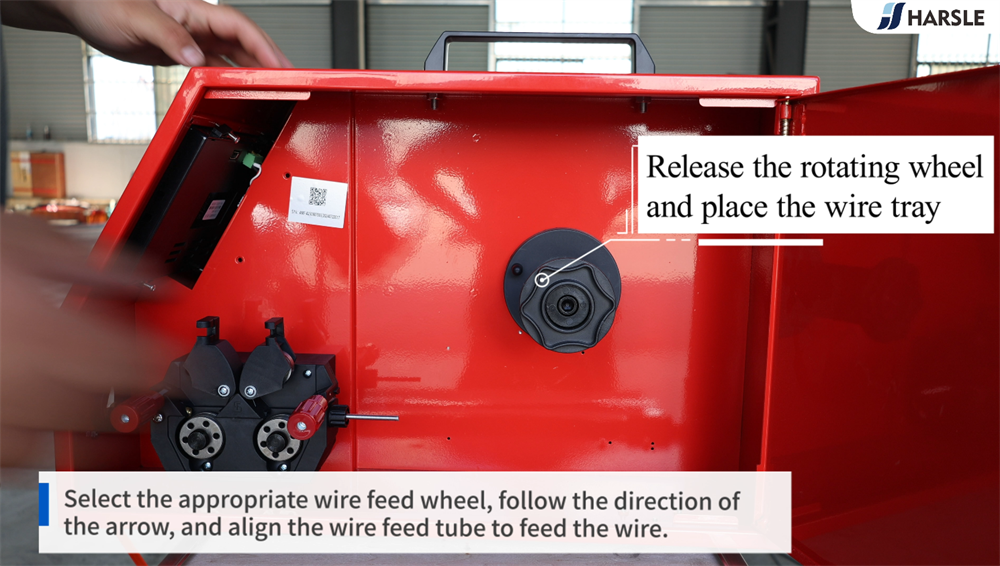
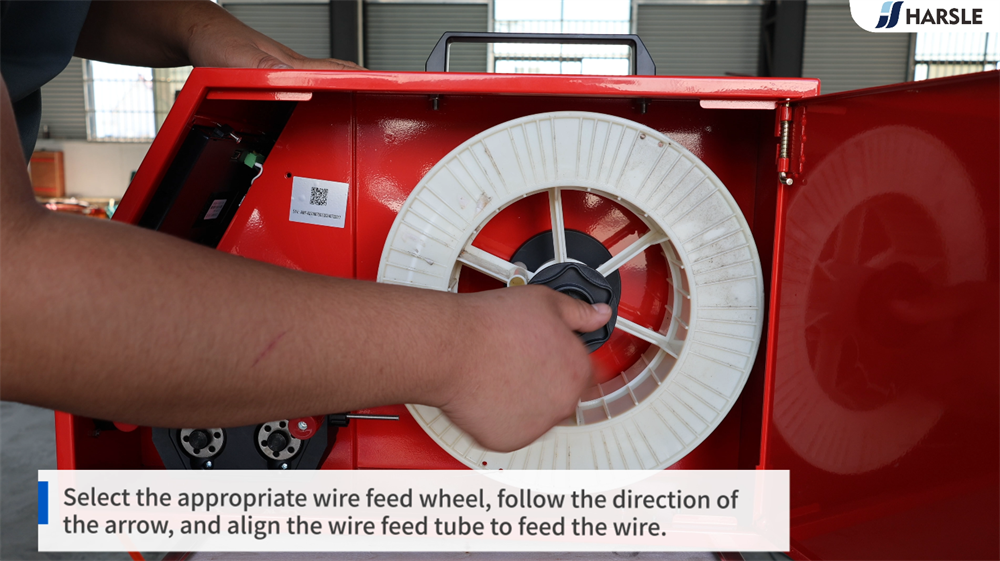
Wire Feeder Connection
Release the rotating wheel and place the wire tray. Select the appropriate wire feed wheel, follow the direction of the arrow, and align the wire feed tube to feed the wire. Loosen the fixture and feed the wire manually.


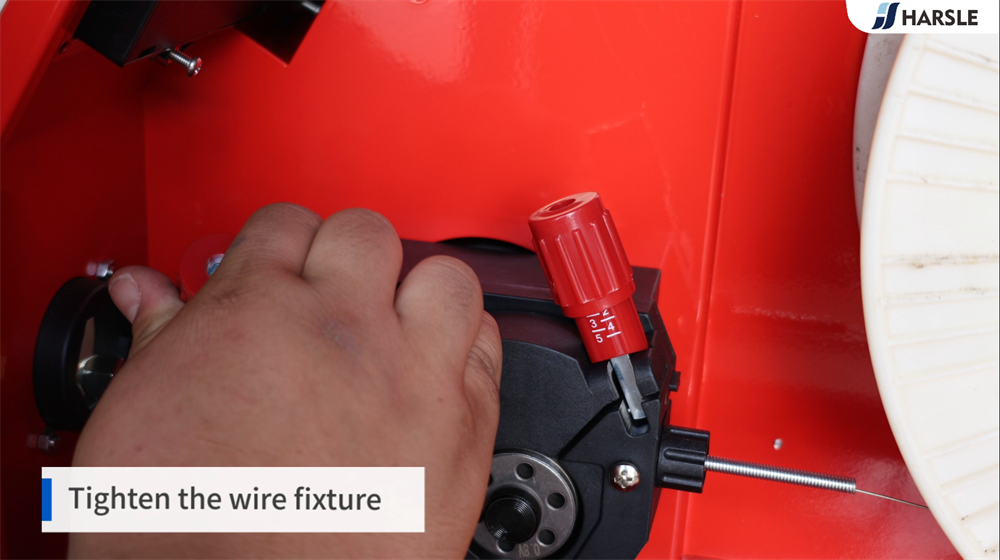
Tighten the wire fixture
Ensuring the wire fixture is properly tightened is essential for stable and precise laser welding. A loose fixture can cause wire misalignment, leading to inconsistent welds and potential defects. Begin by positioning the welding wire correctly in the feeder and securing it firmly using the adjustment screws or clamps. Avoid overtightening, as it may damage the wire or restrict smooth feeding. Regularly inspect and adjust the fixture to maintain consistent tension and stability. Proper tightening ensures accurate wire delivery, reduces welding errors, and enhances overall weld quality, resulting in stronger and more precise metal joints.
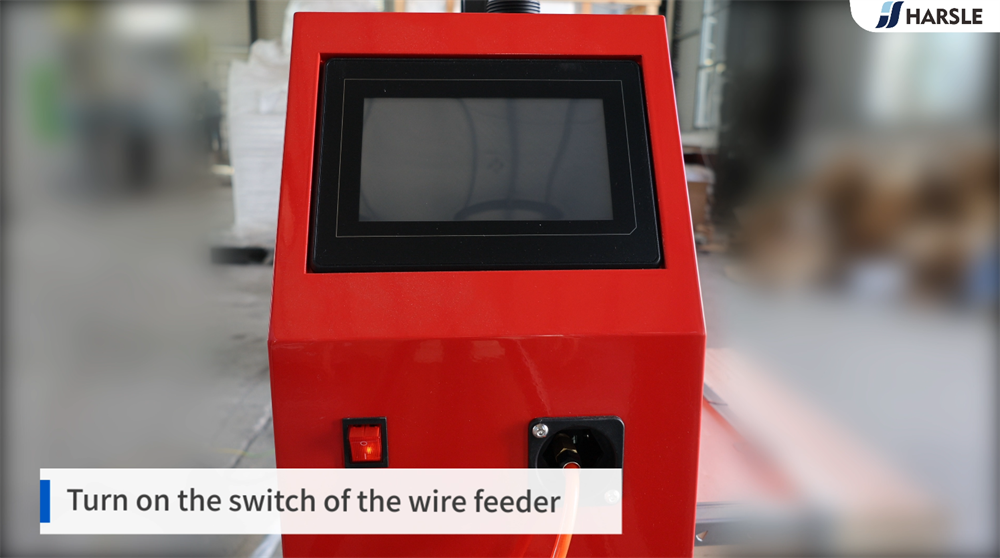
Turn on the switch of the wire feeder
To begin the laser welding process, it is essential to properly turn on the switch of the wire feeder. The wire feeder supplies the filler material continuously, ensuring a stable and precise weld. Before turning on the switch, check that the wire spool is properly installed and that the feeder is free from obstructions. Once the switch is activated, observe the wire movement to ensure smooth feeding without interruptions. Proper adjustment of the wire speed and tension is crucial for consistent weld quality. Regular maintenance and calibration of the wire feeder help prevent feeding issues and enhance welding efficiency.
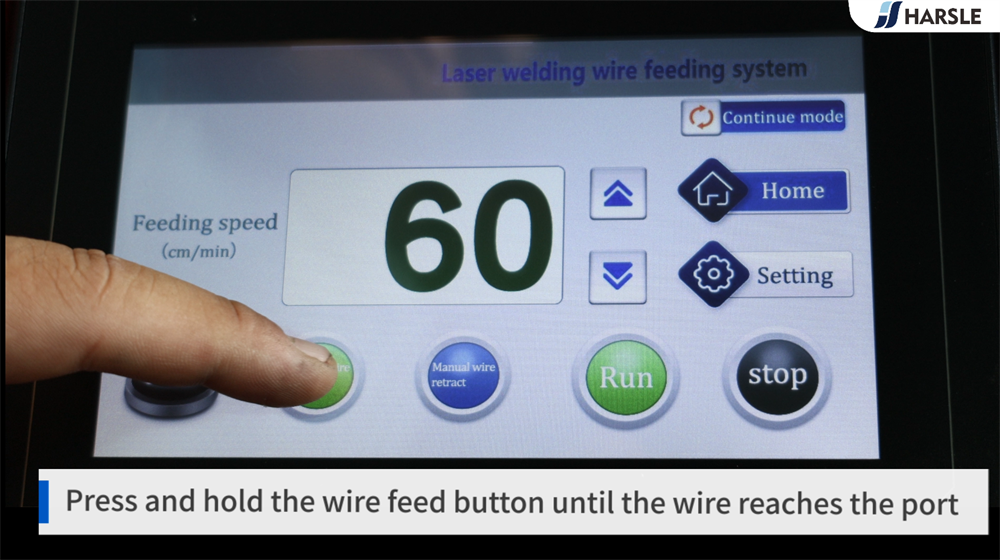
Proper Wire Feeding Procedure for Laser Welding Machines
To ensure smooth operation of a laser welding machine, properly feeding the welding wire is essential. Begin by inserting the wire into the designated wire feeder inlet. Next, press and hold the wire feed button to activate the automatic feeding mechanism. Continue holding the button until the wire reaches the welding port and is properly positioned for use. Make sure there are no tangles or obstructions in the wire path to ensure a steady feed. Regularly inspect the wire spool and feeder system for wear or debris to maintain optimal weld quality and prevent interruptions during operation.
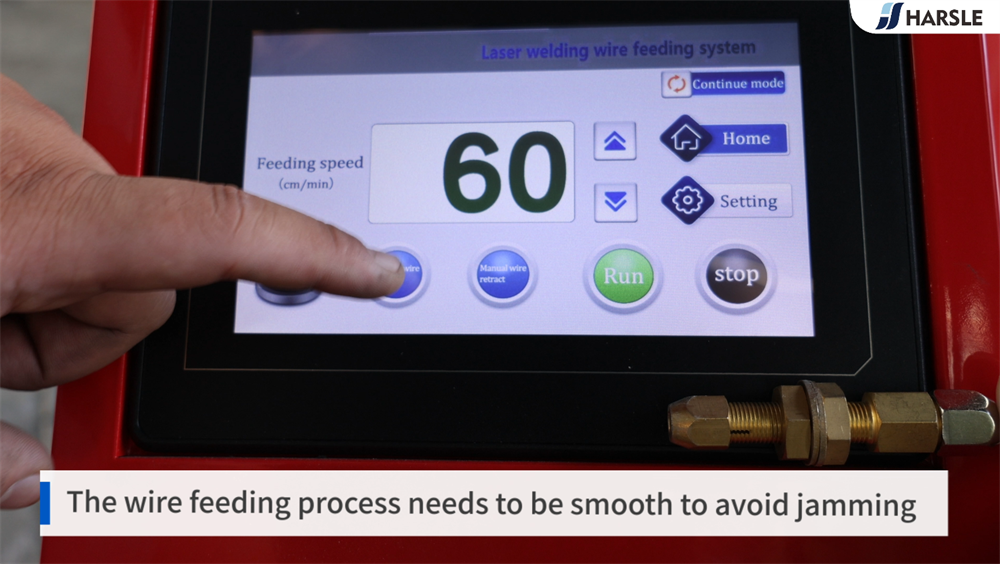
Ensuring a Smooth Wire Feeding Process in Laser Welding
A smooth wire feeding process is crucial for stable and efficient laser welding. Any interruption, such as jamming or uneven feeding, can lead to inconsistent welds, defects, or even equipment damage. To prevent issues, ensure the wire spool is properly installed and the feeding mechanism is clean and well-lubricated. Regularly inspect the wire feeder, rollers, and nozzles for obstructions or misalignment. Adjusting the tension and speed settings according to the welding material can also help maintain a steady wire supply. Proper maintenance and monitoring of the wire feeding system ensure precise welding results and enhance overall machine performance.
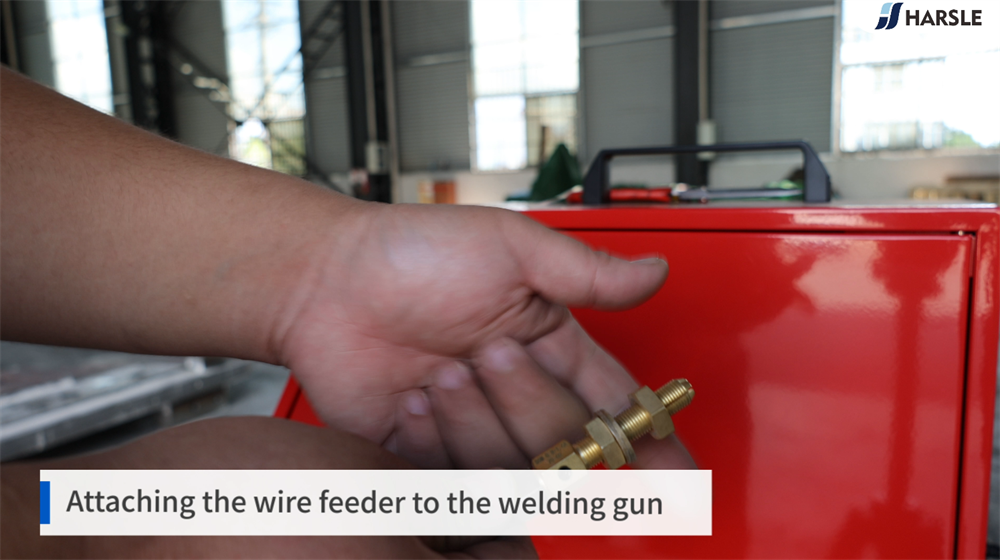
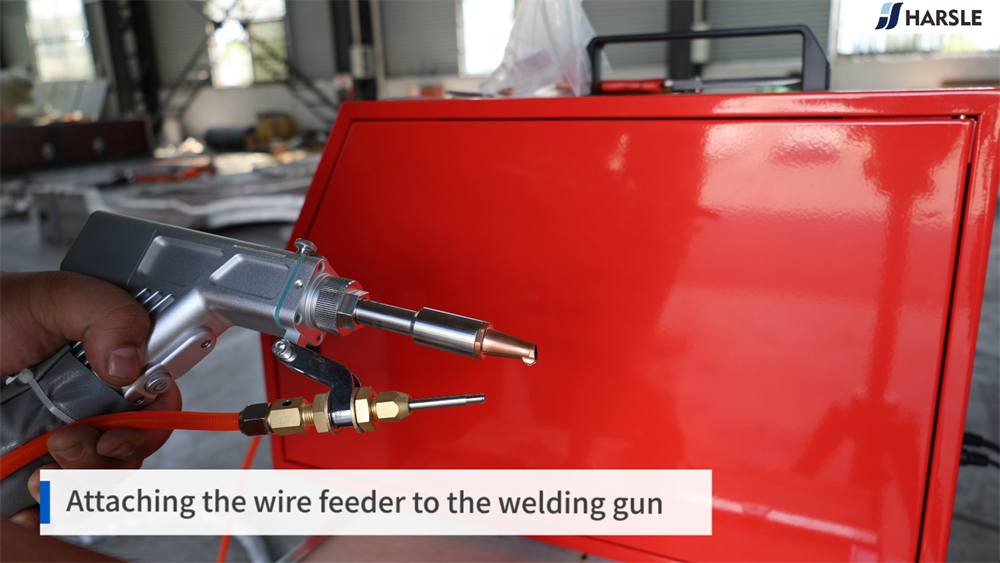
Attaching the wire feeder to the welding gun
Attaching the wire feeder to the welding gun is a crucial step in ensuring smooth and consistent wire delivery during welding. Begin by aligning the wire feeder mechanism with the gun’s inlet and securely fastening the connection to prevent slippage. Thread the welding wire through the feeder, ensuring it moves smoothly without obstructions. Adjust the tension settings to maintain a steady wire flow, preventing feeding issues or breakage. Proper attachment improves arc stability, enhances weld quality, and minimizes wire jams. Regularly inspect and maintain the connection to ensure optimal welding performance and long-term equipment reliability.
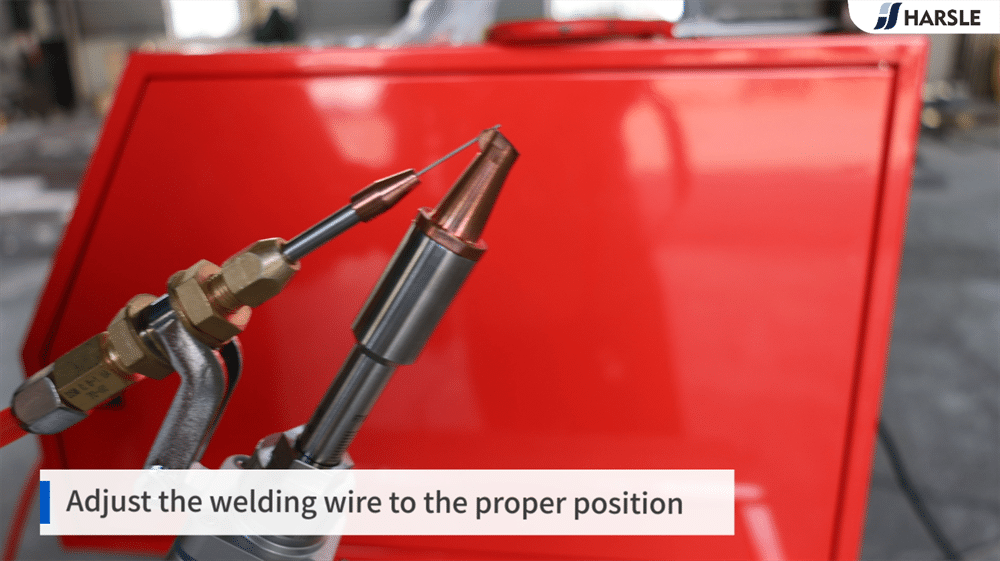
Adjust the welding wire to the proper position
Ensuring the welding wire is in the correct position is crucial for achieving strong, precise welds in laser welding. Begin by aligning the wire feeder so that the wire is centered in the welding area. Adjust the wire feed angle and length based on the material thickness and welding parameters. The wire tip should be positioned precisely at the focal point of the laser beam to ensure even melting and minimal spatter. Proper alignment enhances weld penetration, reduces defects, and improves efficiency. Regularly inspect the wire feeding mechanism to maintain smooth operation and consistent welding quality.
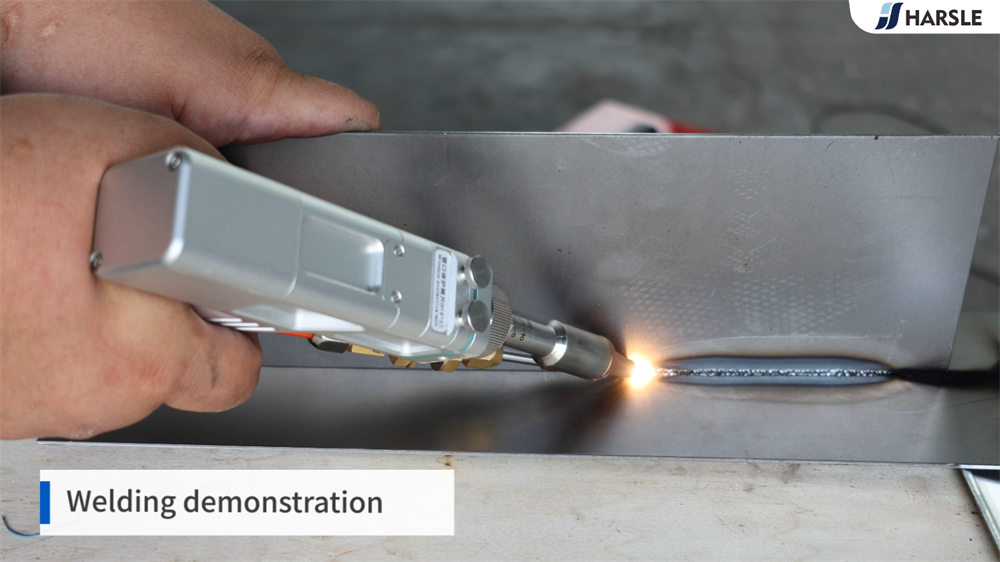
Welding demonstration
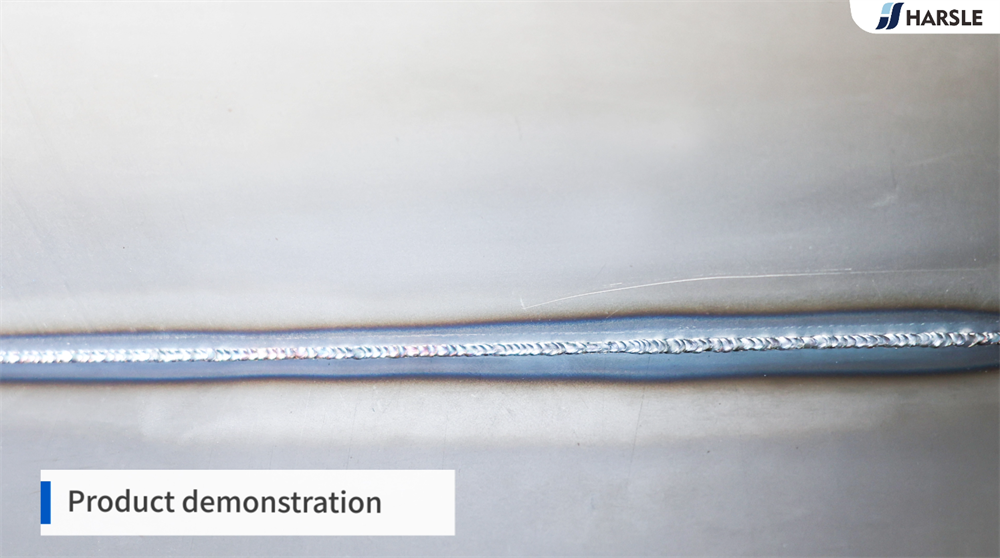
Product demonstration
Thank you for following the HARSLE Laser Welding Machine Tutorial. By carefully following the detailed setup and operational steps outlined here, you have laid the foundation for achieving precise and reliable welding results across a wide variety of materials. With proper calibration and configuration, you can ensure that your HARSLE laser welding machine consistently delivers high-quality performance, enhancing the efficiency of your daily manufacturing processes.
Regular maintenance is critical for long-term performance and machine longevity. We strongly recommend routine checks such as monitoring water levels, inspecting protective lenses for any signs of wear or damage, and ensuring that the wire feed mechanism is properly aligned to avoid jamming or other operational issues. Regular attention to these details will not only help you avoid potential breakdowns but also maintain the machine’s energy efficiency and operational precision. Always be vigilant about monitoring key system indicators, such as water temperature and gas pressure, to ensure that the machine operates in optimal conditions, safeguarding the quality of your welds.
For those looking to further enhance their machine’s capabilities, HARSLE offers a wealth of additional resources. Whether you are interested in advanced configurations, seeking tips for optimizing machine performance, or need help troubleshooting specific issues, our website provides a variety of tutorials, guides, and technical insights. In addition, our dedicated technical support team is always available to provide personalized assistance and advice, helping you get the most out of your equipment. We are committed to ensuring that your HARSLE laser welding machine continues to meet the demands of your business with unmatched accuracy and efficiency.
Thank you for choosing HARSLE, and we look forward to seeing how you use your laser welding machine to achieve outstanding results in your field!


