https://www.youtube.com/watch?v=c3lX3gjhngAStruggling with inefficiency or poor results in the laser cutting process? Discover proven techniques to master precision and efficiency effortlessly in your operations.
To master the laser cutting process, focus on three key factors: selecting the right laser settings, ensuring proper material preparation, and conducting regular machine maintenance. Optimizing these aspects improves precision, reduces errors, and enhances efficiency, making your laser cutting projects flawless.
Ready to dive deeper? Let’s explore each step in detail to refine your laser cutting skills.
Laser Cutting Process
Laser cutting process that uses a laser beam to cut materials with high precision. The laser beam is directed onto the material being cut, which causes the material to melt, burn, vaporize, or be blown away by a jet of gas, depending on the type of laser and the material being cut.
The laser beam is typically generated by a laser resonator and focused by a series of mirrors and lenses before being directed onto the material. The focused laser beam has a high power density, which allows it to melt or vaporize the material at the point of contact, creating a narrow cut with high precision.
Laser cutting can be used to cut a wide range of materials, including metals, plastics, wood, paper, and fabrics. It is commonly used in manufacturing for cutting and shaping parts and components for various applications, such as aerospace, automotive, electronics, and medical devices.
Laser cutting is a versatile and efficient process that offers several benefits over traditional cutting methods, such as high accuracy, speed, and repeatability. It also produces a clean and precise cut without the need for secondary processing, such as sanding or polishing.
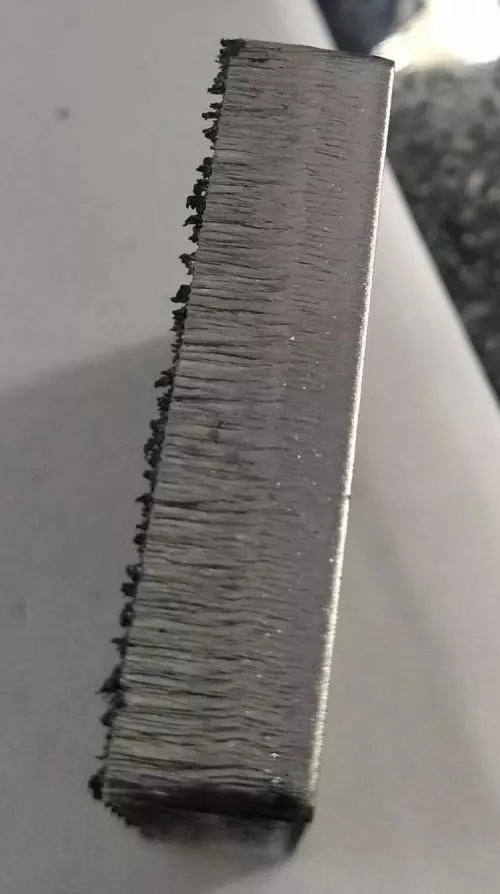
Carbon Steel
| Problem | Reason | Solution |
 | 1. Atmospheric pressure | 1. Reduce air pressure |
 | 2. Low focus3. Nozzle is too large | 2. Improve focus3. Use a small nozzle |
| Layered at the bottom, wrinkles appear | ||
 | 1. Excessive air pressure2. Cutting speed is too slow | 1. Reduce air pressure2. Speed up the cutting |
| Small streaks appear on the section | ||
 | 1. Low air pressure2. Focus is too low3. Small nozzle4. Fast cutting speed | 1. Increase air pressure2. Improve focus3. Change the large nozzle4. Reduce cutting speed |
| There are welding slag and welding spots on the bottom | ||
 | 1. Too much energy2. Excessive air pressure3. Cutting speed is too slow | 1. Reduce peak power2. Reduce air pressure3. Speed up the cutting |
| Burnt at the bottom | ||
 | 1. Polarized light2. Protect the lens from dirty3. Cutting speed is too fast4. The nozzle is not round or the nozzle is blocked | 1. The center of dimming2. Clean the protective lens or replace the protective lens3. Reduce the cutting speed4. Replaced nozzle |
| Bad cut to the side | ||
 | 1. Cutting speed is too slow | 1. Speed up the cutting speed |
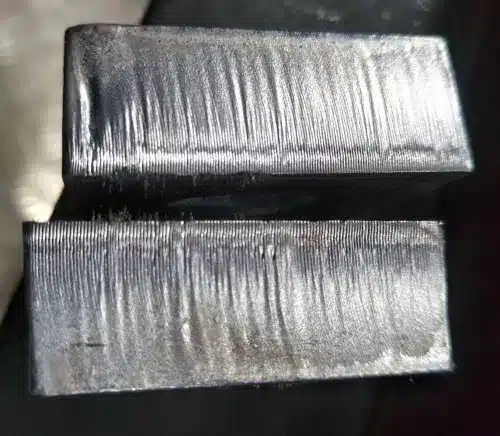
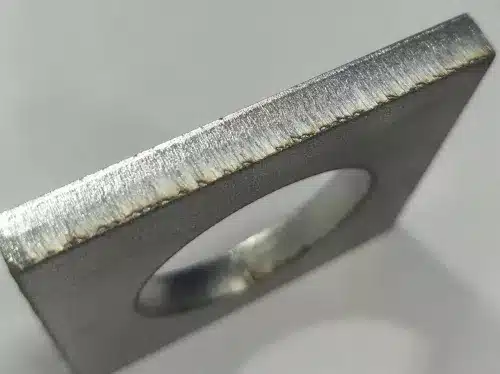
| Small fine lines on the section with molten iron at the bottom | ||
 | 1. Cutting speed is too fast2. The air pressure is too low3. Wrong focus | 1. Reduce the cutting speed2. Increase the air pressure3. Adjust focus |
| Hot metal on the surface | ||
 | 1. Cutting speed is too fast | 1. Reduce the cutting speed |
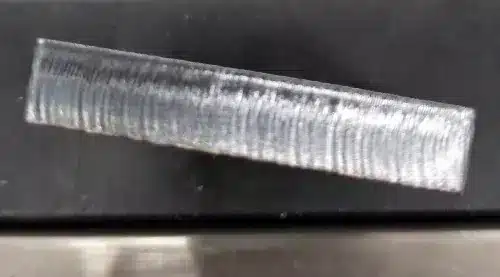
| Sectional Twill | ||
 | 1. The focus is too high2. Excessive air pressure | 1. Reduce focus2. Reduce air pressure |
| There are fine stripes on the upper section of the cut | ||
 | 1. Turning heat is too high | 1. Round the sharp corners2. Use cooling points3. Use power curve |
| Horn burn |
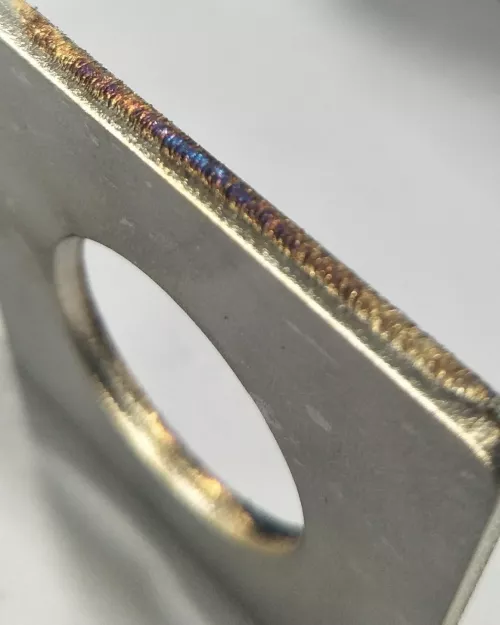
Stainless Steel Craft
| Problem | Reason | Solution |
 | 1. The focus is too high2. Air pressure is too low | 1. Reduce focus |
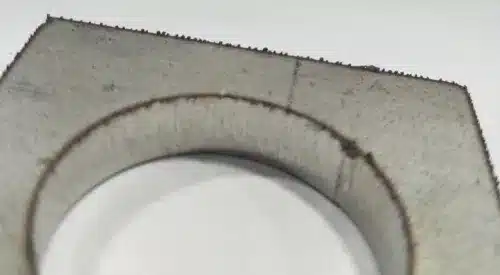
| Striped hard slag hanging on the bottom | ||
 | 1. High focus2. The cutting nozzle height is too low3. Excessive air pressure | 1. Reduce focus2. Increase the nozzle height3. Reduce air pressure |
| The lower part of the section is whitish | ||
 | 1. The focus is too high | 1. Reduce focus |
| Yellowing at the bottom of the section | ||
 | 1. Too fast2. Low focus | 3. Reduce the cutting speed4. Improve focus |
| Small drop-like burrs on the bottom | ||
 | 1. High focus | 1. Reduce focus |
| Corner dregs | ||
 | 1. Protect the lens from dirty | 1. Replace the protective lens |
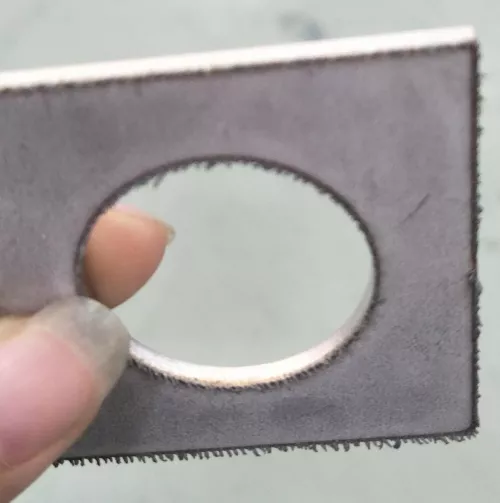
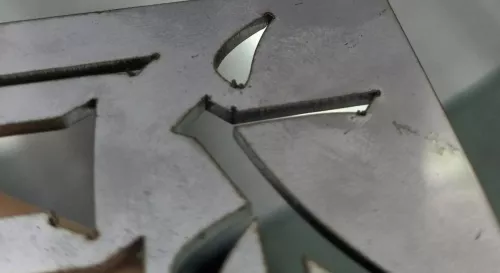
| The slit becomes wider | ||
 | 1. The focus is too low2. Cutting speed is too fast3. The knife is not set | 1. Improve focus2. Reduce the cutting speed3. Use a slow starting point for starting the knife or use a round hole at the starting point of the lead to introduce |
| Rough section, blue light appears in the seam during cutting | ||
 | 1. Polarized light2. Protect the lens from dirty3. The coaxial is not good4. The nozzle is not round | 1. Check the center of the light2. Clean or replace the protective lens3. Check the coaxial4. Replaced nozzle |
| One side or both sides are not cut well, the other side is cut well | ||
| 1. The gas is impure2. Air or oxygen in the trachea | 1. Nitrogen purity requirement 99.99%2. Check the gas path3. Check delay |
| Yellow section |
Carbon Steel Perforation Process
| Problem | Reason | Solution |
 | 1. Perforation frequency is too high2. Punching power is too large3. Too much air pressure | 1. Reduce frequency by 10% each time2. Reduce the duty cycle, 1%-2% each time3. Reduce air pressure, 0.1bar each time |
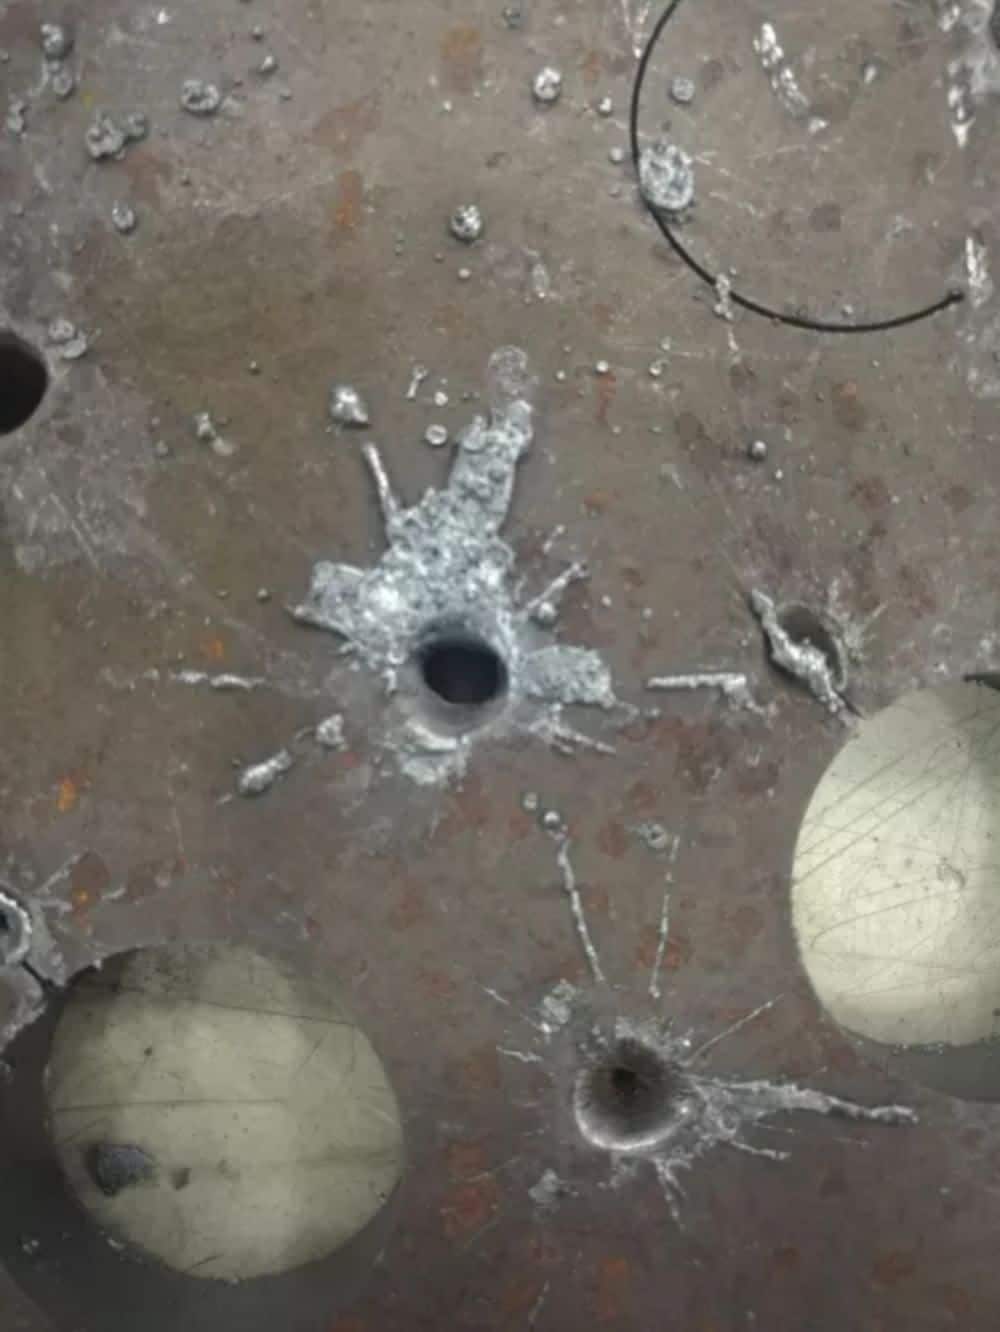
| Light blasthole | ||
 | 1. Perforation frequency is too high2. Punching power is too large3. Too much air pressure | 1. Reduce frequency by 10% each time2. Reduce the duty cycle, 1%-2% each time3. Reduce air pressure, 0.1bar each time |
| Blast hole during piercing | ||
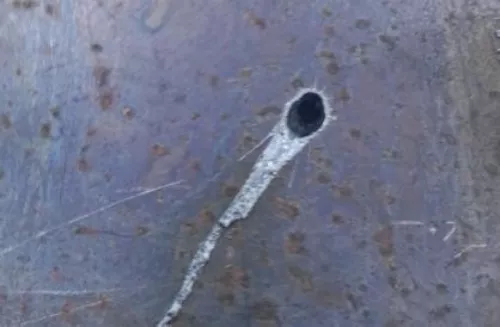 | 1. Insufficient punch time2. Punching power is low | 1. Increase the punching time, every time 0.5sec2. Increasethepunchingpower, 5% each time3. Increase the duty cycle, every time |
| End of piercing and start cutting blasthole |
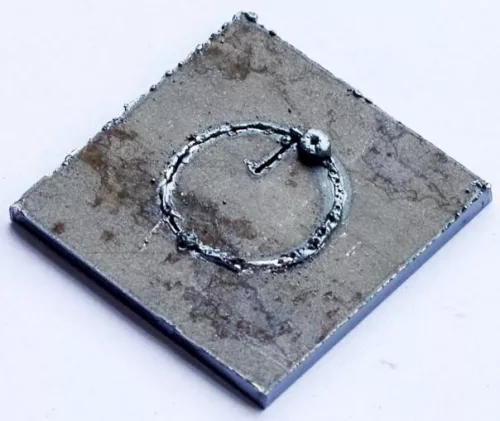
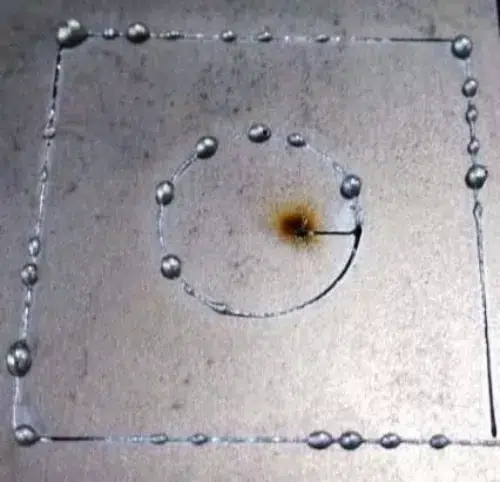
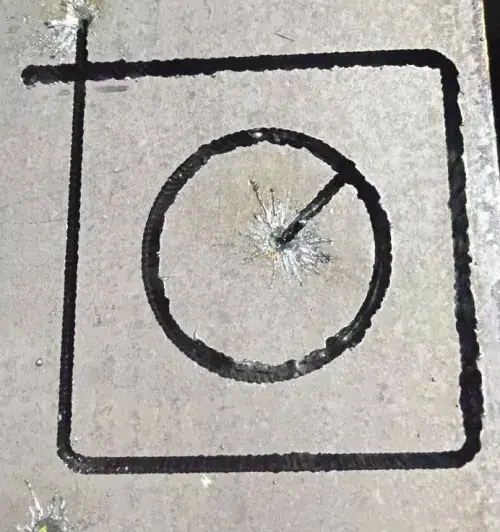
1. Common blasting at the beginning is divided into three stages. The order of piercing is three-level, two-level, and one-level post-cutting. For example, in the first segment of blasting at the beginning of piercing, we need to adjust the three-level piercing parameters.

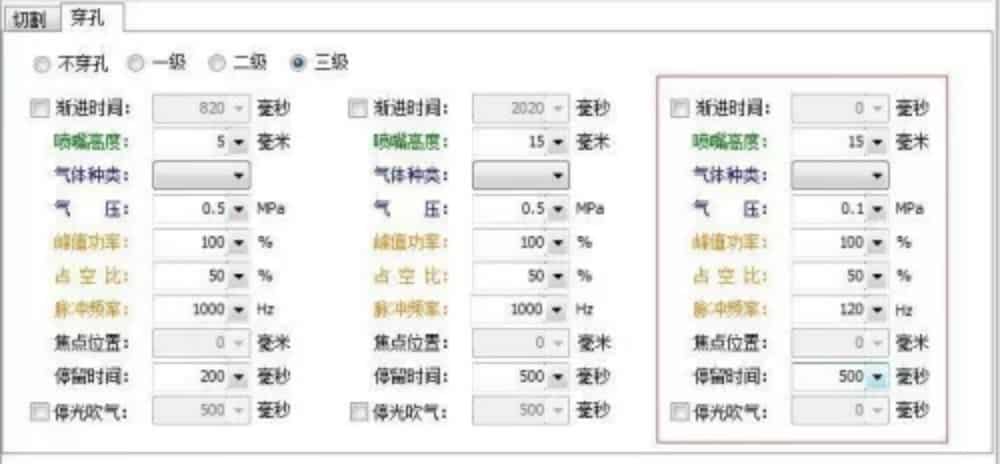
As shown in the picture above, the hole is blasted at the beginning of the three-level perforation. First choose Hongshan thick plate, the processing method is as follows.
1. Check whether the perforation air pressure exceeds the standard, generally the perforation air pressure is between 0.04mpa-0.15mpa

2. Check the nozzle height, the blasting height is generally between 12mm-20mm.
3. Lengthening the progression time and perforation residence time is the most direct way to slow down the perforation speed
4. Reducing the piercing frequency or piercing duty cycle can deal with blasting, the frequency is average 50HZ-1000HZ, duty cycle 30%-70%.
5. Stop blowing air must be checked to help blow off the slag generated during perforation.
6. Rust or other labels attached to the plate will also affect the quality of the perforation.
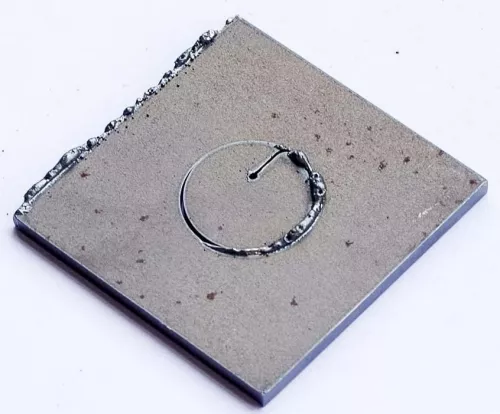
As shown in the figure below, when the second and third poles are perforated, the blasting is the same. The specific link is blasted, so modify that one.
As shown in the picture on the left, the blasting occurs when the piercing reaches the second stage. It is necessary to check several important factors affecting perforation in the second stage.
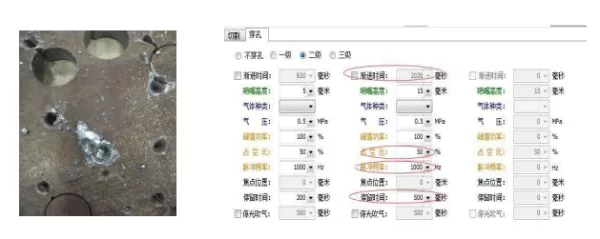
Note: Generally lengthening the piercing time and gradual time, reducing the duty cycle and frequency is a direct way to slow down blasting lead.
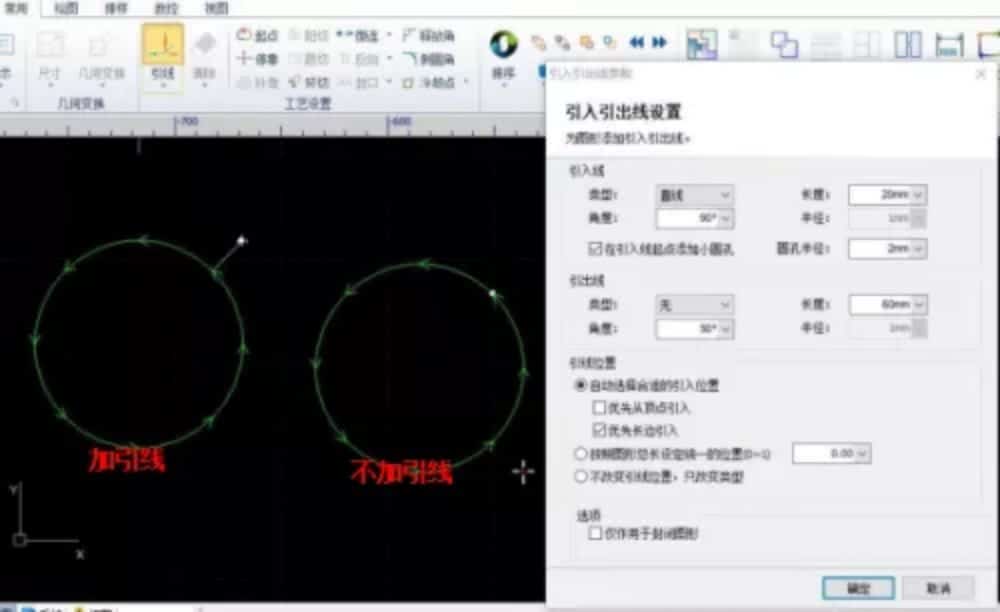
Lead-in line: the line connecting the punching position and the contour of the workpiece, called lead-in line or lead-in line.