


The ESA S650 Semiautomatic Mode Corrections feature allows operators to directly adjust bend angles and back-gauge positions from the semiautomatic page, providing greater flexibility and precision during production. By mastering ESA S650 Semiautomatic Mode Corrections, you can apply corrections either to a single bend or to all bends with the same angle within a section, improving efficiency and ensuring consistent results.
This guide will walk you through using the semiautomatic page, entering corrections, extending adjustments to multiple bends, and understanding the impact of internal radius changes on stretching calculations.
Dostęp do strony półautomatycznej
Step 1: Entering the Semiautomatic Mode
When the ESA S650 is in ZATRZYMYWAĆ SIĘ, the semiautomatic page automatically appears. This page is the central hub for making precise corrections to the bend angles and back-gauge positions. Operators can edit Y1, Y2, and X axes corrections directly from this page without returning to the Editor page, saving time and reducing the risk of mistakes.
On this page, each editable field is clearly displayed, and when a correction is applied, the system uses color reversal to indicate which values have been changed. This visual feedback helps prevent errors, especially when multiple bends require adjustments.
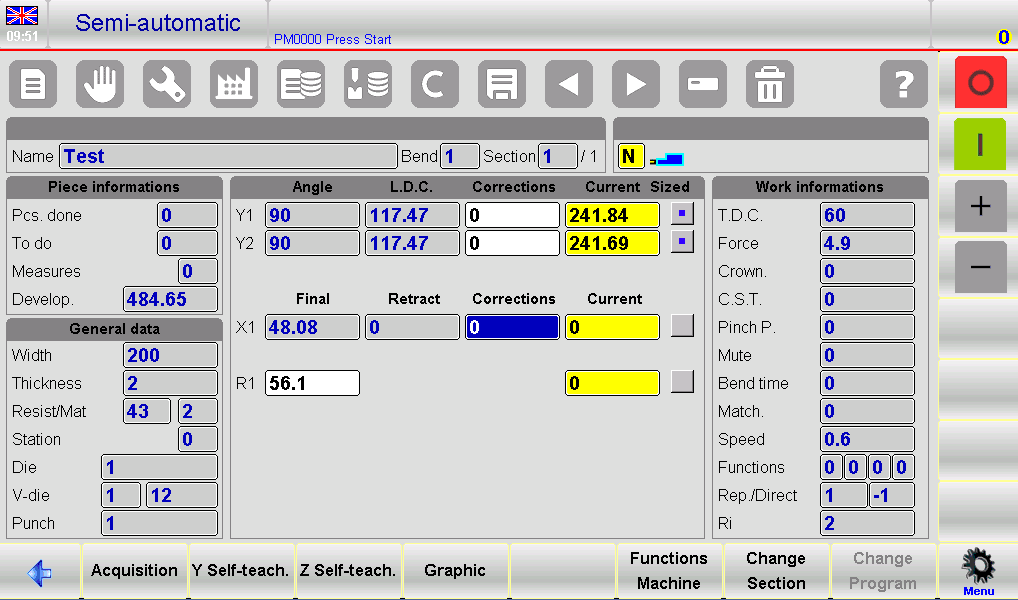
Kiedy START button is pressed, the semiautomatic page switches to a read-only format, allowing operators to observe the corrections without accidentally altering them during operation. This safeguard ensures production continues smoothly while keeping all corrections intact.
How to Make Bend Corrections
Step 2: Correcting Individual Bends
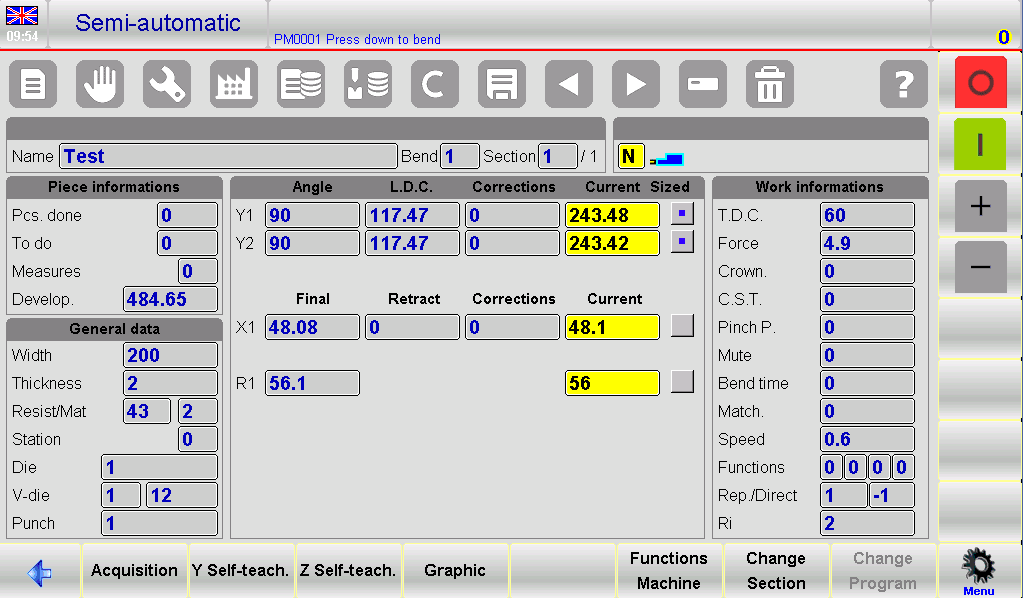
To adjust a specific bend, simply enter the desired corrections on the semiautomatic page. Corrections can be made to the kąt or the position of back-gauge axes, providing precise control over the bending process.
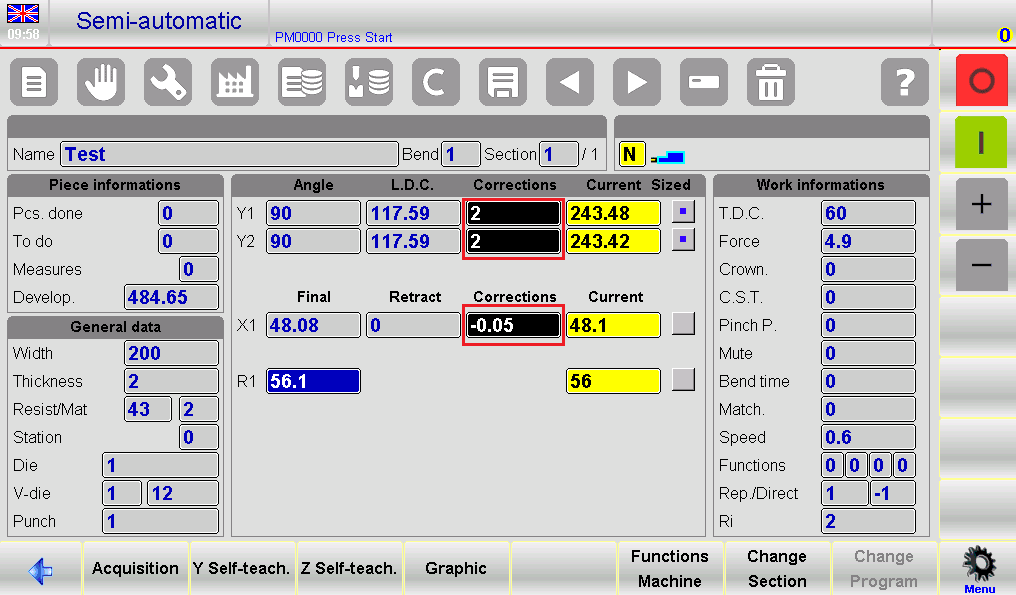
Each time a value is changed, the corresponding field highlights with reversed colors. This ensures the operator can quickly identify which bends have been modified, maintaining clarity even during complex programs with multiple steps. Corrections are immediately applied to the current bend, and the machine updates in real-time, allowing operators to see the results of their adjustments without delays.
Step 3: Applying Corrections to All Equal Bends in a Section
For efficiency, the ESA S650 allows extending corrections to all bends in a section that share the same angle as the currently edited bend. To do this:
- Naciśnij przycisk menu to open the sub-menu.
- Wybierać [Konf. Sek. Równe Zgięcie].
This feature eliminates the need to manually adjust each bend individually when multiple bends in the section require the same correction, significantly reducing setup time and improving consistency.
Step 4: Applying Corrections to the Entire Piece
If a correction needs to be applied to the entire piece, including all bends with the same angle, use the [Conf. Pr. Equal Bend] function:
- Open the sub-menu by pressing the przycisk menu.
- Wybierać [Conf. Pr. Equal Bend].
This ensures that every bend across the piece that matches the angle of the current bend receives the same correction. This is particularly useful in production runs requiring consistent bends across multiple pieces, such as sheet metal panels for automotive or construction applications.
Step 5: Corrections for Special Bends
Certain bends, such as coining bends, complex shapes, or bends outside standard V-dies, may require specific adjustments. These can be executed directly from the semiautomatic page using the same principles:
- Make angle corrections to Y1 and Y2 individually if each cylinder behaves differently.
- Apply back-gauge corrections for X-axis positioning to ensure the sheet aligns precisely.
- Use color-coded feedback to monitor which adjustments have been implemented.
These capabilities allow operators to correct bends in real-time, reducing scrap and increasing productivity without returning to program editing.
Adjusting the Internal Radius
Step 6: Viewing and Editing Internal Radius
Ten internal radius is a critical parameter that influences stretch calculations. Operators can view and adjust the internal radius on the Editor page. Key points to note:
- The radius is always calculated, whether the program is numeric or graphic.
- Any change to the internal radius affects the stretch calculation only if the program is numeric.
- For graphic programs, changes to the radius will not recalculate the stretching, but can be used for reference.
By understanding how the internal radius interacts with bend corrections, operators can achieve precise bending results. Adjustments to the internal radius should be cross-checked with the calculated bend angles and back-gauge positions to avoid misalignment or inaccuracies.
Practical Tips for Operators
- Always confirm the current bend angle and section before applying corrections.
- Użyj color-coded feedback to ensure no bends are missed during correction.
- For high-volume production, apply section-wide or piece-wide corrections to maintain uniformity.
- Regularly monitor internal radius adjustments to maintain consistent stretch calculations.
- If a correction produces unexpected results, use the [Undo Correct.] key to revert to the previous values.
By following these practices, operators can leverage ESA S650 Semiautomatic Mode Corrections to maximize accuracy and reduce production errors.
Często zadawane pytania (FAQ)
What are ESA S650 Semiautomatic Mode Corrections?
They are adjustments to bend angles and back-gauge positions that can be applied directly from the semiautomatic page for individual bends or groups of bends.
How do I extend corrections to all bends in a section?
Użyj [Konf. Sek. Równe Zgięcie] function from the semiautomatic page sub-menu.
Does changing the internal radius affect all programs?
No. Internal radius adjustments affect numeric programs only. Graphic programs will not recalculate stretch automatically.
Wniosek
Mastering ESA S650 Semiautomatic Mode Corrections is essential for achieving accurate and consistent bending results. By learning how to adjust Y1, Y2, and X-axis corrections directly from the semiautomatic page, operators can quickly optimize bend angles and back-gauge positions without returning to the editor page. Functions such as Conf. Sec. Equal Bend I Conf. Pr. Equal Bend further improve efficiency by allowing corrections to be applied across sections or entire workpieces with the same bend angle.
Understanding how internal radius settings influence stretch calculations is also important for maintaining precision, especially in numeric programs. With proper correction management and careful verification during production, operators can reduce setup time, minimize material waste, and improve overall bending quality.
For more detailed technical support, machine operation guidance, or additional ESA S650 documentation, feel free to contact HARSLE. You can also explore more tutorials and troubleshooting articles on our website to further improve your prasa krawędziowa productivity and performance.


