


Tube Bender Setup and Calibration is the foundation of achieving high-precision results in any tube fabrication process, especially when working with automotive components, HVAC tubing, furniture frames, or complex industrial assemblies. If you’re wondering how proper setup and accurate calibration influence the final bending quality, you’re in the right place. In this article, I’ll walk you through the essential setup steps, calibration techniques, and practical methods that help you minimize errors and achieve consistent bending performance. Whether you’re new to tube bending or looking to improve your current workflow, this guide will give you a clear and practical path to reliable, repeatable results.
How to Perform Tube Bender Setup for Maximum Accuracy
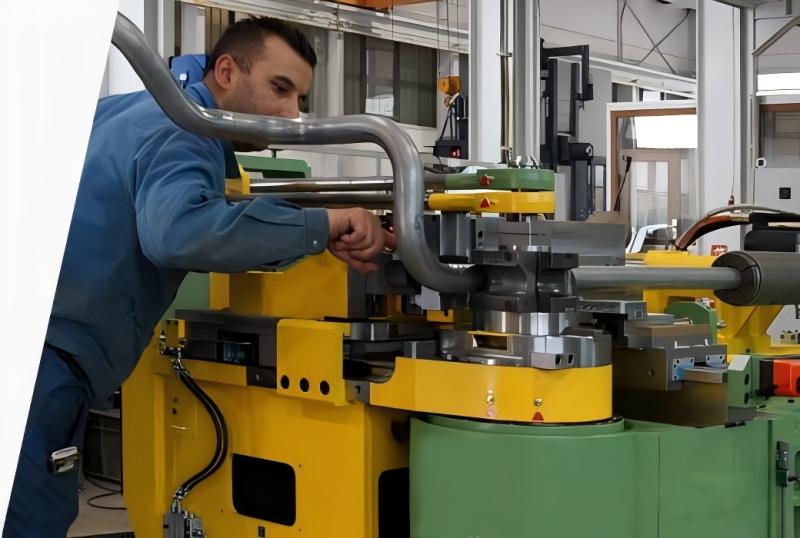
Step 1: Preparing the Machine and Work Area
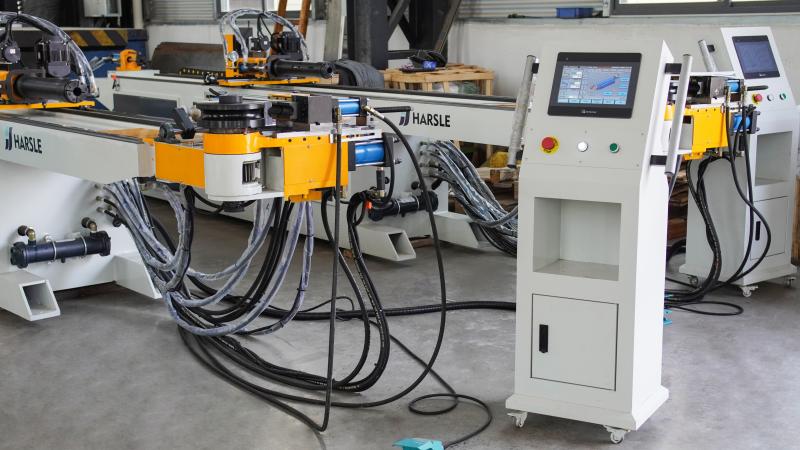
Before I begin any tube bender setup, I always make sure the work area is organized and free from debris. A stable and clean workspace prevents unexpected movement during bending and ensures accurate calibration later on. I also check that the machine is correctly anchored to the floor and that the base is level. Even slight unevenness can lead to angle deviations or wrinkling during bending.
Step 2: Selecting the Correct Tooling for the Material
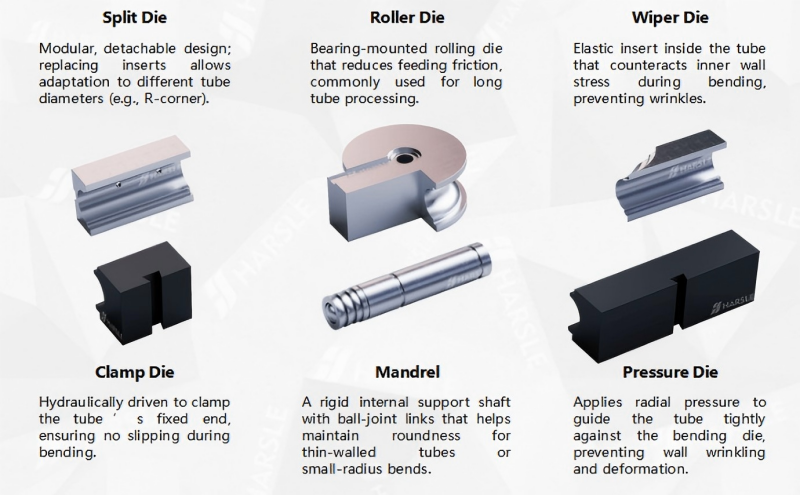
Choosing the right tooling is one of the most important parts of Tube Bender Setup and Calibration. I match the mandrel, wiper die, pressure die, and bending die to the tube’s material, wall thickness, and outer diameter. Using the wrong tooling combination often results in issues like ovality, springback, or surface marks. If I’m bending stainless steel, for example, I select harder tooling materials to maintain consistent pressure during the bend.
Step 3: Installing and Aligning the Tooling
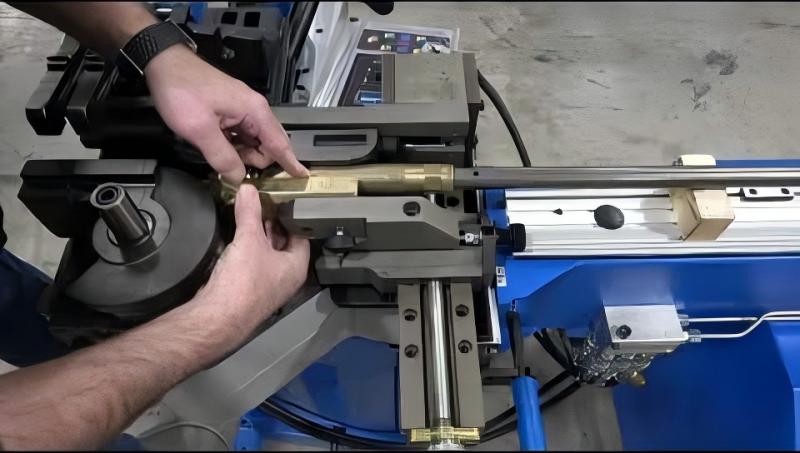
Once the tooling is selected, I install each component carefully, making sure everything is perfectly aligned. Misalignment is one of the most common causes of inaccurate bending angles and distorted shapes. I verify that the mandrel is centered inside the tube, that the pressure die sits flush with the bending die, and that the clamping system is tight. At this stage, I also lubricate the tooling to reduce friction during the bending process.
Step 4: Configuring Machine Parameters
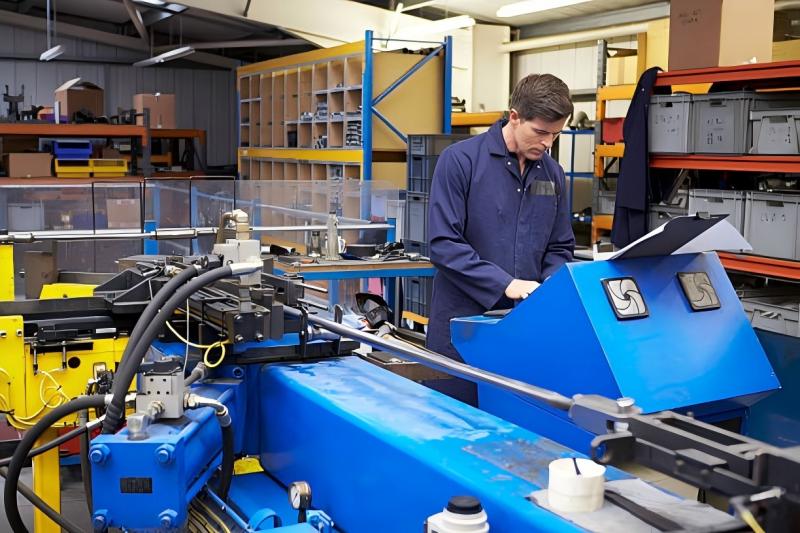
After the physical setup is finished, I move to the tube bender’s control system. I input parameters such as bending angle, bending speed, clamping pressure, and mandrel retraction distance. These values vary depending on the tube material and bending radius. For example, high-strength steel might require slower bending speeds to avoid cracks, while aluminum typically requires more precise control to prevent surface deformation.
How to Calibrate a Tube Bender for Consistent Bending Results
Step 1: Zeroing the Machine Axes

To begin calibration, I first bring all machine axes to their zero point. This includes the rotation axis, bending head, and feeding carriage. Zeroing ensures that the machine reads every movement accurately and helps avoid accumulated errors after multiple bends.
Step 2: Calibrating the Bending Angle
I use a digital angle measuring tool to check the first test bend. Because tube materials behave differently depending on hardness and thickness, springback must always be compensated. I compare the actual angle with the programmed angle and adjust the machine’s compensation value. This step is crucial for maintaining accuracy across long production runs.
Step 3: Calibrating the Tube Feed Length
If the tube bender includes an automated feeding system, I calibrate the feeding length to ensure the tube moves to the exact position before bending. Even a 0.5 mm deviation can affect multi-bend shapes. I run a few test feeds, measure the tube displacement, and fine-tune the feed servo parameters.
Step 4: Calibrating the Rotation Axis
For complex components such as automotive exhaust pipes or multi-directional frames, the tube must rotate precisely between bends. I perform several test rotations and check the orientation with a protractor or digital rotary meter. Once I identify any offset, I adjust the rotation calibration setting in the control panel.
Step 5: Running Complete Test Bends
After calibrating all axes, I perform full test bends to verify overall accuracy. I check the tube against design drawings, paying attention to ellipticity, wall thinning, bending radius consistency, and angular accuracy. If everything matches the required tolerances, the machine is ready for production.
Common Issues Solved by Proper Tube Bender Setup and Calibration
Eliminating Springback Variations
Springback is unavoidable, but with correct calibration, I can accurately compensate for it and achieve perfect angles every time.
Preventing Tube Wrinkling and Cracking
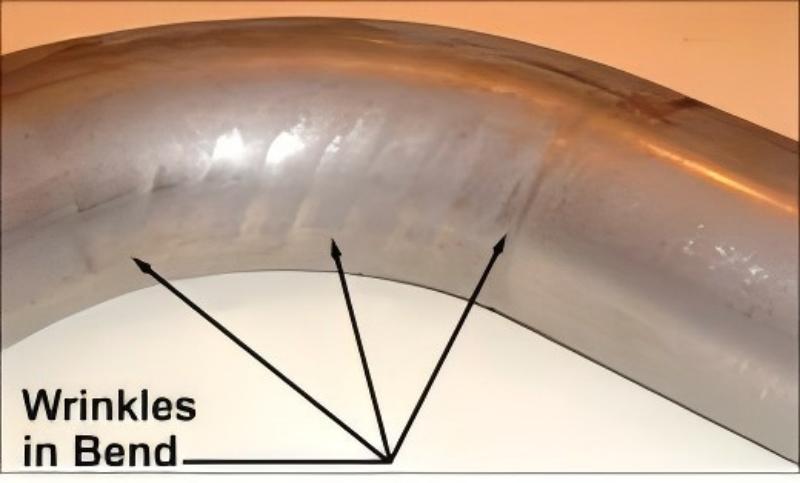
Proper tooling selection and alignment stop the tube from collapsing or tearing during the bend.
Reducing Dimensional Deviations
A well-calibrated feed and rotation axis ensures that multi-bend tube components come out consistent and precise.
Improving Production Efficiency
Once the machine is set up correctly, I can reduce rework rates and produce more accurate parts with fewer adjustments.
FAQs
How often should I recalibrate my tube bender?
I recommend checking calibration after every major tooling change or every 200–300 production cycles. High-precision applications may require more frequent calibration.
How can I reduce springback when bending stainless steel tubing?
Using proper mandrel support, reducing bending speed, and adjusting the compensation angle can significantly reduce springback during stainless steel bending.
What is the most important part of Tube Bender Setup and Calibration?
Consistent alignment and accurate angle calibration are the keys to achieving repeatable bending performance.
Should I run test bends every time I change tubing material?
Yes. Different materials—even from different suppliers—can behave differently, so test bends help ensure accuracy.
Conclusion
Proper Tube Bender Setup and Calibration is essential for producing high-precision tube components in any manufacturing environment. By following the right tooling procedures, adjusting machine parameters, and running accurate calibration steps, I can achieve consistent bending angles and reliable results across all production batches. If you want to improve your tube bending efficiency or need guidance for specific materials, feel free to reach out to the HARSLE team for expert support and additional documentation.


