


If you’re looking to refine your skills in making precise adjustments during the metal bending process, mastering the ESA S640 semiautomatic corrections is key. In this guide, I’ll walk you through the essentials of ESA S640 Semiautomatic Corrections, enabling you to enhance your operational accuracy and efficiency. Understanding these corrections not only optimizes your workflow but also improves the overall quality of your metalworking projects. Whether you’re a seasoned professional or just starting out, learning how to effectively implement these corrections will take your metalworking capabilities to the next level.
Navigating the ESA S640 Semiautomatic Page
Accessing the Semiautomatic Page
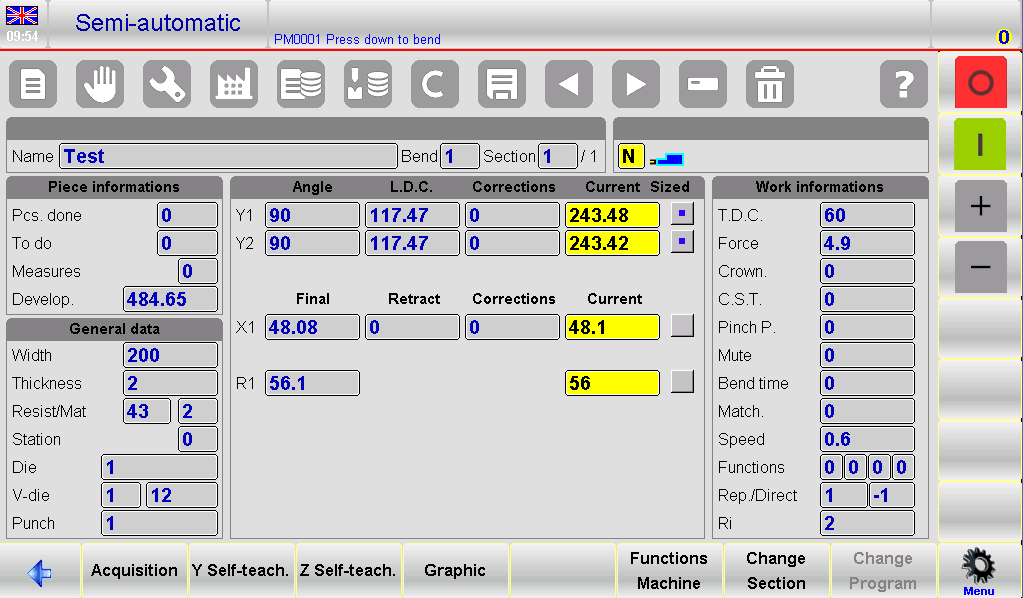
To begin mastering the ESA S640 Semiautomatic Corrections, it’s essential to familiarize yourself with accessing the semiautomatic page. When the machine is in STOP mode, the semiautomatic page will appear. This page allows for direct entry of corrections for angles and back gauges.

Making Corrections for Y1, Y2, and X Axes
Once on the semiautomatic page, operators can edit corrections for the Y1, Y2, and X axes. These adjustments can be made without returning to the Editor page, streamlining the correction process. When START is enabled, note that these features will be in ‘read only’ mode.
Confirming Corrections for Equal Bends
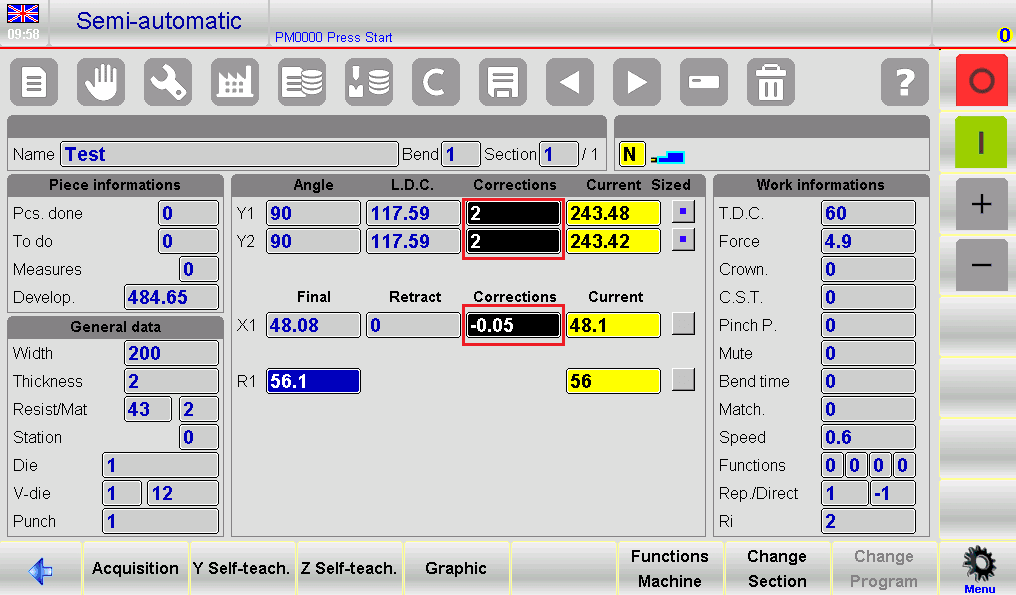
If the corrections are made on the semiautomatic page, said corrections will be made directly to the current bend. When a correction is changed, the corresponding edit is displayed with the colours reversed; in this way the operator is advised about the changes made.
If corrections need to be applied to all bends of the current section with the same angle, follow these steps:
- Make the necessary corrections on the semiautomatic page.
- Press the button to access the submenu.
- Select the function key [Conf. Sec. Equal Bend] to extend corrections.
For extending corrections to all bends of a piece having the same angle, use the function key [Conf.Pr. Equal Bend].
Utilizing the Editor Page for Internal Radius Adjustments
Displaying and Calculating the Internal Radius
Within the Editor page, the internal radius of bends can be displayed and adjusted. The internal radius is calculated either graphically or numerically, depending on selected generic parameters. Note that changes to the internal radius will impact stretch calculations in numeric programs, but not if the program is graphic-based.
Understanding the Impact of Internal Radius Changes
While working with ESA S640 Semiautomatic Corrections, recognize how internal radius modifications affect the bending process. Adjustments to the internal radius can impact material stretch and overall bend integrity. For instance, a smaller internal radius may result in higher material stress, potentially leading to cracking if the material isn’t adequately ductile. Conversely, a larger radius might not achieve the desired bend tightness, affecting the component’s fit and function. Consult the machine parameters manual to explore various application modes, ensuring that your adjustments align with your project’s requirements.
Tips for Effective Use of ESA S640 Semiautomatic Corrections
When making corrections on the semiautomatic page, the changes will apply directly to the current bend. This real-time adjustment capability enhances operational precision, allowing for immediate refinement of the bending process. It’s essential for operators to closely monitor these changes, which are highlighted with reversed colors to alert the operator to any modifications made. This visual cue helps in preventing errors and ensuring that all intended adjustments are correctly implemented.
Troubleshooting is a critical part of mastering ESA S640 Semiautomatic Corrections. Given the complexity of bending operations, occasional discrepancies can occur. If you encounter issues, double-check your corrections, ensuring that they reflect the desired parameters and that the machine is in the correct mode. Consulting the machine parameters manual can provide additional guidance and insights into resolving any persistent issues. Adopting a proactive approach to troubleshooting ensures smooth operation and long-term reliability of the ESA S640 system.
Frequently Asked Questions(FAQ)
What common issues might I encounter with ESA S640 Semiautomatic Corrections?
Users may occasionally encounter issues such as incorrect bend angles or alignment problems. Ensure that the initial data input into the ESA S640 controller is accurate, as this can significantly impact the effectiveness of semiautomatic corrections.
Can ESA S640 Semiautomatic Corrections be customized for different materials?
Yes, ESA S640 Semiautomatic Corrections can be customized to accommodate different materials. Input the specific type of material into the controller; this allows the system to adjust corrections accordingly, optimizing the bending process for each material type.
What should I do if ESA S640 Semiautomatic Corrections are not functioning properly?
If ESA S640 Semiautomatic Corrections are not functioning correctly, first verify the accuracy of the input data and check for any system error messages. If issues persist, consult the user manual or contact technical support for further assistance.
Conclusion
Mastering ESA S640 Semiautomatic Corrections involves understanding the system’s interface, accurately calibrating settings, and consistently applying best practices for maintenance and operation. By following the detailed steps outlined in this documentation, you can optimize the performance and accuracy of your ESA S640 system, leading to improved production outcomes.
For further assistance or to inquire about training opportunities, feel free to contact HARSLE’s support team. We also invite you to explore our additional resources and documentation for comprehensive insights into machine optimization and efficiency improvements.


