


ESA S875 Numeric Programme entry is a common and essential task for press brake operators who require a fast and precise method to create bending programs. For those looking to understand how to enter an ESA S875 Numeric Programme, this guide provides a clear and practical explanation. It covers how the ESA S875 numeric programming method functions, which parameters need to be entered, and the correct procedure for completing the setup. Following this guide ensures that press brakes can be programmed efficiently, input errors are minimized, and overall bending accuracy is improved in daily operations.
How to Start an ESA S875 Numeric Programme Entry
Step 1: Creating a New Numeric Programme on ESA S875
To enter an ESA S875 Numeric Programme, begin by accessing the main interface and selecting [New prog. of bend] from the Home mask.
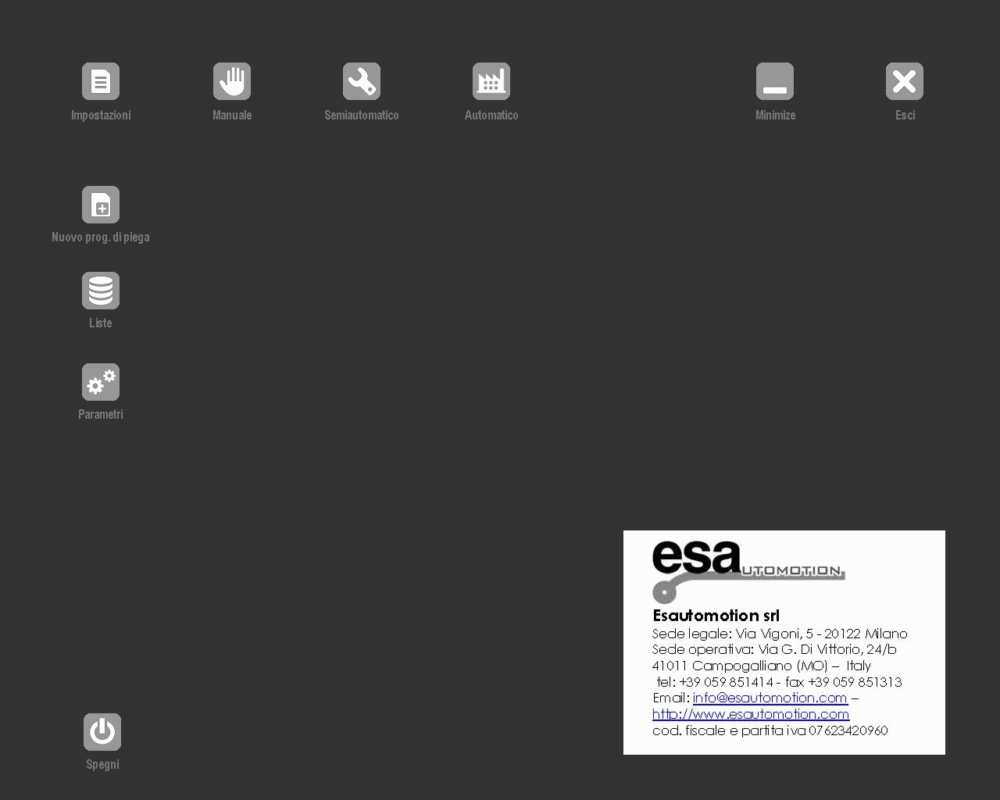
The numeric mode should be chosen in the Num / Gr field to ensure the programme uses numeric calculation logic rather than graphic programming.
Once confirmed, the controller opens the data entry window, ready for entering the bending programme parameters.
Setting Piece Data for ESA S875 Numeric Programme
Step 2: Selecting Punch and Die for Numeric Programming
Accurate tool selection is critical in an ESA S875 Numeric Programme. The punch and die to be used for bending must already exist in the tool library.
The touch-based interface allows rapid selection:
- Tapping the punch field opens the Punch List
- The required punch is selected with a double click or double touch
- The same procedure is applied for die selection
Once selected, the punch and die appear in the programme editor for further configuration.
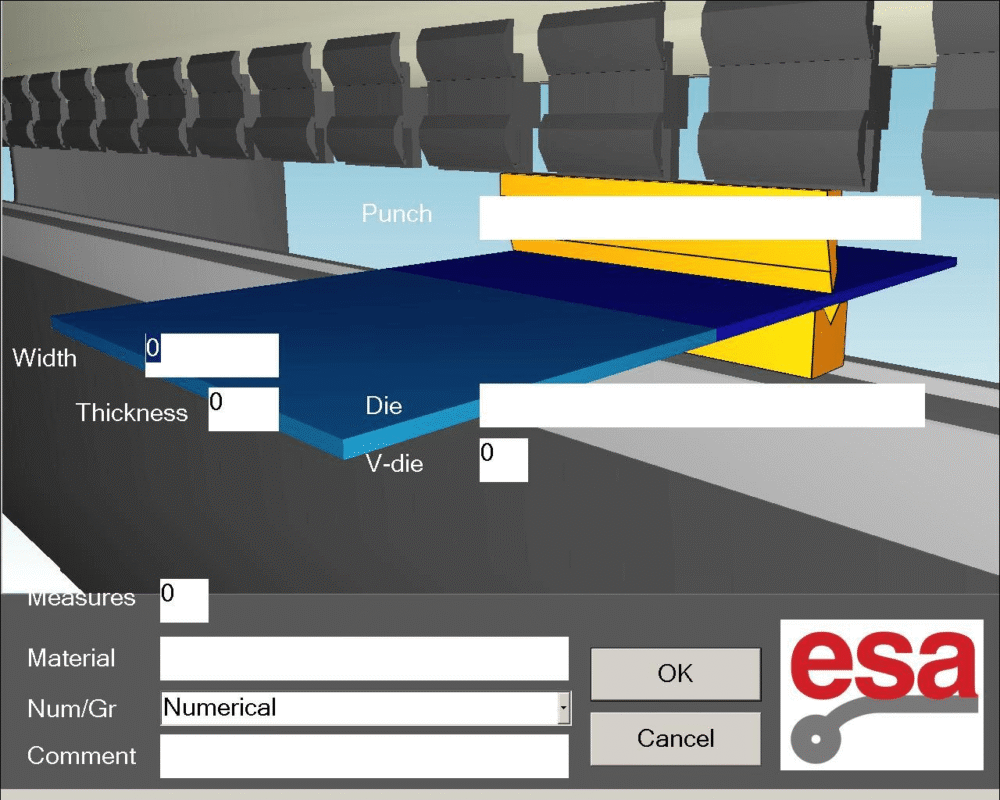
Step 3: Entering Sheet and Material Parameters
Next, the workpiece parameters are defined:
- Die cavity number (enter 1 if the die has a single cavity)
- Metal sheet width
- Metal sheet thickness
- Material type and resistance
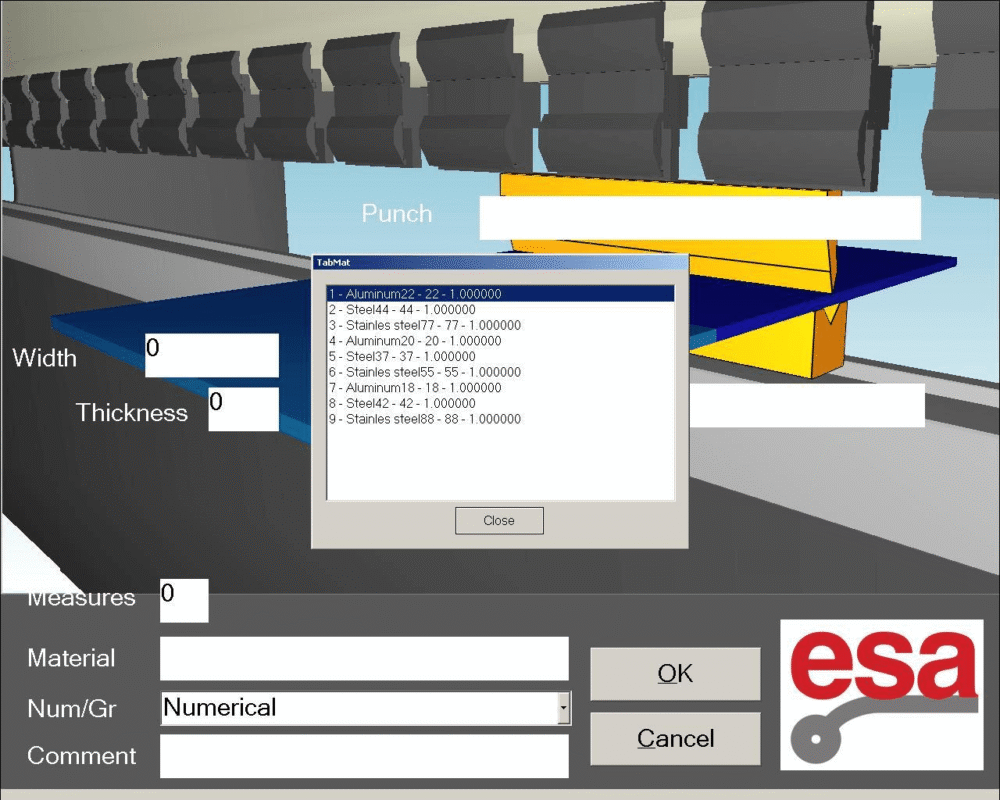
Selecting the material field opens the Materials Table, allowing quick selection from predefined values. The selected material is then displayed in the programme automatically.

Confirming Programme Data and Accessing Settings
Step 4: Confirming Data and Opening the Settings Mask
After all piece data is entered, pressing [Confirm] accepts the information and provides direct access to the Settings mask.
From the Settings mask:
- You can access General Data for overall programme information by pressing

- You can access Work Data to review calculated positions and heights by pressing

This structure allows you to control both global and bend-specific parameters efficiently.
Setting Bends in an ESA S875 Numeric Programme
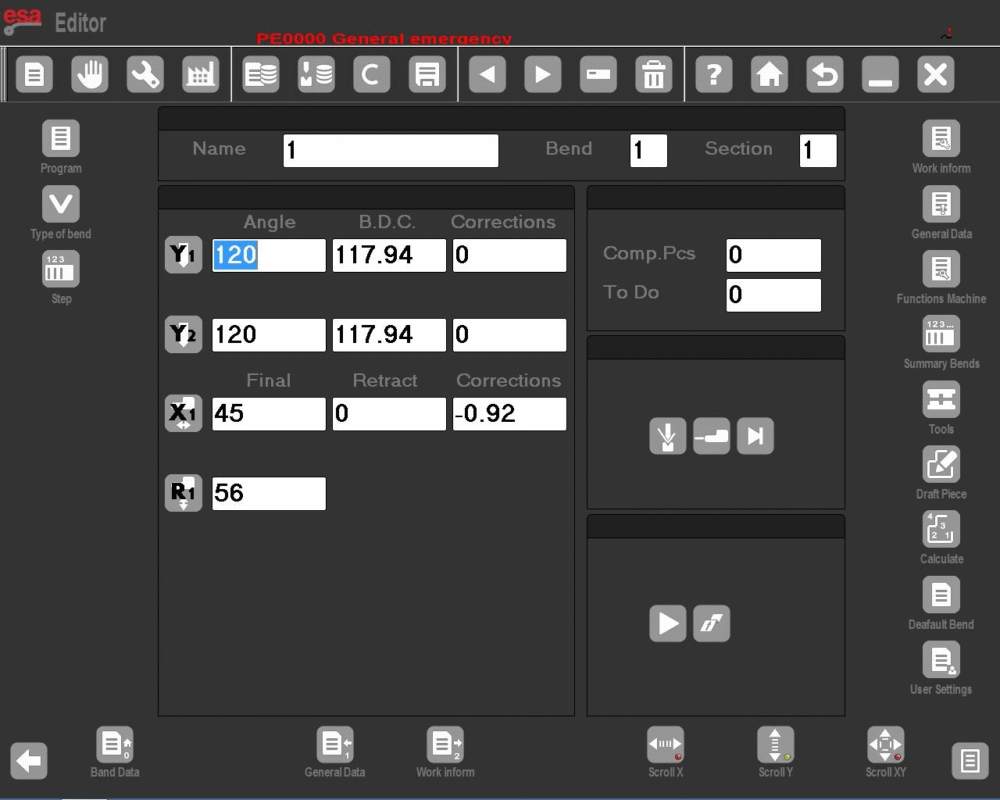
Step 5: Defining Bend Angle and Bend Length
The cursor moves to the bend definition fields, where each bend must have:
- The required bend angle in the Y1 angle field
- The bend length in the Final X1 field
Other bending parameters, such as ram positions and corrections, are automatically calculated by the ESA S875 controller but can be adjusted manually if needed.
Step 6: Viewing and Managing Work Data
To review detailed bending data, move to the required bend and open the Work Data window. Here, you can view:
- Absolute P.M.S
- P.C.V and P.C.L values
After reviewing, exiting the window via [Confirm] returns the operator to the main programme interface.
Editing and Reusing Bends in Numeric Programming
Step 7: Copying and Inserting Bends
The ESA S875 Numeric Programme supports flexible bend management. Bends can be copied or inserted to speed up programming:
To insert a bend before another, select [Enter step] to maintain the correct bend sequence within the programmesert a bend before another one, select [Enter step], ensuring correct bend sequence within the programme.
Move to the desired bend, open the menu, and select [Copy step] to add a bend at the end of the section
Advanced Functions in ESA S875 Numeric Programme
Defining and Correcting Calendering
For calendering operations, the [Calendering] function can be activated from the numeric programme menu. Operators can enter:
- Calendering angle
- Radius
- Pitch length
- Initial stop position
Corrections can be applied if the resulting angle differs from the desired angle. The difference is divided evenly across all bends to achieve precise results.
Clinching, Coining, and Conical Bends
Advanced operations are also supported in an ESA S875 Numeric Programme:
- Clinching is defined by setting the Y1 angle to 0.0 and adjusting the P.M.I values
- Coining or moulding operations are entered directly via the menu and corrected by adjusting lower dead points
- Conical bends are created using the Conical function, with automatic calculation of X1, X2, Z1, and Z2 axes
These functions enable complex bending operations with high accuracy and efficiency.
Saving and Updating an ESA S875 Numeric Programme
Step 8: Saving, Renaming, and Updating Programmes
Once all settings are complete, the ESA S875 Numeric Programme can be saved by entering a programme name and confirming.
The [Save with name] function allows creation of a new version without overwriting the original programme.
When any punch or die is changed, the programme must be updated using [Update Prog.] to recalculate all heights and ensure bending accuracy before running the programme.
Frequently Asked Questions(FAQ)
What is an ESA S875 Numeric Programme used for?
An ESA S875 Numeric Programme is used to create press brake bending programs by manually entering bending parameters instead of relying on graphical simulation. It is suitable for standard bends, repetitive parts, and situations where fast and precise programme creation is required.
Why must the punch and die be defined before numeric programming?
In an ESA S875 Numeric Programme, the controller calculates bending depth, force, and positions based on the selected punch and die. Undefined or incorrect tools may lead to inaccurate calculations, affecting bending quality and machine safety.
Can bend parameters be modified after creating a numeric programme?
Yes. Bend angles, bend lengths, and correction values in an ESA S875 Numeric Programme can be modified through the Settings mask. The controller recalculates all dependent parameters automatically to maintain accuracy.
Conclusion
Proper entry of an ESA S875 Numeric Programme is essential to ensure accurate, reliable, and repeatable bending results on CNC press brakes. By following the correct procedure—creating a new numeric programme, selecting the appropriate punch and die, entering sheet and material parameters, defining bend angles and lengths, and confirming all settings—press brakes can perform calculations precisely, minimizing input errors and improving production efficiency.
Advanced operations, including calendering, clinching, coining, and conical bends, are fully supported within an ESA S875 Numeric Programme, providing flexibility and precision for complex workpieces. Updating the programme after any tool change is crucial to maintain accuracy and ensure safe operation.
For professional guidance with ESA S875 Numeric Programme setup, press brake tooling, or CNC bending solutions, contact HARSLE for expert support. Additional technical resources and guides on ESA S875 controllers are available to optimize programme efficiency and overall production performance.


