


If you’re exploring how to efficiently use the CYBELEC CybTouch 12 EasyBend interface, you’ve landed in the right spot. In this article, I’ll guide you through navigating the EasyBend page of the CybTouch 12 system, ensuring you can easily set up and execute bending operations. Whether you’re a novice or an experienced user, understanding the EasyBend interface is crucial for optimizing your workflow and achieving precise metal bends. This guide will provide you with the essential steps to enhance your productivity and operational effectiveness.
Introduction
The CYBELEC CybTouch 12 EasyBend feature streamlines the process for individual bends when production is temporarily interrupted. This is ideal for situations such as an external worker needing to perform a single bend using the existing tool setup. The tool setup on the EasyBend page mirrors the current program tools, ensuring seamless integration. Importantly, switching to the EasyBend page does not require saving the ongoing program, allowing you to easily resume production afterward. This functionality of CYBELEC CybTouch 12 ensures minimal disruption and maximized efficiency.
Making a Bend on the EasyBend Page
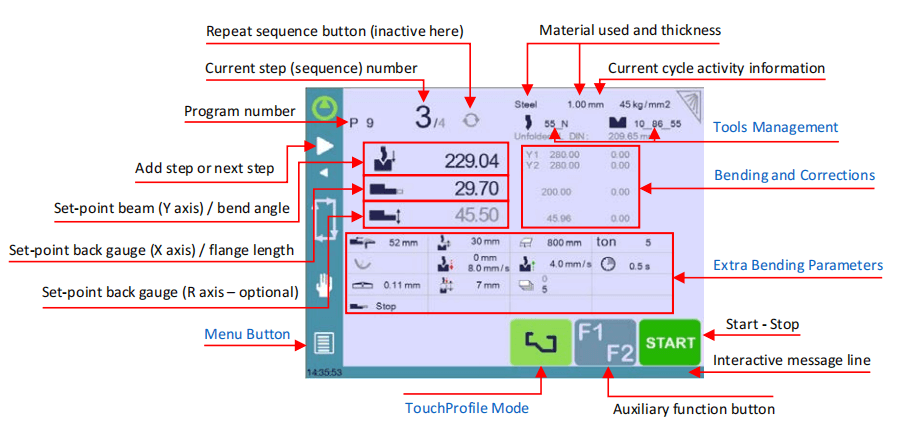
See Basic Page Description for more information on the different controls on the EasyBend page.
SETTING INSTRUCTIONS:
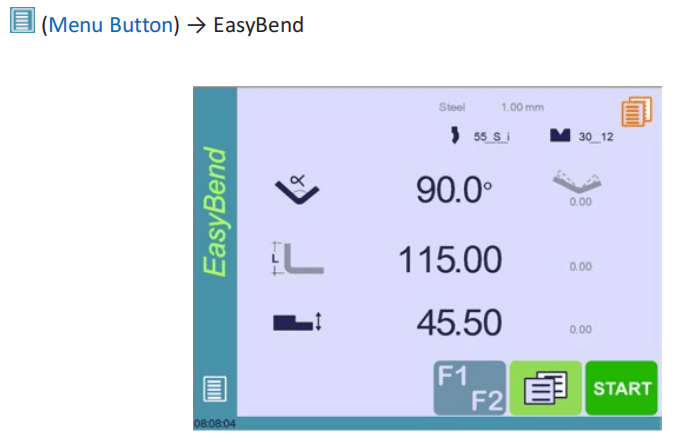
1. Touch the material’s name (here Steel). There are displayed. Select the Material used, enter the Material thickness and the Bending length.
2. Touch one of the tool’s icon to select a punch or die. To learn how to configure tools, please refer to section Tools Management.


3. Enter the angle for the bend you wish to create (here 90°).
4. Enter the flange’s length (here 115.00 mm).
5. Enter the back-gauge height value (here 45.50 mm)
6. Press this button to go to the Extra Bending Parameters and enter the eventually required extra data for the bend.
7. Start the hydraulic pump motor (by pressing this button

if available. It turns red when the motor is running).
8. Press the START button to position the machine according to the data that were just entered.
9. When the machine is ready to bend, a OK button is displayed.
10. Press the foot switch to execute the bend.
Error and Warning Messages
In the CYBELEC CybTouch 12 EasyBend system, two types of messages may appear on the interactive message line:
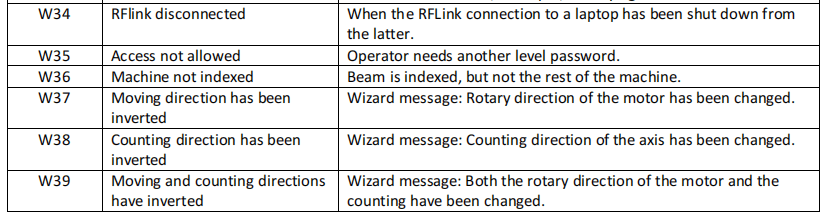
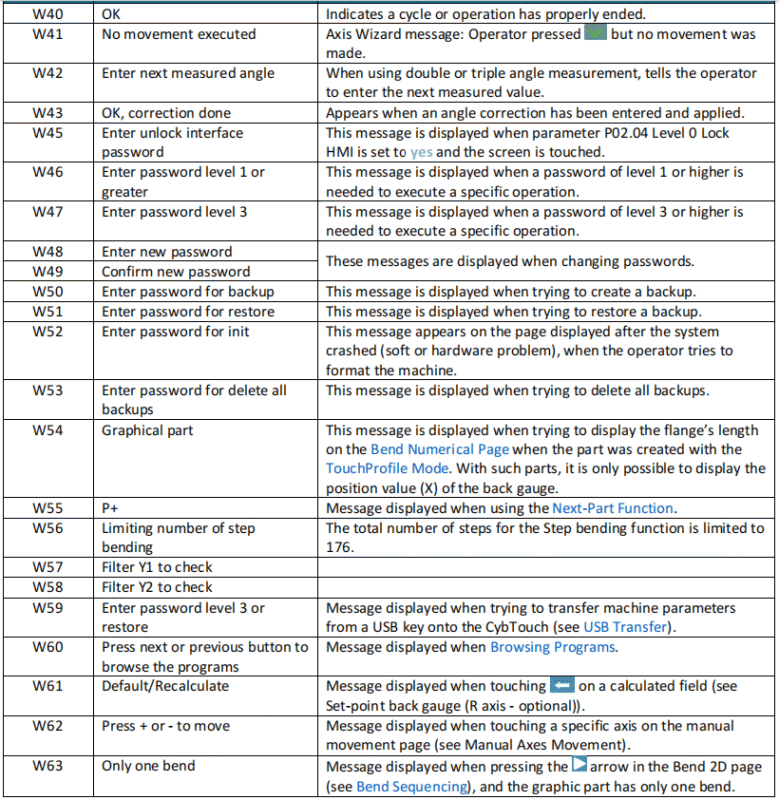
- Warning Messages – Displayed on a green background, these provide information or instructions and will disappear automatically.
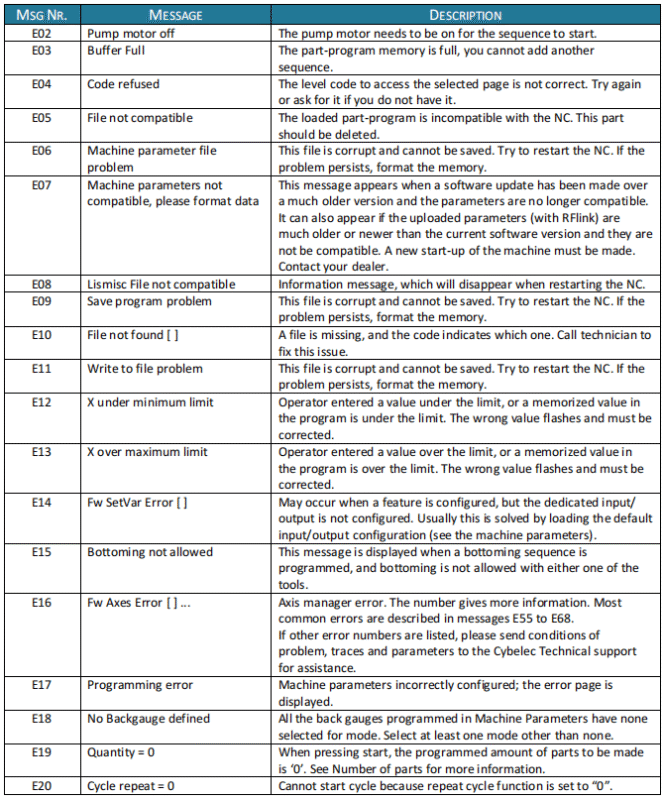
- Error Messages – Displayed on a red background, these indicate machine or NC errors, often requiring intervention from the user or a technician.
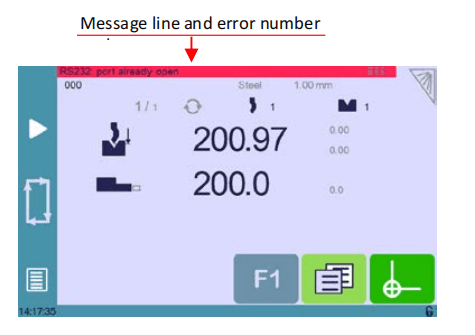
When you encounter an error message in the CYBELEC CybTouch 12 EasyBend interface, always report the full message. Include any numbers in brackets and the error number at the end of the line, which corresponds to the detailed information in the reference section.
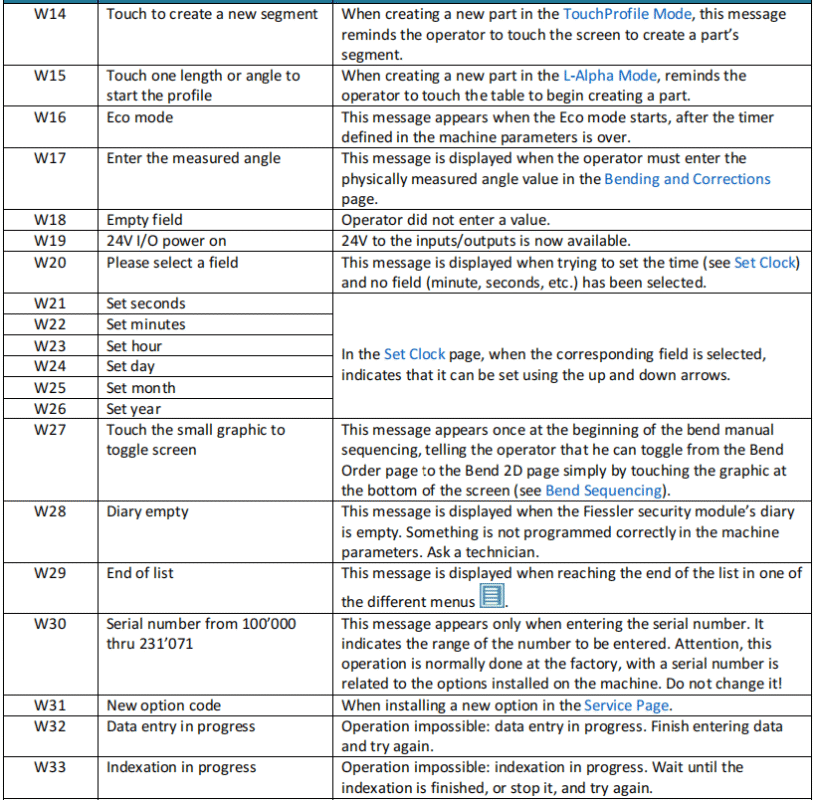
Warning Messages

Error Messages


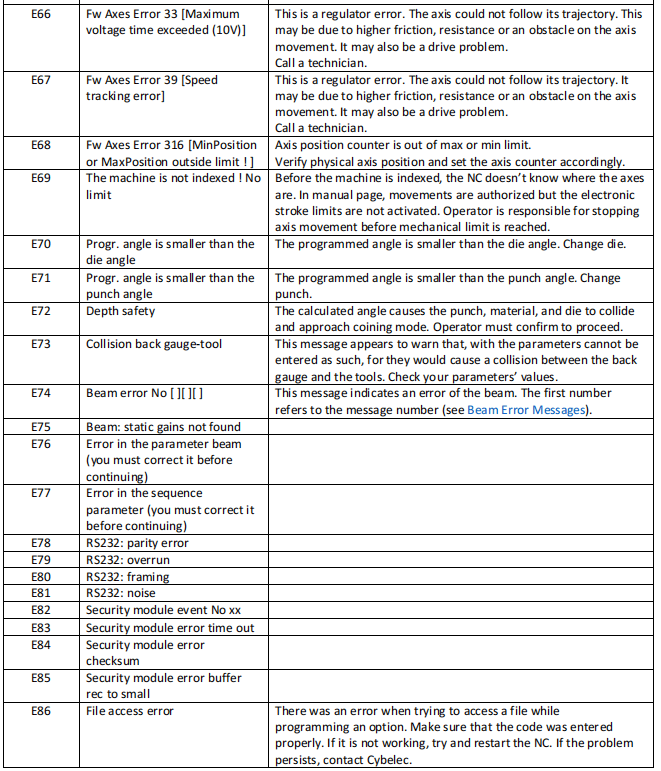
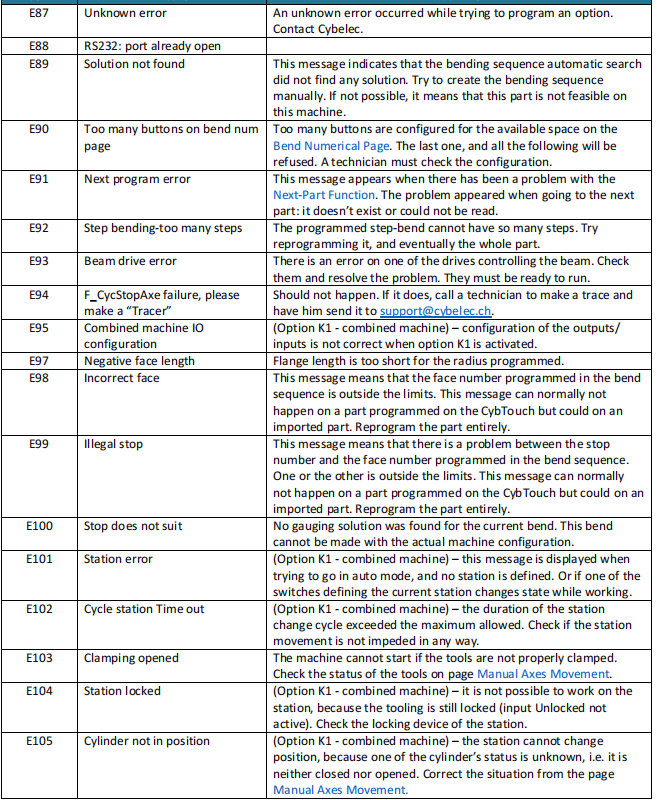

Beam Error Messages


This table does not contain an exhaustive list of all the errors related to beam. If the message number is not explained here, please write it down and contact us.
Internal Reset Error Messages
This kind of messages appears if a serious error occurred. The display automatically switches to a page as shown below.
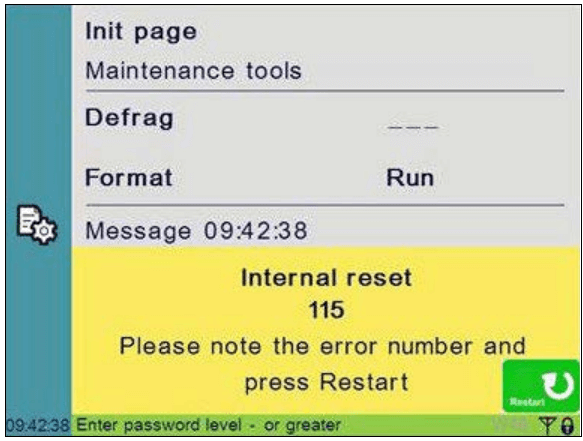
If such an error occurs,
- Write down the error number and press the Restart button.
- If the error remains, turn the machine off and let it cool down before restarting it.
- If the error still remains, write down the error number and contact your dealer.
Frequently Asked Questions(FAQ)
How can I optimize my use of CYBELEC CybTouch 12 EasyBend for better results?
To get the most out of CYBELEC CybTouch 12 EasyBend, familiarize yourself with its interface and settings. Regularly update the software to benefit from new features and enhancements. Additionally, take advantage of user manuals and customer support for any specific guidance.
Why does my CYBELEC CybTouch 12 EasyBend show an error during operation?
Errors on the CYBELEC CybTouch 12 EasyBend might result from incorrect settings or wear on machine components. Check the error code details and refer to the troubleshooting section in the manual. Regular maintenance is also crucial to prevent such issues.
How do I maintain the accuracy of my press brake using CYBELEC CybTouch 12 EasyBend?
Ensure regular calibration of your press brake using a digital gauge, as suggested in the CYBELEC CybTouch 12 EasyBend guidelines. Keep the machine level and follow the manufacturer’s specifications for adjustments to uphold bending precision.
Conclusion
In summary, mastering the CYBELEC CybTouch 12 EasyBend involves understanding and efficiently navigating its user interface to optimize bending operations. Key steps include familiarizing yourself with the main screen layout, utilizing shortcut keys, and customizing settings for your specific bending needs. By optimizing these features, you can significantly enhance your production efficiency and ensure accurate bending results.
For further assistance or to explore more detailed resources, feel free to contact our team. Additionally, you can visit our documentation page for more in-depth guides and tutorials on maximizing the potential of your CybTouch 12 EasyBend system.


