


Looking to master the ESA S640 Graphic Bending Sequence? You’ve come to the right spot. In today’s rapidly advancing metalworking industry, precision and efficiency are key. If you’re interested in delving into the advanced capabilities of certain models, particularly the ESA S640, I will guide you through the essentials. This article will cover how to effectively enter a graphic program and navigate both automatic and manual calculations of the bending sequence. Whether you’re enhancing your current skills or just getting started with graphic programming features, these insights will help you optimize your bending operations for better results.
Setting Up a Graphic Program in ESA S640
When working with the ESA S640, entering a graphic program enables precise control over your bending operations.
Initial Setup of Graphic Parameters
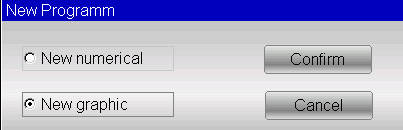
Before starting a new graphic program, ensure you have correctly entered key parameters. Access the Editor page, choose [New program], then select [New graphic]. You’ll open a general data entry window. Here’s how to proceed:
- Width and Thickness: First, enter the width and thickness of the metal sheet to be bent. You can do this by selecting the relevant fields on the interface and confirming each value by pressing [Ok]. This step ensures the press brake can accommodate the material properly, aligned with the ESA S640’s capabilities.
- Material Resistance: Inputting the material resistance is essential. Touch the field to enter this information and press [Ok]. The ESA S640 Graphic Bending Sequence system will utilize this data to automatically calculate appropriate settings, enhancing precision in your work.
- Tool Selection:
- Die and Punch Selection: Choose the die from the list by scrolling through the toolbar and select it by pressing [Insert]. The die must be drawn beforehand. Also, select the V-die if multiple options exist, and set the Die Orientation (0 = standard, 1 = rotated by 180°).
- Punch Setup: Similarly, select the punch from the list, ensuring it is already drawn. Adjust the Punch Orientation as needed.
Navigating the Drawing Window
In the ESA S640 Graphic Bending Sequence, once you’ve entered the general data, you move to the drawing window for making precise adjustments to your bending design.

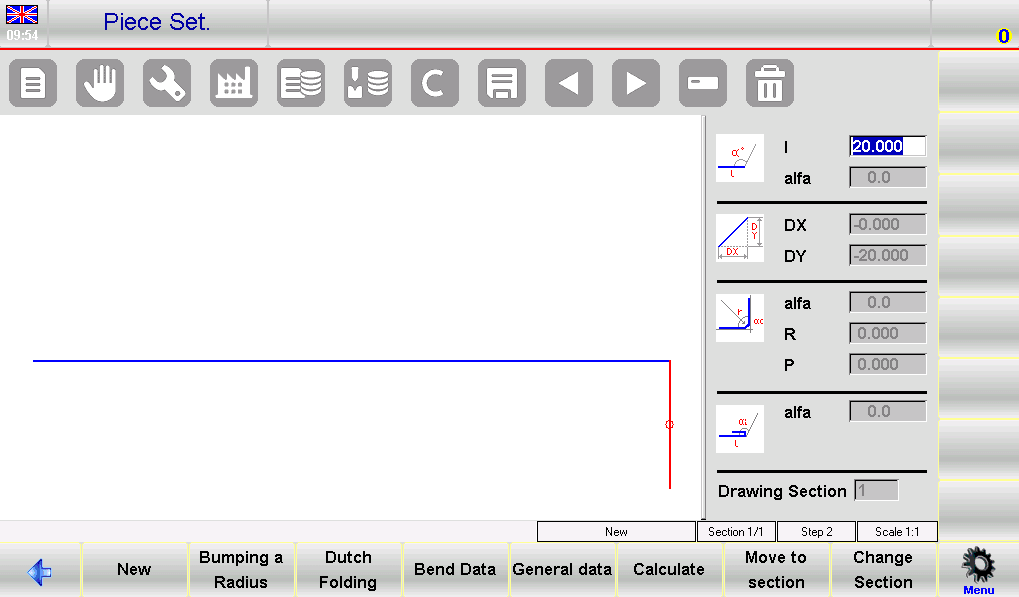
Drawing Window Layout: The left side of the screen displays the main drawing window, while the right side contains four sections for different types of drawing data:
- Polar drawing data
- Cartesian drawing data (not commonly used)
- Radius bends data
- Dutch folding bends (hemming) data
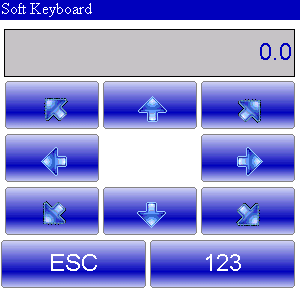
Segment Adjustments: As you begin, the first segment will appear in red with a default length of 20.0 mm. Touching the field “l” opens a “Soft Keyboard,” allowing you to adjust this length according to your requirements.

Angle Configuration: After setting the segment length, the system automatically shifts to the “alfa” polar drawing data field. Here, you can use the “Soft Keyboard” to adjust angles. Predefined angle options (such as 45, 90, 135, 180, -135, -90, -45) facilitate quick changes, but custom angles can also be entered for more specific requirements.
Continuing the Drawing Process: Once the angle is set, the focus shifts back to the next segment’s length. Using the “Soft Keyboard,” you can efficiently set the next segment’s length and continue constructing the drawing.
Utilizing Bend Sequencing and 3D Viewer
Gain a comprehensive view of your bending process:
- Access Bend Sequence: On the AUTOMATIC graphic page, open the menu and select 0>> Bending sequence. Navigate through the bends to ensure accuracy.
- Visualize with 3D Viewer: Select 3>> 3D Viewer from the menu for a 3D perspective, allowing for detailed inspection and adjustments.
Automatic Bending Sequence Calculation
The ESA S640 Graphic Bending Sequence provides a streamlined approach to automatic bending sequence calculations, significantly enhancing operational ease and efficiency. By leveraging these powerful tools, operators can achieve optimal results with minimal manual intervention. Here’s how to maximize these features in your workflow.
Generating Automatic Sequences
To initiate an automatic bending sequence, begin from the PIECE SETTING page after completing all parts of the drawing. Simply press the [Calculate] button. This action opens the calculation window, showcasing a simulation of the piece to be bent, including essential components like the press brake, punch, die, and stops.
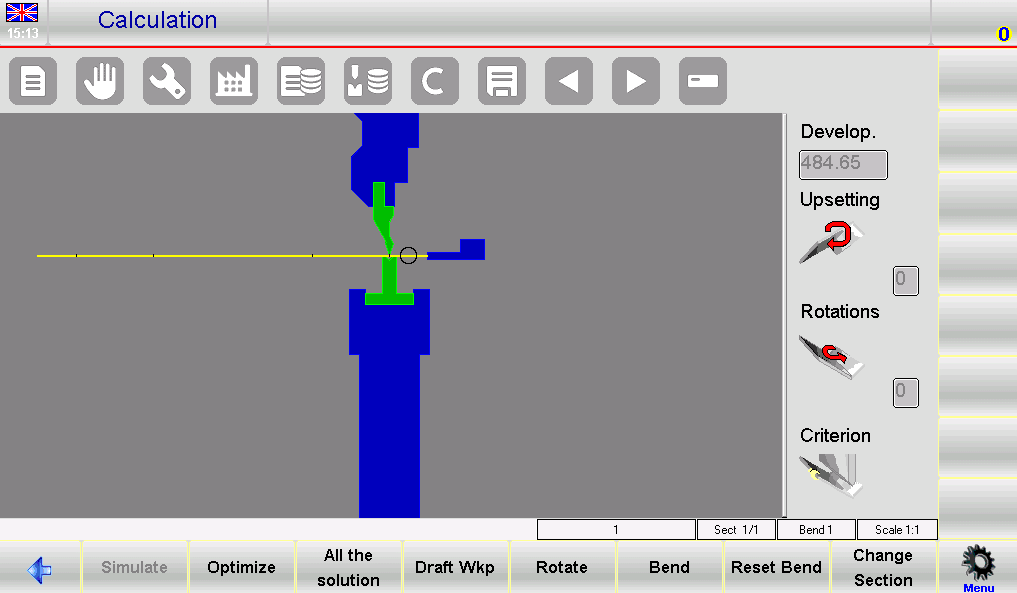
- Simulation Setup: The window on the right displays information on upsetting, rotations, and the chosen calculation criterion.
- Solution Search: By default, the system searches for solutions that retain the greatest part of the metal sheet in the operator’s hands, prioritizing safety and efficiency. Adjust the criterion to explore all potential sequences, including those with a higher degree of complexity.
- Optimization: For an automatic search, press [Optimize]. The ESA S640’s numeric control will identify the optimal bending sequence, adjusting as necessary to ensure safe handling.
Simulation for Optimized Results
Once a sequence is confirmed, it’s crucial to simulate the bending process to ensure operational fluency.
- Visualization: Press the [Simulate] key to see the piece without bends, set up for the first operation. The sequence allows for clear visibility of each bend in progress.
- Real-Time Adjustments: Use [Rest/Support] to select the piece’s support positions, ensuring the stops only engage when safe to do so. If no collision points are present, proceed to the next steps.
- Continuity of Operation: Continue the process by pressing the [Continue] function key until the entire bending sequence is simulated. Each step should be meticulously checked for precision and safety, halting if necessary using the [Stop] key.
The ESA S640 graphic bending sequence tips outlined here should empower you to utilize its automatic calculation features to their fullest potential. By integrating these capabilities into your workflow, you not only enhance precision but also ensure the safe and efficient operation of your machine.
Manual Bending Sequence Calculation
Customizing Bending Sequences Manually
From the drawing page, press [Calculate]. A simulation window will display the piece and various parts of the press brake. Use manual force inputs by pressing the [Bend] key at the desired bend location. This will either add or straighten previously set bends. Utilize the [Rotate] key to reposition the sheet, helping fine-tune alignment and setup.
Once you have defined all desired bends, press [Optimise]. This ensures that the numeric control adheres to the sequence you’ve input manually.
Handling Potential Issues
When working with manual sequences, problems may arise, especially if the piece isn’t feasible:
- Collision Detection:
If there’s a conflict with any part of the machine, indicated by a color change, manually inspect the collision points. Adjust the sequence or force specific bends to find alternatives without compromising safety.
- Forcing Sequences Despite Collisions:
For non-damaging collisions, you can force the complete sequence by manually adjusting until a feasible solution is realized.
- Simulation for Verification:
Simulate the sequence after making adjustments. This allows you to verify the efficacy and accuracy of the changes made.
By leveraging manual adjustments in the ESA S640 graphic bending sequence, operators can address complex bending scenarios effectively, ensuring precision and operational safety.
Frequently Asked Questions(FAQ)
Can the ESA S640 automatically calculate the bending sequence for any material?
Yes, the ESA S640 is equipped with advanced algorithms that automatically calculate the optimal bending sequence for various materials. By inputting the material type and thickness into the system, it will recommend the most efficient sequence to minimize errors and improve production speed.
What should I do if I encounter errors in the ESA S640 Graphic Bending Sequence calculations?
If errors occur during calculations, first review the input data for any inaccuracies. Ensure that all material specifications and tool settings are correctly entered. If the problem persists, refer to the troubleshooting section of the manual or contact technical support for further assistance. Regular software updates are also recommended to maintain optimal system performance.
Conclusion
Mastering the ESA S640 Graphic Bending Sequence involves understanding and utilizing the advanced features of graphic programming, alongside both automatic and manual bending sequence calculations. By familiarizing yourself with these processes, you can significantly enhance your metalworking efficiency and precision. If you have any questions or need further guidance on optimizing your use of the ESA S640, I encourage you to reach out to our team for expert advice. Additionally, explore our other documentation for more tips and insights into maximizing the performance of your equipment.


