


ESA S840 tool list interface is where you manage all your bending tooling—punches and dies—on your HARSLE press brake. If you’ve ever struggled to find the right tool in a long list or wondered how to quickly view tool details before selecting them for a program, you’re in the right place. In this article, I’ll walk you through navigating the tool list interface, show you how to view tool information, and explain how to select the right tools for your bending jobs. Whether you’re setting up a new program or verifying tooling for an existing one, this guide will help you move through the ESA S840 tool list interface with speed and confidence.
Understanding the ESA S840 Tool List Interface
The ESA S840 tool list interface is your central hub for managing all bending tooling on your HARSLE press brake. This interface gives you complete control over your punches and dies, allowing you to view tool specifications, select the right tools for each job, and manage your tool library efficiently. Whether you’re setting up a new program or verifying tooling for an existing one, understanding how to navigate the tool list interface will save you time and prevent errors.
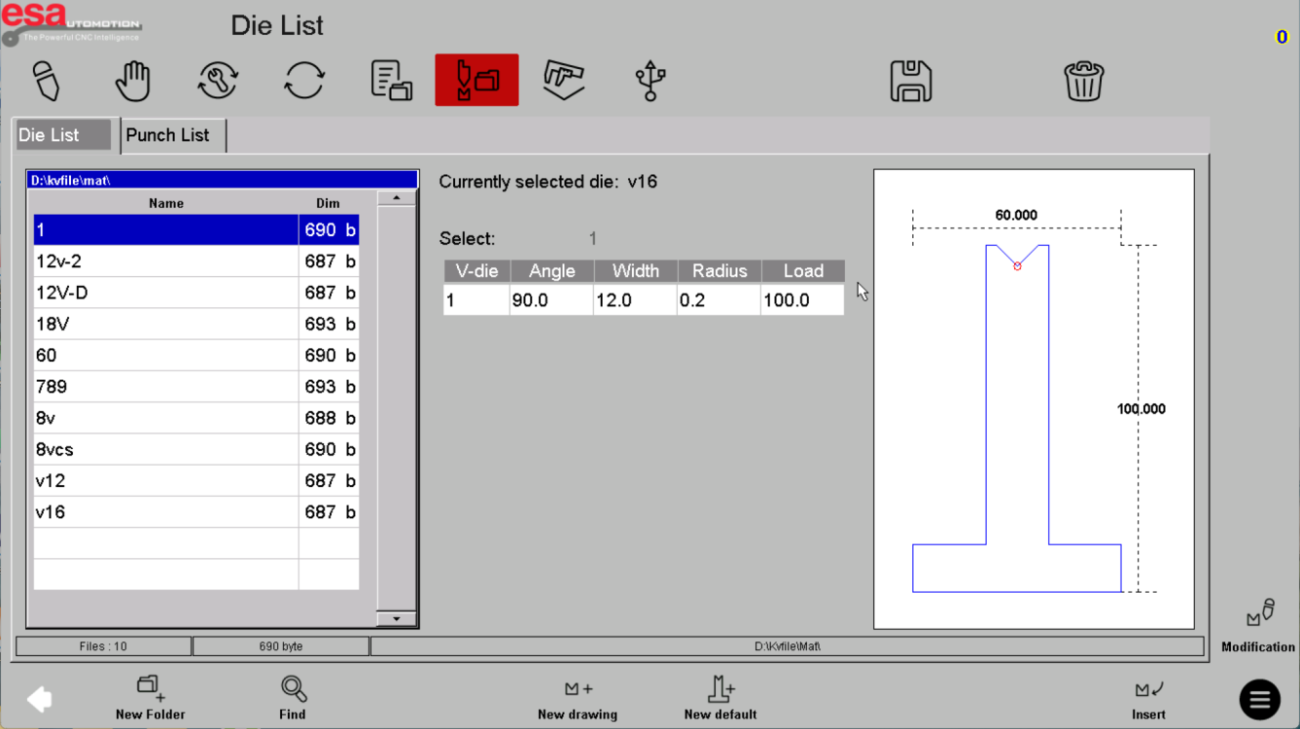
Within the ESA S840 tool list interface, you’ll find all your upper tools (punches) and lower tools (dies) organized with detailed information including angle, V-opening, chamfer radius, compressive strength, and more. This comprehensive view ensures you always have the right tool information at your fingertips.
Main Interface Layout
When you first access the ESA S840 tool list interface, you’ll notice it is divided into two distinct sections: the Die list and the Punch list. This separation makes it easy to locate the specific type of tool you need without scrolling through mixed lists.
Die List Section
The Die list within the tool list interface displays all your lower tools. Here you can:
- Browse all available dies in your library
- View detailed specifications for each die
- Select dies for your current program
- Modify existing die definitions
- Insert new dies into your tool library
Punch List Section
The Punch list within the ESA S840 tool list interface displays all your upper tools. Similar to the Die list, you can:
- Browse all available punches
- Review punch specifications
- Select punches for your bending jobs
- Modify existing punch definitions
- Add new punches to your tool library
Understanding Tool Information Display
One of the most valuable features of the ESA S840 tool list interface is the detailed information panel located on the right side of the screen. This panel provides all the critical data you need to make informed tool selections.
Tool Details Available
When you select a tool in the ESA S840 tool list interface, the right panel displays:
- Tool name
- Angle
- V-opening (for dies)
- Chamfer radius
- Compressive strength
- Other relevant specifications
Identifying Active Tools
If a tool is currently being executed in a program, its name appears prominently at the top of the information panel on the right side of the ESA S840 tool list interface. This clear visual indicator helps you confirm at a glance which tool is active, preventing confusion during tool changes.
Navigating Through Long Tool Lists
As your tool library grows, the ESA S840 tool list interface accommodates this by allowing you to scroll through multiple pages of tools. When you have more tools than can fit on a single screen, simply drag down the list to reveal additional tools. Continue scrolling until you find the desired tool, then click to select it.
This intuitive navigation within the ensures that even shops with extensive tooling libraries can quickly locate and access any tool without frustration.
How to Select Tools in ESA S840 Tool List Interface
Tool selection is one of the most frequent operations you’ll perform within the ESA S840 tool list interface. The process is straightforward for both dies and punches.
Selecting a Die
To select a die using the tool list interface:
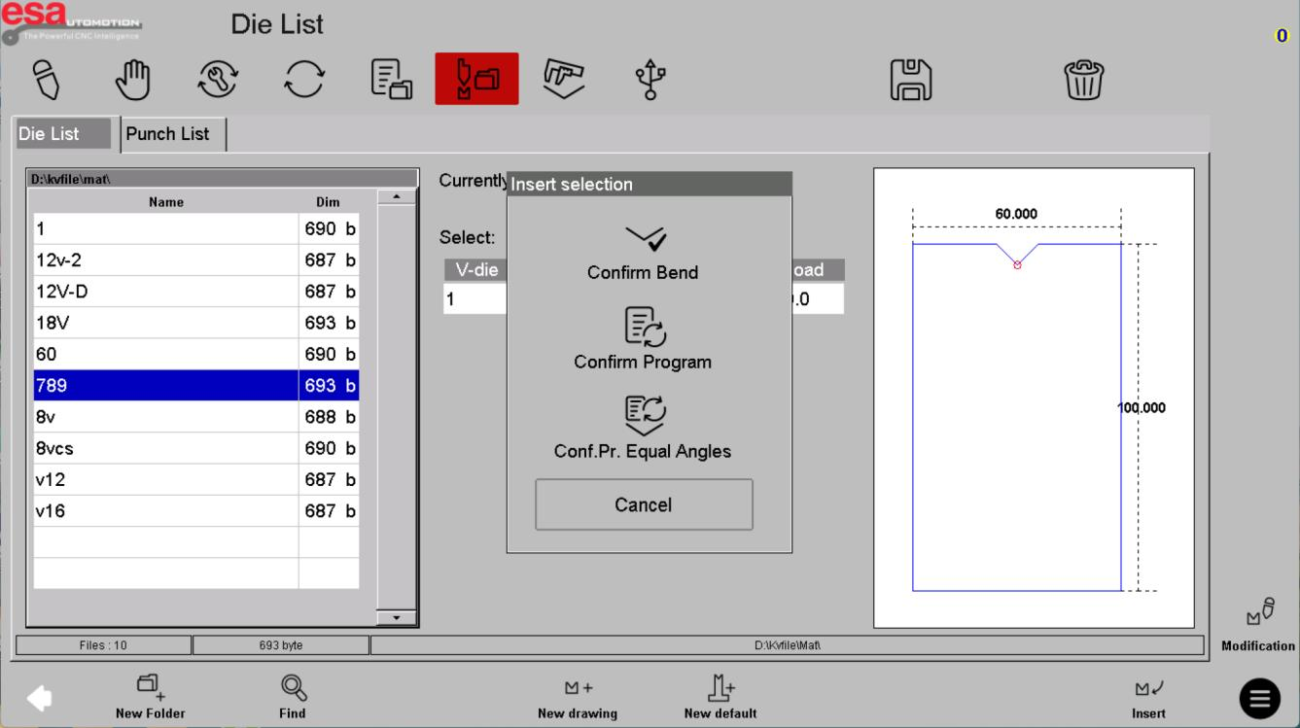
- Click on the bottom tool list (Die list) to view all available dies
- Browse or scroll through the list until you find the desired die
- Click on the tool name to select it
- Click Insert to load the die into the editing interface
- Select the insertion option in the pop-up dialog box to confirm
Once you’ve completed these steps within the ESA S840 tool list interface, the die is selected and ready for use in your program.
Selecting a Punch
To select a punch using the tool list interface:
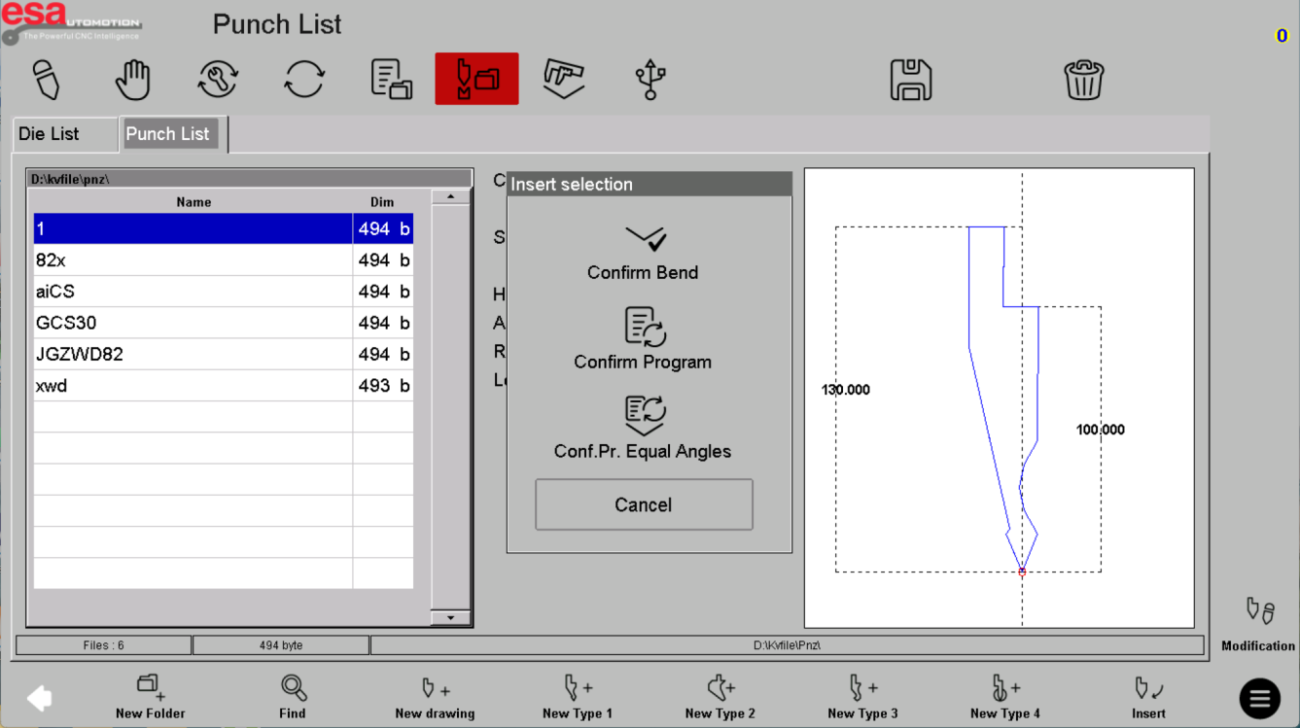
- Click on the Punch list to view all available punches
- Browse or scroll through the list until you find the desired punch
- Click on the tool name to select it
- Click Insert to load the punch into the editing interface
- Select the insertion option in the pop-up dialog box to confirm
After completing these steps within the ESA S840 tool list interface, the punch is selected and loaded for use in your bending program.
Creating New Tools from the Tool List
While the ESA S840 tool list interface primarily serves as a management hub for existing tools, it also provides the starting point for creating new ones. The interface allows you to build a new tool from scratch when no existing tool matches your current production requirements.
This flexibility within the tool list interface means you can seamlessly expand your tool library as you acquire new tooling, ensuring your machine control always reflects your actual shop capabilities.
Modifying Existing Tools
The ESA S840 tool list interface also allows you to modify existing tool definitions. If you need to update tool specifications or correct information, simply:
- Select the tool you wish to modify from the list
- Access the edit function
- Update the relevant fields such as angle, V-opening, or compressive strength
- Save your changes
This functionality within the ESA S840 tool list interface ensures your tool library remains accurate and up to date.
Tips for Efficient Tool List Navigation
Based on experience with the ESA S840 tool list interface on HARSLE press brakes, here are some practical tips to improve your efficiency:
Organize your tool library. Use consistent naming conventions when adding tools to the ESA S840 tool list interface. This makes finding specific tools much faster.
Preview before selecting. Always check the detailed information on the right side of the tool list interface before confirming your tool selection. Verify that the angle, V-opening, and other specifications match your job requirements.
Use the scroll function. When working with long tool lists, drag down the ESA S840 tool list interface to reveal all available tools rather than trying to remember tool names.
Verify active tools. Before starting production, check the tool list interface to confirm which tool is currently active. The tool name appears at the top of the information panel if it’s being executed.
By mastering the navigation and selection features of the ESA S840 tool list interface, you’ll reduce tool search time, minimize selection errors, and keep your production running smoothly. Whether you’re selecting tools for a new program or verifying existing tooling, this central hub puts everything you need at your fingertips.
Frequently Asked Questions(FAQ)
What tools can I manage in the ESA S840 tool list interface?
The ESA S840 tool list interface allows you to manage both upper tools (punches) and lower tools (dies). The interface is divided into two separate lists: the Die list for all your lower tools and the Punch list for all your upper tools, making it easy to locate and select the specific tool you need.
How do I know which tool is currently active in the ESA S840 tool list interface?
When a tool is being executed in a program, its name appears at the top of the information panel on the right side of the ESA S840 tool list interface. This clear visual indicator helps you confirm which tool is active before starting production or making changes.
How do I modify an existing tool in the ESA S840 tool list interface?
To modify an existing tool using the ESA S840 tool list interface, select the tool you wish to modify from the appropriate list, access the edit function, update the relevant fields such as angle, V-opening, or compressive strength, then save your changes. This keeps your tool library accurate and up to date.
Conclusion
Mastering the ESA S840 tool list interface is essential for efficient press brake operation. By understanding how to navigate between the Die list and Punch list, interpret tool specifications in the information panel, select the right tools using the insert function, and manage long tool lists through scrolling, you can significantly reduce setup time and minimize tool selection errors. Remember to always verify tool specifications before selection and keep your tool library organized with consistent naming conventions.
For more detailed support on the ESA S840 tool list interface or any other questions about your HARSLE press brake, don’t hesitate to contact our technical support team. We’re here to help you optimize your tool management workflow and get the most from your equipment.


