


When working with a CNC press brake, having an efficient ESA S840 Tool Setup process is essential for ensuring accurate bending and smooth production. If you’re wondering how to quickly create, configure, and manage punch and die tools on the ESA S840 controller, you’re in the right place. In this article, I’ll guide you through simplified steps for setting up and editing tools, helping you reduce errors, save time, and improve overall machine performance.
How to Create a New Die in ESA S840 Tool Setup
Step 1: Create a New Die with Default Values
To begin the ESA S840 Tool Setup, go to the tool list and click on the new default value option under Die. This allows you to quickly generate a standard die profile for common bending tasks.
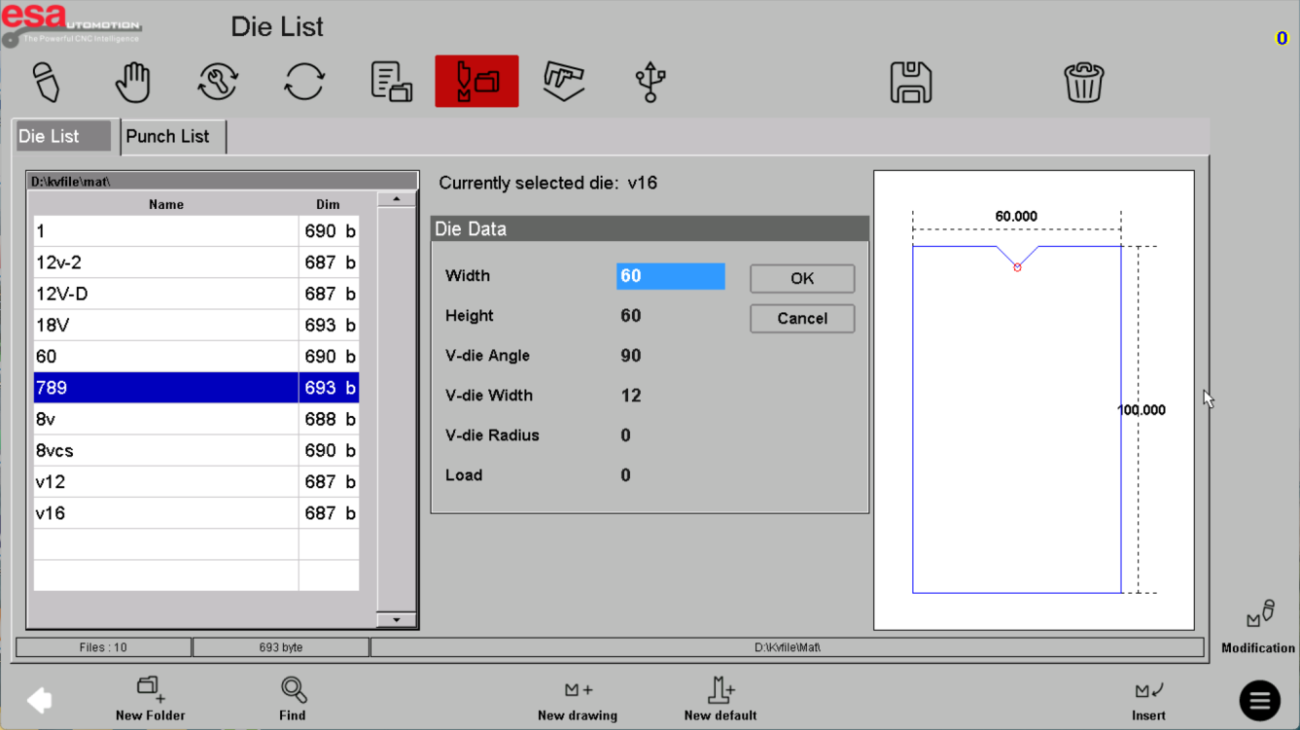
After selecting the default die, the system will provide basic parameters such as plate width, height, angle, chamfer radius, and compressive strength. At this stage, you need to carefully input all required data to ensure the tool matches your actual production needs.
Step 2: Confirm and Edit Die Parameters
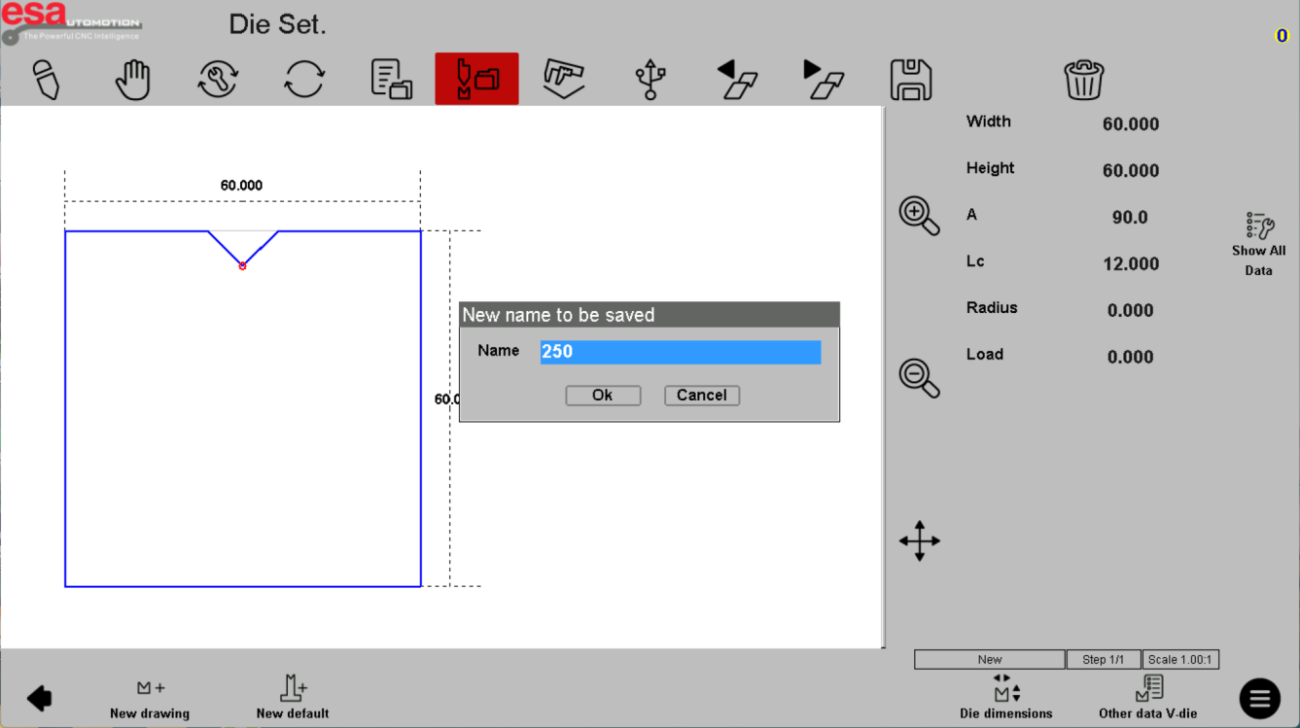
Once the basic data is completed, click Confirm. The system will automatically enter the Die editing interface, where you can further refine the tool parameters if needed.
After finishing the adjustments, click the Save button, enter a clear and recognizable die name, and complete the creation process. This step is critical in maintaining an organized ESA S840 tool management system.
Step 3: Customize a Die Using Image Templates
If you need a more complex tool shape, you can use the new image option to customize the die contour.
After selecting a template, input basic values such as width and height.

Then click Confirm to enter the editing interface. Once all modifications are completed, save the tool with a new name.
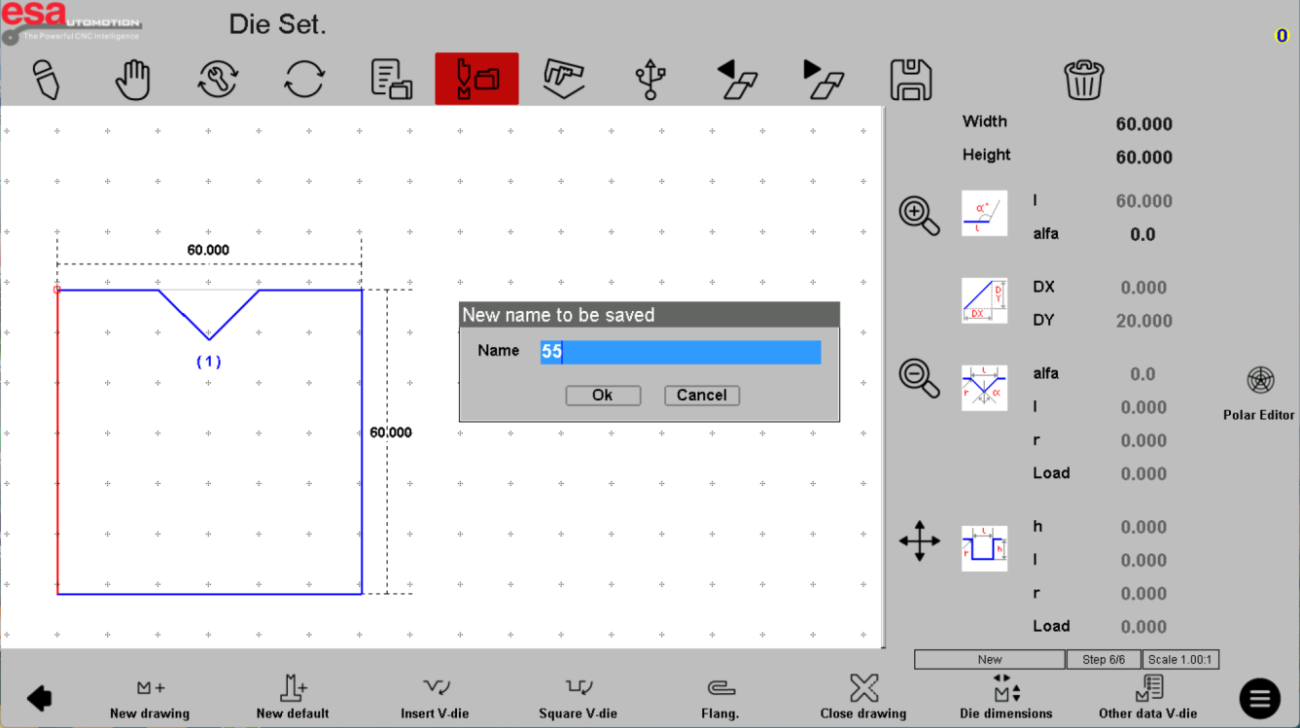
This method is especially useful when performing advanced ESA S840 punch and die setup for non-standard bending requirements.
How to Create a New Punch in ESA S840 Tool Setup
Step 1: Select Punch Type for ESA S840 Tool Setup
In the Punch section, choose from predefined types such as Type 1, Type 2, Type 3, or Type 4. These templates simplify the ESA S840 Tool Setup process by providing ready-to-use structures.
Each punch type includes default parameters like reference height (total height), angle, chamfer radius, and compressive strength. Enter the correct values based on your tooling specifications.
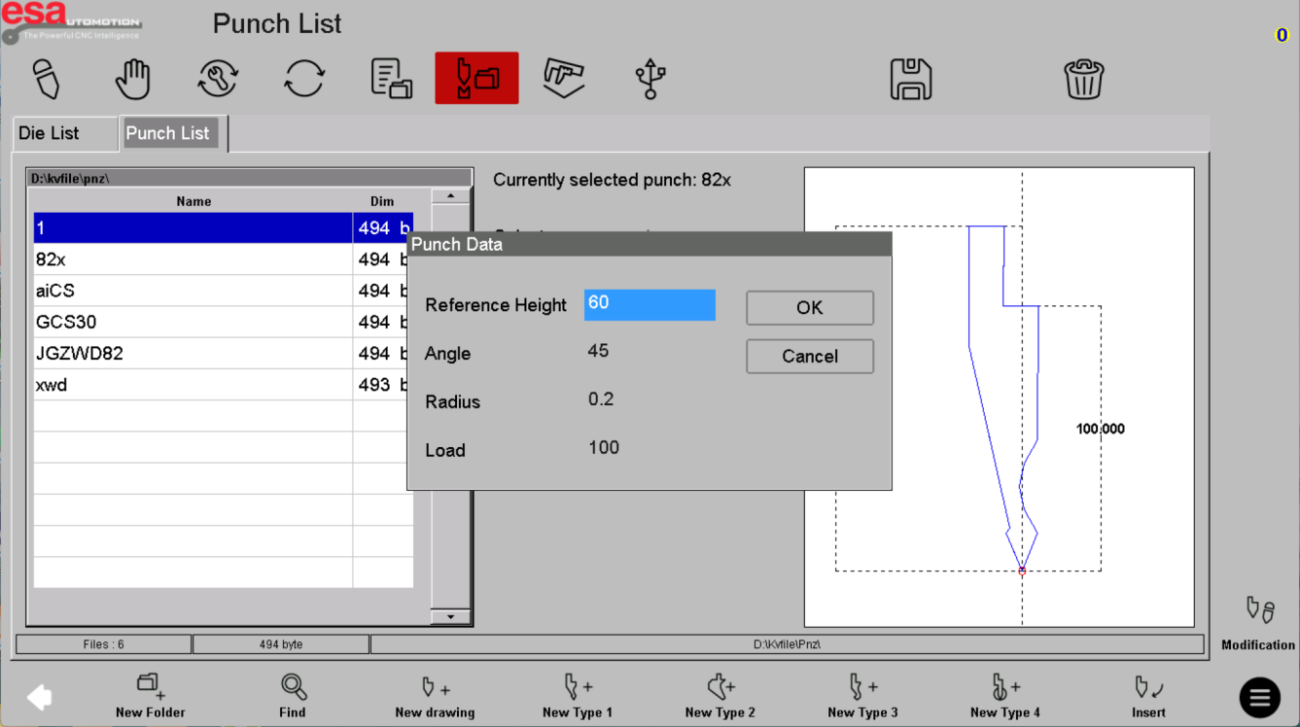
Step 2: Edit and Save the Punch Tool
After confirming the input data, the system will automatically open the Punch editing interface. Here, you can fine-tune the tool dimensions and properties.
Once completed, click Save, assign a proper name, and finalize the punch creation. A clear naming system helps improve efficiency in future ESA S840 tool setup and configuration tasks.

Step 3: Create Punch Using Image Templates
For customized applications, you can also create a punch using image templates. This approach allows greater flexibility when dealing with special bending profiles.
Follow the same process: select a template, input parameters, confirm, edit, and save the tool.
How to Edit Tools in ESA S840 Tool Setup
Step 1: Copy Tools for Faster ESA S840 Tool Setup
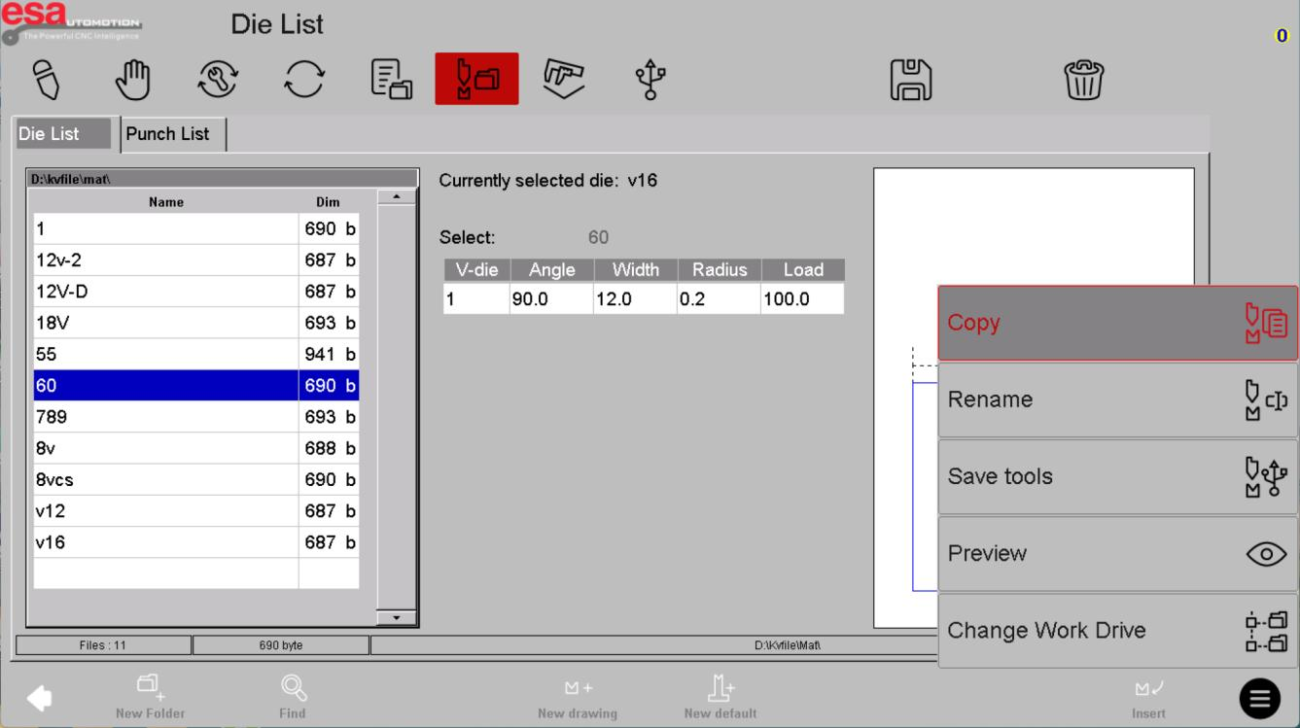
To improve efficiency, you can copy an existing tool instead of creating one from scratch. Select the desired tool, click the menu button in the bottom-right corner, and choose Copy.
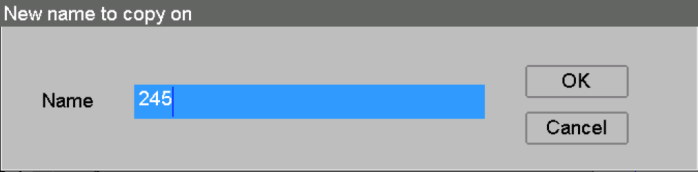
Enter a new name for the duplicated tool and confirm. This is a practical method for speeding up repetitive ESA S840 Tool Setup tasks.
Step 2: Delete Unused Tools
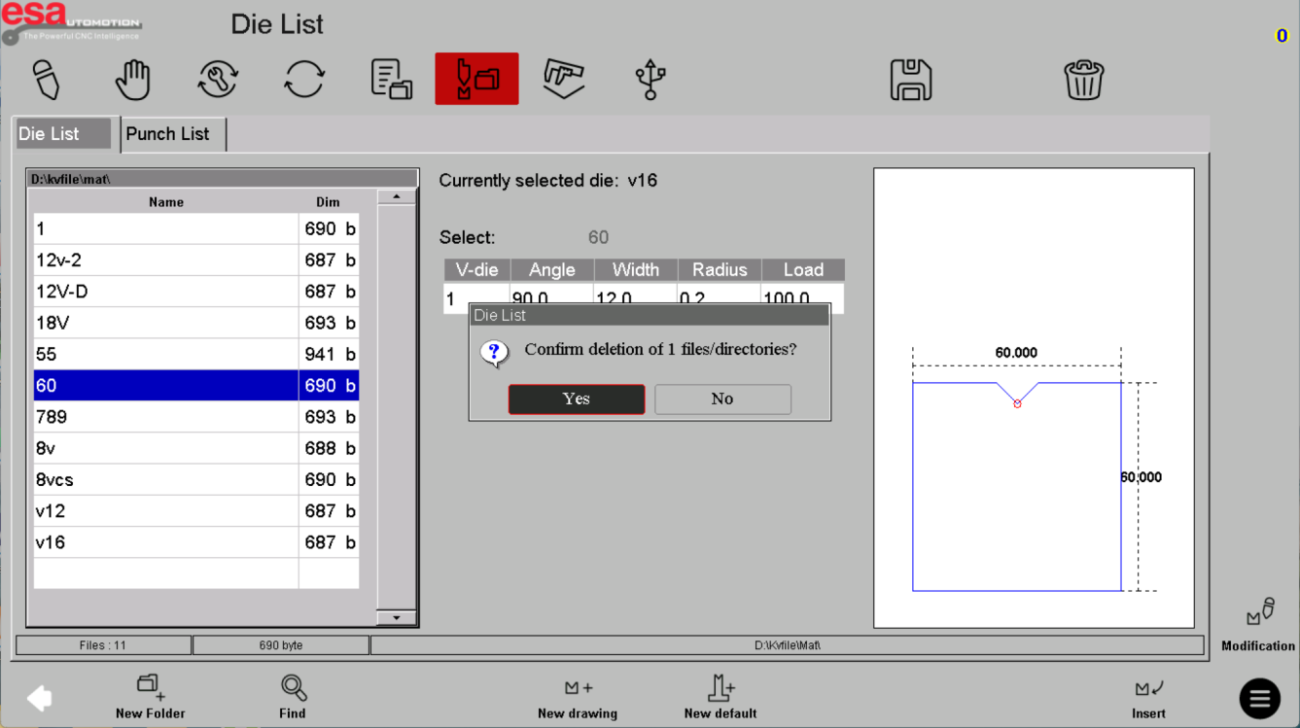
To keep your tool library organized, remove unnecessary tools regularly. Select the tool, click Delete, and confirm the action.
This helps maintain a clean and efficient ESA S840 tool management system, reducing confusion during operation.
Step 3: Rename Tools for Better Organization
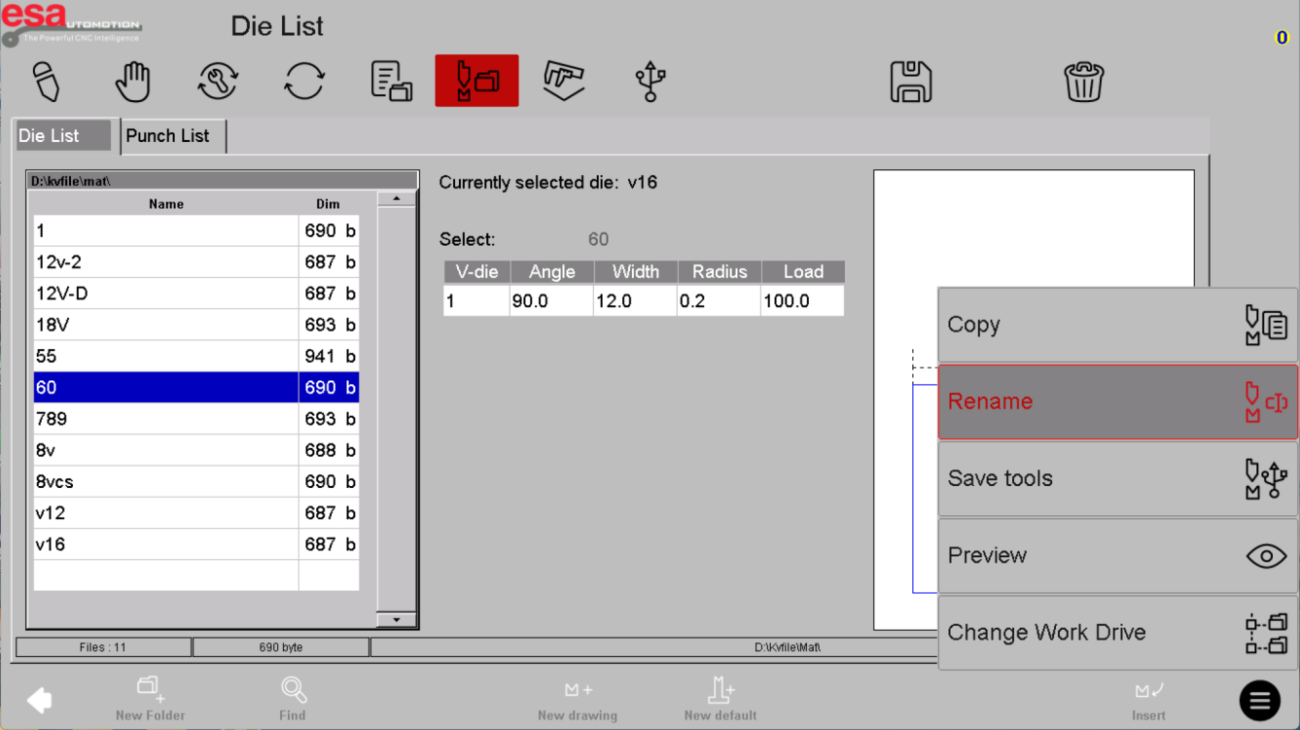
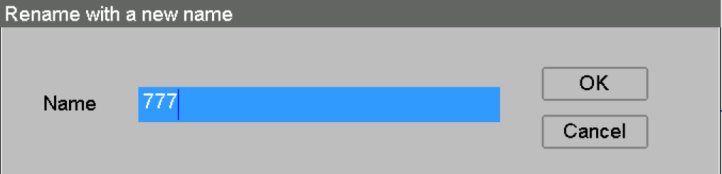
Renaming tools is a simple yet important step. Select the tool, open the menu, and choose Rename. Then enter a new, more descriptive name.
Clear naming conventions make it easier to identify tools quickly, especially when handling multiple punch and die configurations in your ESA S840 Tool Setup process.
By following these steps, you can efficiently create, customize, and manage tools, making your ESA S840 Tool Setup more streamlined and reliable for daily production.
Frequently Asked Questions(FAQ)
How do I avoid errors during ESA S840 Tool Setup?
To avoid errors, always ensure that all required parameters—such as tool height, angle, and compressive strength—are entered correctly before confirming. Double-check your inputs and use the editing interface to verify details. Proper naming of tools also helps prevent confusion during future ESA S840 tool management.
Can I reuse tools in ESA S840 Tool Setup?
Yes, you can reuse tools by using the Copy function. This allows you to duplicate an existing tool and modify only the necessary parameters. It is one of the most efficient methods to speed up repetitive ESA S840 Tool Setup process tasks.
What should I do if I need a custom tool shape in ESA S840 Tool Setup?
If standard templates are not suitable, you can use the image-based tool creation option. This allows you to customize the contour of the punch or die according to specific bending requirements, making your ESA S840 Tool Setup more flexible.
Conclusion
A well-executed ESA S840 Tool Setup is key to achieving accurate bending results and maintaining efficient production. By following the steps outlined—creating tools with default or custom templates, editing parameters carefully, and managing your tool library through copy, delete, and rename functions—you can significantly simplify your workflow and reduce setup time.
If you want to further optimize your machine performance or need detailed technical support, consider consulting your equipment supplier or referring to the official ESA documentation. For more practical guides and troubleshooting tips, explore our other resources to keep improving your CNC press brake operations.


